ADFS SAML 2.0 SSO Integration with AIR
This article explains how to configure Active Directory Federation Services (ADFS) as a SAML 2.0 identity provider for AIR.
Prerequisites
Section titled “Prerequisites”- Windows Server with the AD FS role installed and configured
- Access to the AD FS Management console with admin privileges
- Access to AIR as an administrator
- Users to be authenticated must have their email field populated in Active Directory
- Ensure network connectivity between AIR and the ADFS server (via the Federation Service URL)
Create a relying party trust in ADFS
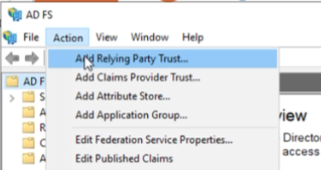
Section titled “Create a relying party trust in ADFS”- Open Server Manager on the ADFS server.
- Go to Tools -> AD FS Management.
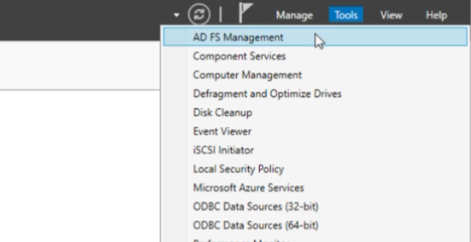
- In the right-side Actions pane, select Add Relying Party Trust.
- In the wizard, use the following selections:
- Welcome:
Claims Aware - Select Data Source:
Enter data about the relying party manually - Specify Display Name: enter a display name
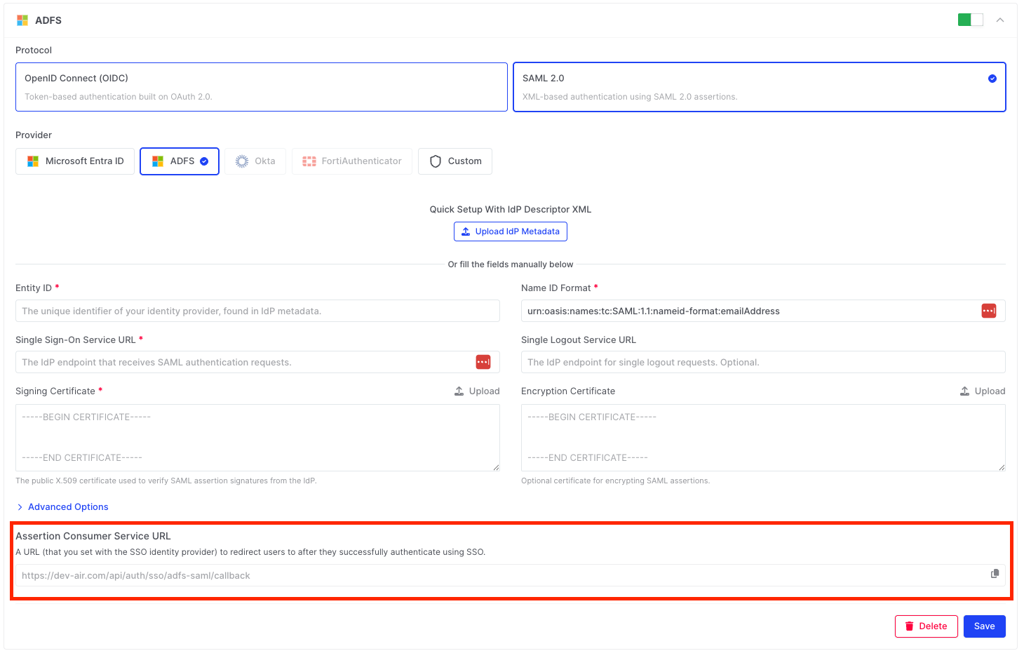
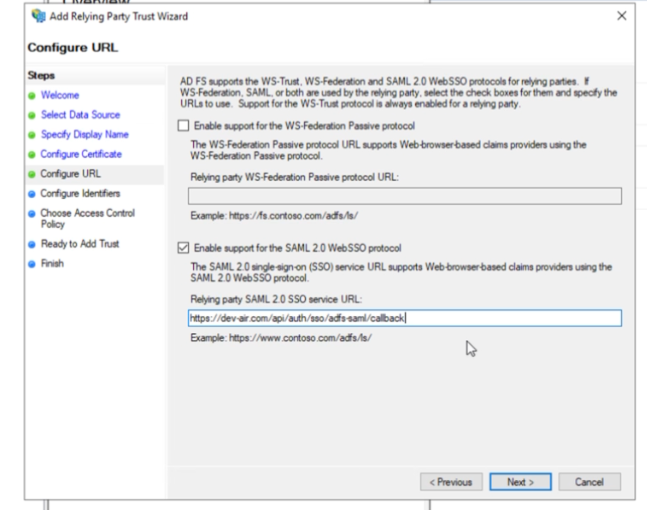
- Configure URL: enable
SAML 2.0 WebSSO protocol, then enter the ACS URL from AIR SSO settings - Configure Identifiers: add the same ACS URL as relying party trust identifier
- Choose Access Control Policy: select a policy that matches your security requirements (default can be
Permit Everyone)
- Welcome:
- Review the configuration and finish the wizard.
Adjust advanced trust settings (optional)
Section titled “Adjust advanced trust settings (optional)”After the trust is created, you can tune additional settings from the trust properties:
- Hash algorithm: change the secure hash algorithm in the Advanced tab if required.
- Endpoint binding: change SAML endpoint binding in the Endpoints tab (default is typically POST).
Edit claim issuance rules
Section titled “Edit claim issuance rules”- In AD FS Management, open Relying Party Trusts.
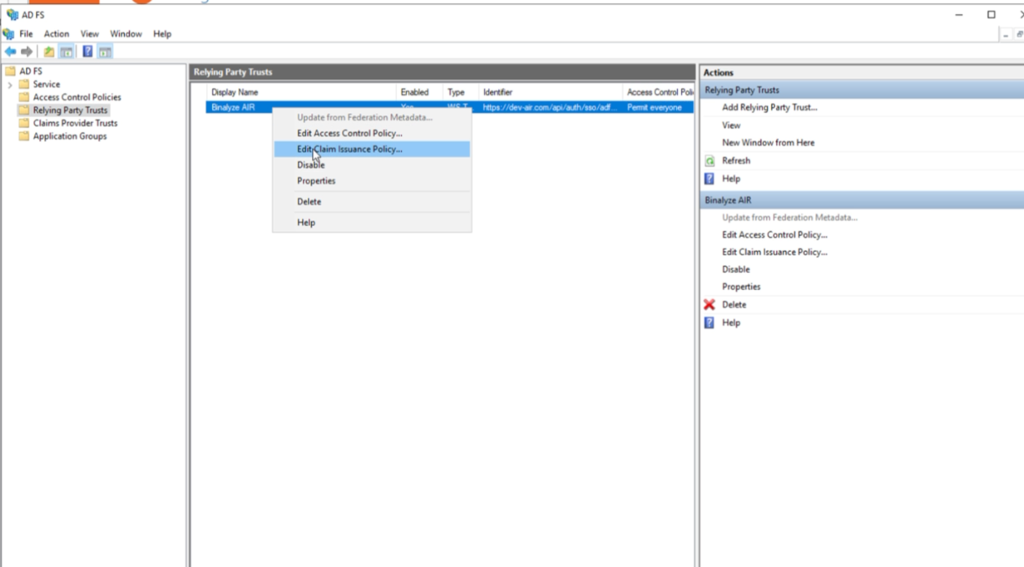
- Select the trust you created for AIR.
- Click Edit Claim Issuance Policy.
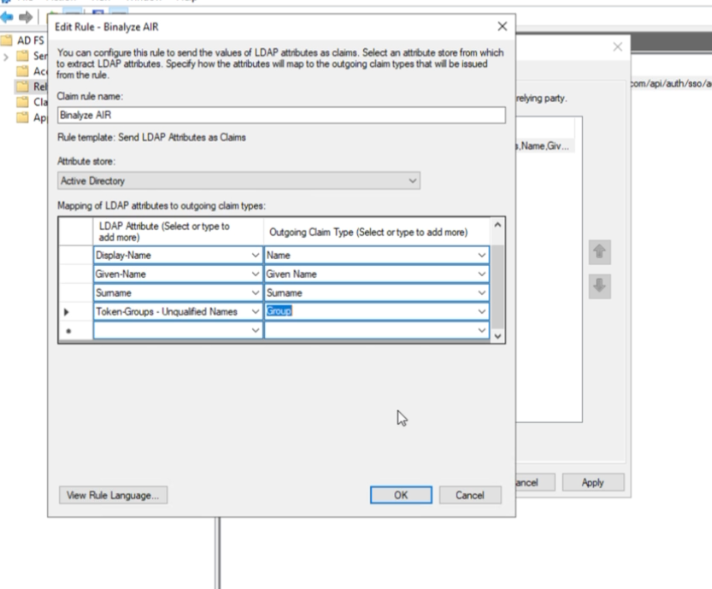
- Add claim rules to pass required user attributes (including Name ID) to Console.
- Start with the Send LDAP Attributes as Claims template and continue with the additional required rules for your deployment.
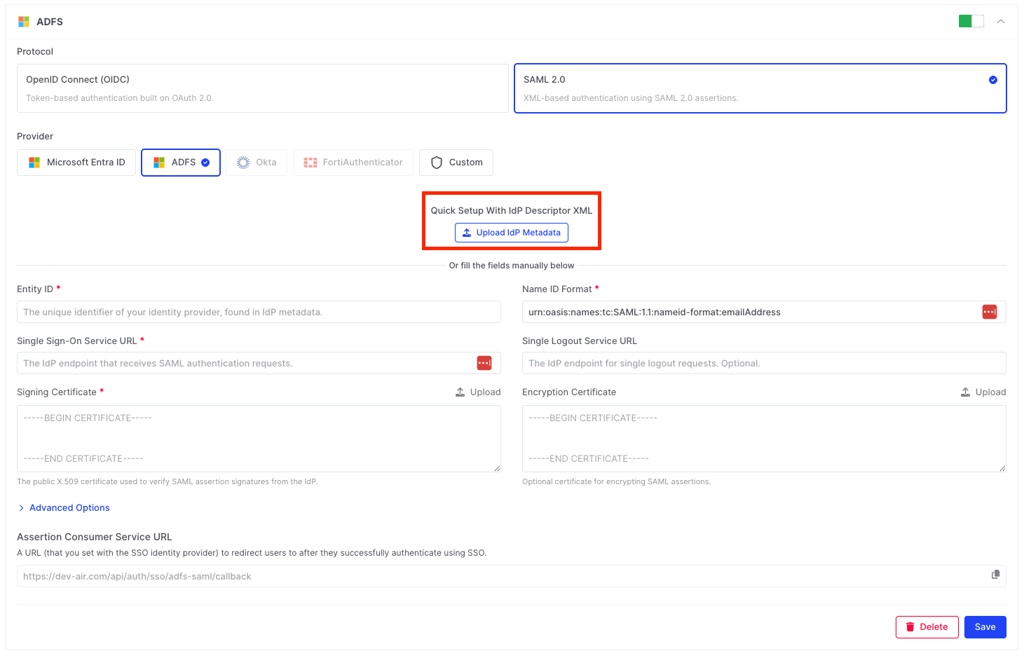
Configure SSO settings in AIR
Section titled “Configure SSO settings in AIR”You can upload IdP metadata to configure SSO quickly.
-
Open the metadata URL from your ADFS server:
https://<ADFS_DOMAIN>/FederationMetadata/2007-06/FederationMetadata.xml -
Download the XML metadata file.
-
In AIR SSO settings, upload the metadata XML file.
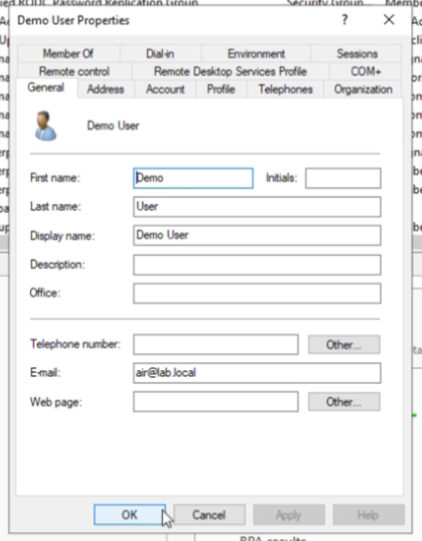
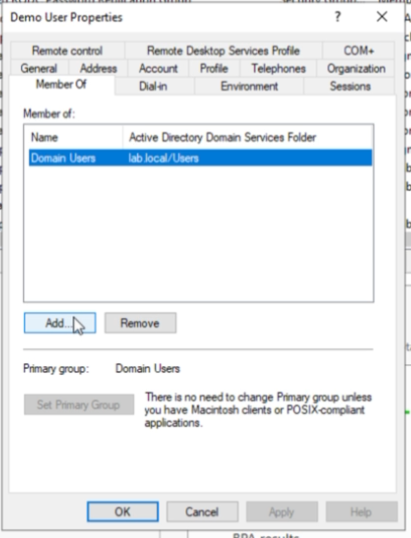
Configure users in Active Directory
Section titled “Configure users in Active Directory”- Open Active Directory Users and Computers.
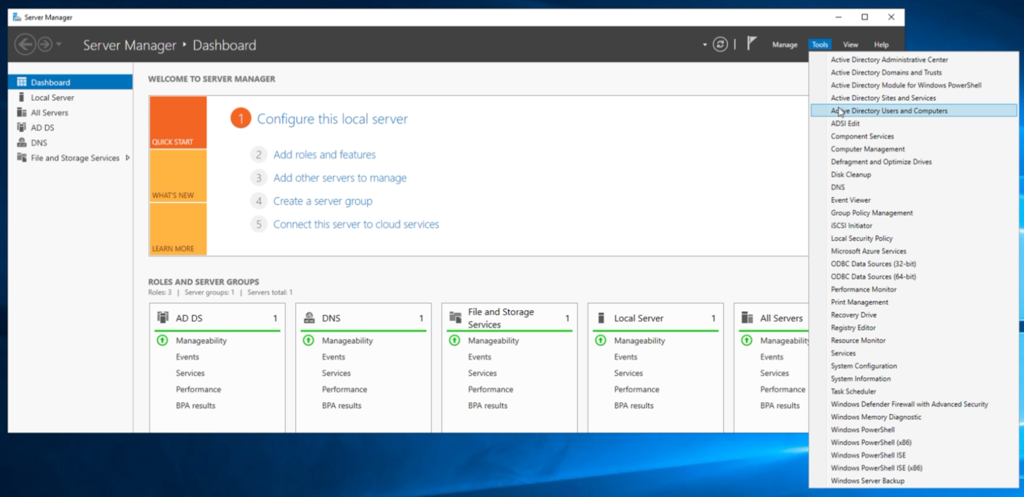
- Create a new user account for SSO testing.
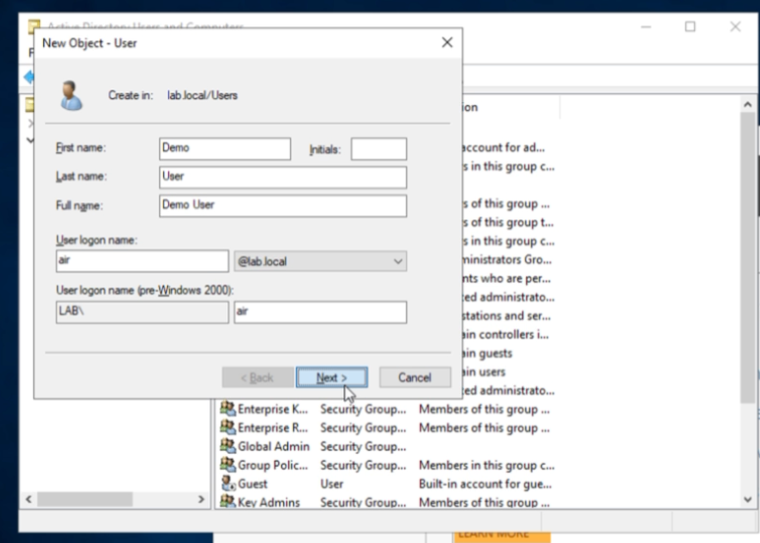
- Edit the user profile and ensure the email address is populated.
Configure role mapping
Section titled “Configure role mapping”- In AIR, open the roles page and copy the required role
Tagvalues.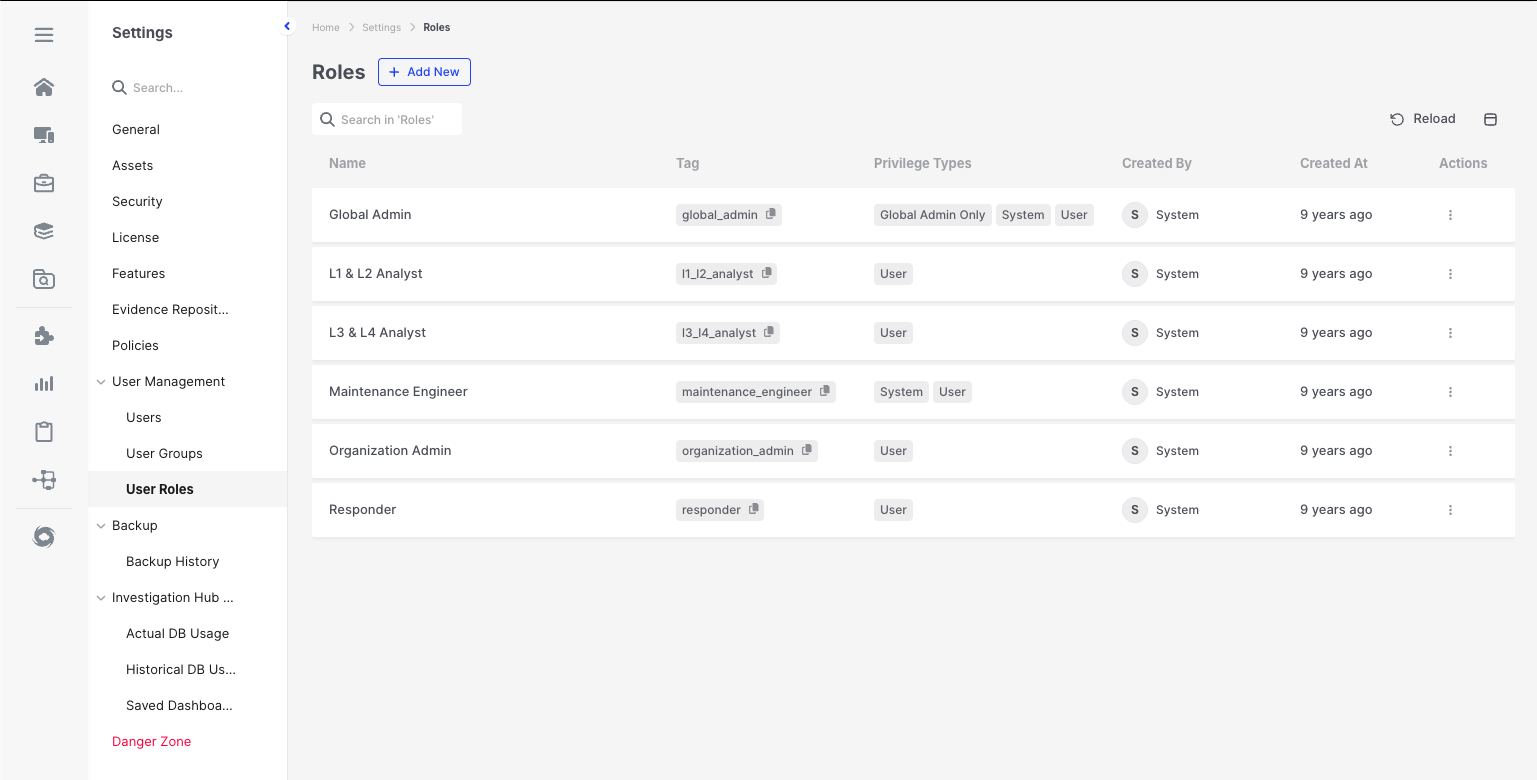
- Add groups and map them to users.
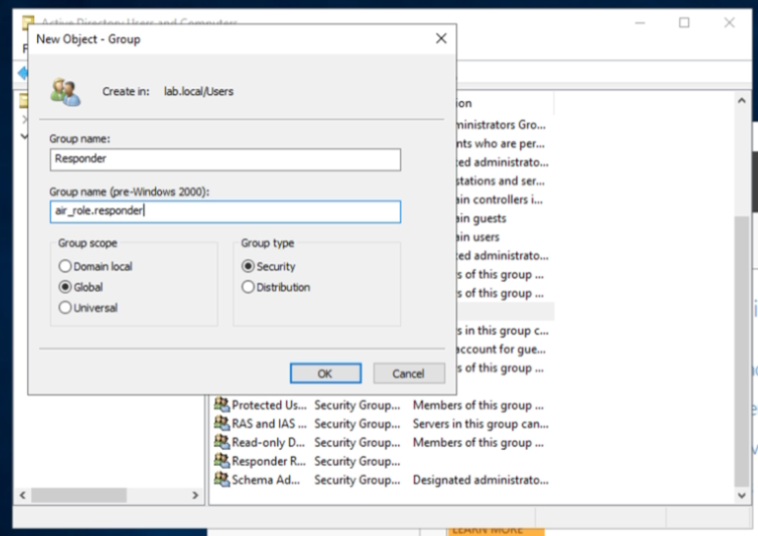
- Use the required role tags with the
air_role.prefix when configuring role-related group values. - Open target user settings and assign required role entries.
Validate the login flow
Section titled “Validate the login flow”After configuration is complete:
-
Open the AIR login page.
-
Confirm the Sign in with ADFS button is visible.
-
Click the button and authenticate on the ADFS login page.
-
Verify that you are redirected back to the AIR Console after successful authentication.
