Microsoft Azure SSO Integration
1. App Registration
Section titled “1. App Registration ”To begin integrating Azure SSO with AIR, you’ll first need to register a new application in Azure Active Directory (AD). This process will create a unique identity for your application, enabling secure communication with Azure services.
- Access the Azure Portal, sign in using your credentials, and navigate to the Microsoft Entra ID Directory under the Azure Services section.
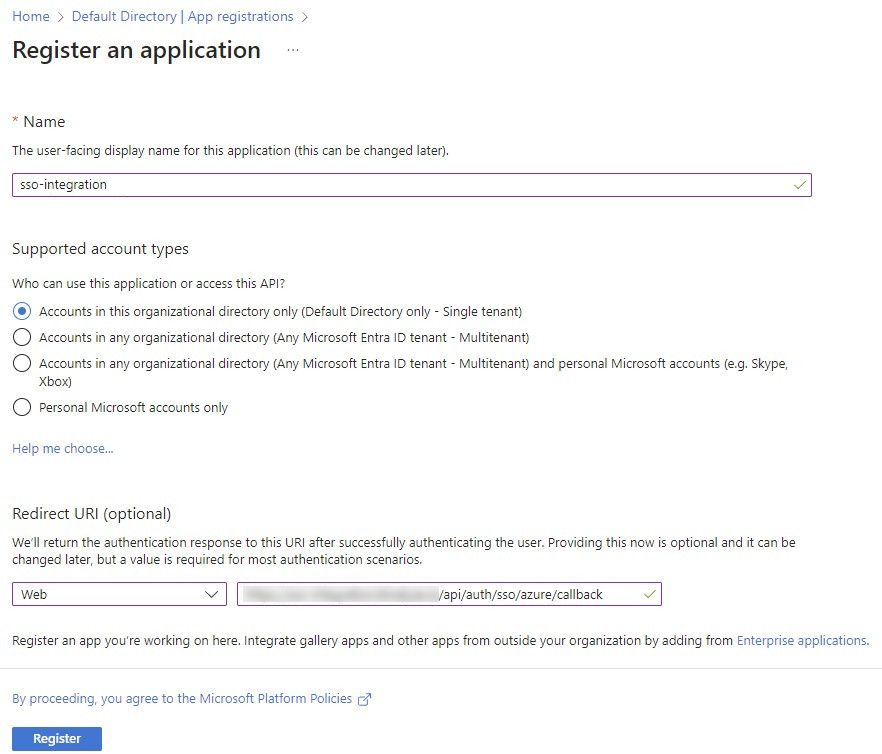
- Go to Manage > App registrations, click on New registration, and provide a name for your application
- Select Web, and enter the
https://[AIR_CONSOLE_ADDRESS]/api/auth/sso/microsoft-entra-id-oidc/callbackvalue for the Redirect URI field. Please remember to change[AIR_CONSOLE_ADDRESS]part for your instance. - Click Register to complete the registration process.
Microsoft Azure SSO Integration: Fig1
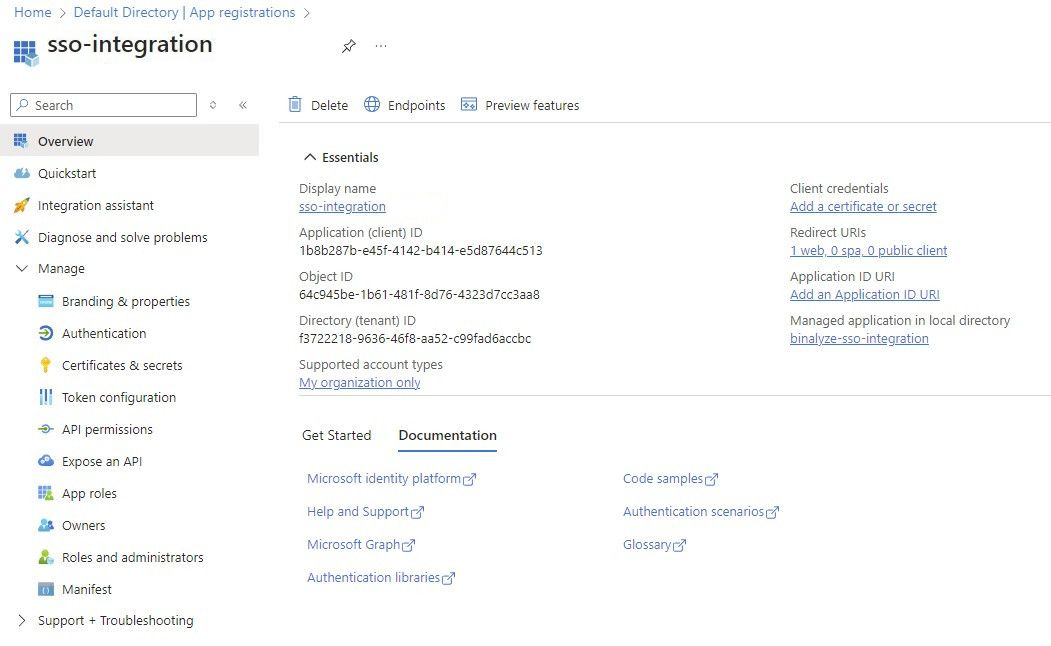
- After registering the application, navigate to the Overview section, and copy the Application (client) ID and Directory (tenant) ID. Open the Endpoints page and copy the “OpenID Connect metadata document” value. You will need to input these values into the AIR Console.
Microsoft Azure SSO Integration: Fig2
2. App Configurations & Permissions
Section titled “2. App Configurations & Permissions ”Once your application is registered, you need to configure essential settings and permissions in Azure AD. This includes creating secrets and setting up API permissions to allow your application to interact securely with Azure resources.
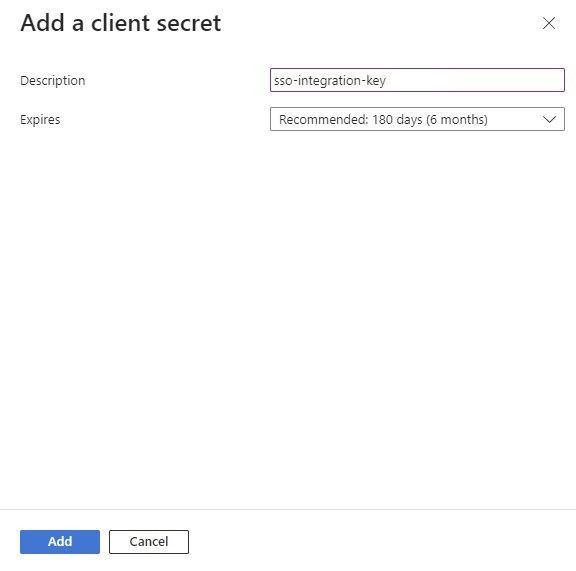
- In the left-hand panel, go to Certificates & Secrets.
- Click New client secret, provide a description, set the expiration period, and click Add.
Microsoft Azure SSO Integration: Fig3
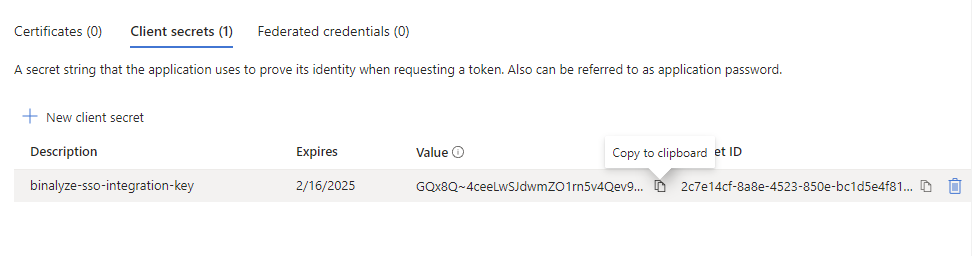
- Copy the value of the client secret and store it securely as it will be required later. You will need to input this value into the AIR Console in the Client Secret field.
Microsoft Azure SSO Integration: Fig4
Microsoft Azure SSO Integration: Fig5
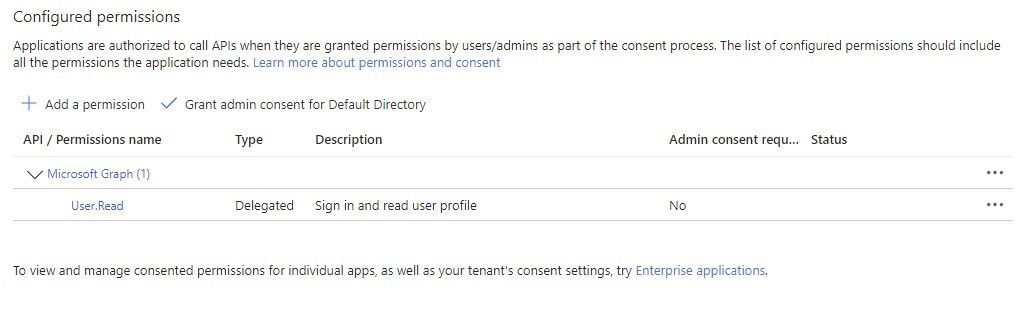
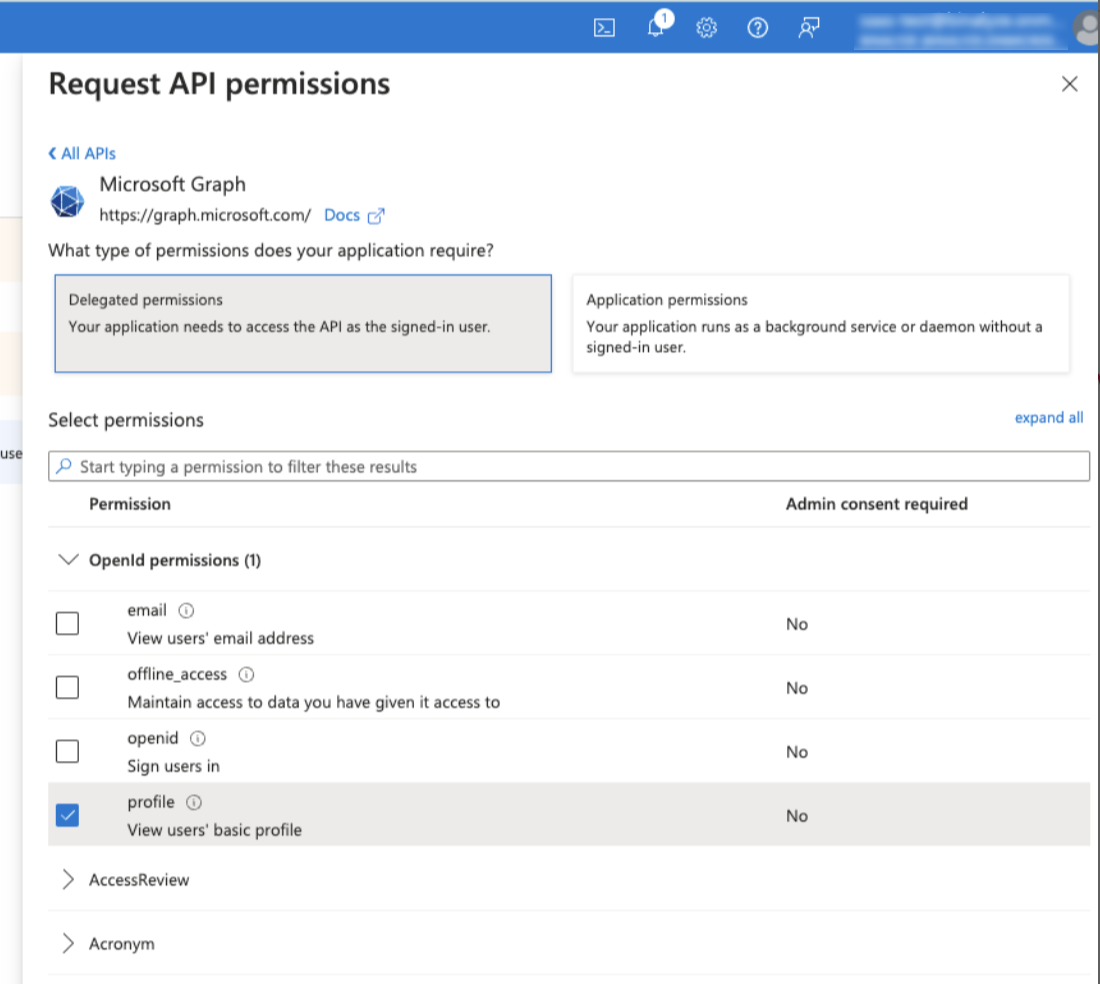
- Navigate to API permissions and ensure that the profile permission is selected.
Microsoft Azure SSO Integration: Fig6
If it’s not present, click + Add permission, select Microsoft Graph, choose Delegated permissions, toggle profile, and click Add permissions.
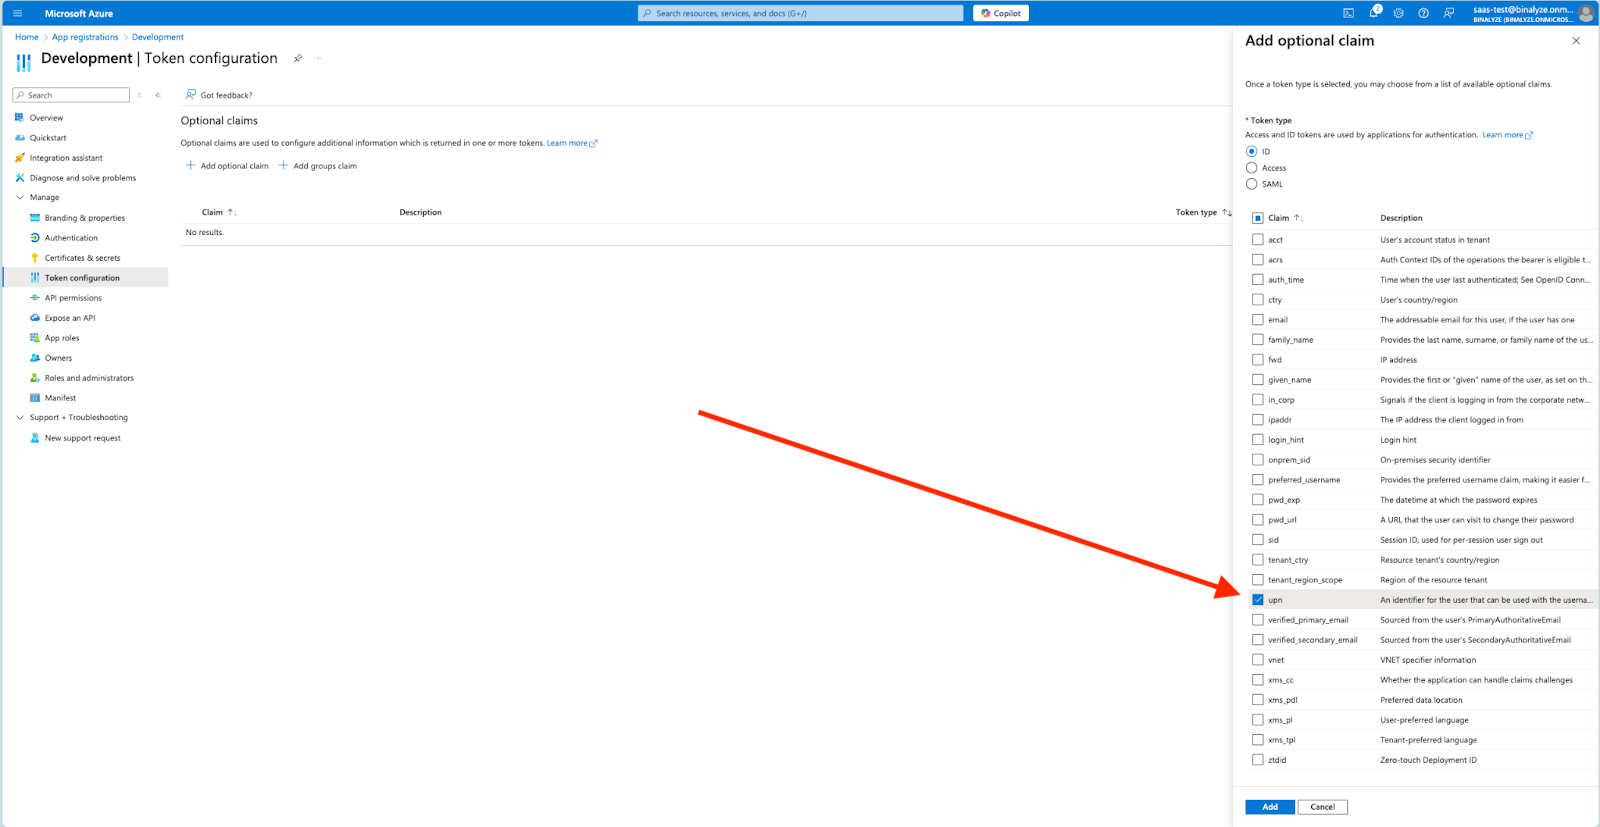
[Optional step] Using UPN as an email address
Section titled “[Optional step] Using UPN as an email address”If you have users with an empty ‘email’ field, AIR can use UPN to identify users. You can follow the steps below to use UPN as an identifier for users without the ‘email’ field:
Navigate to ‘Token configuration.’ If ‘upn’ is not in the list, click on the ‘Add optional claim’ button. After selecting the ‘ID’ token type, tick ‘upn’ and click on the ‘Add’ button.
Microsoft Azure SSO Integration: Fig7
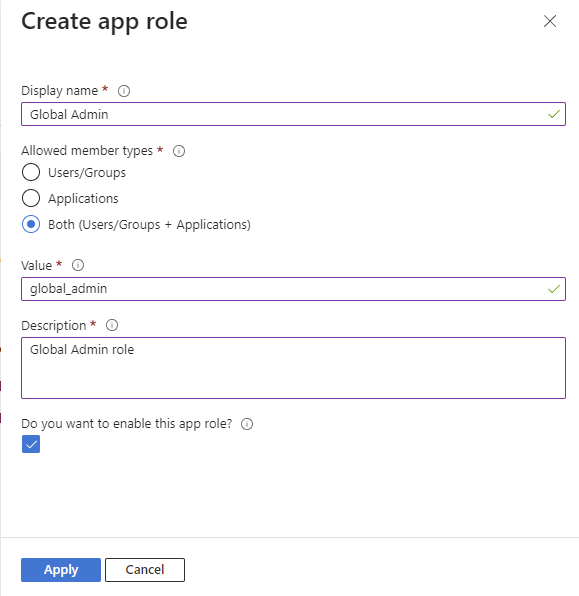
- Go to App roles within the Azure AD application settings, click + Create app role, provide a name for the role, select Users/Groups for allowed member types, and give the role a description.
Microsoft Azure SSO Integration: Fig8
- Enter the corresponding “Tag” of the role to be mapped within the AIR Console under the Value field (e.g., use the tag “global_admin” for the Global Admin role).
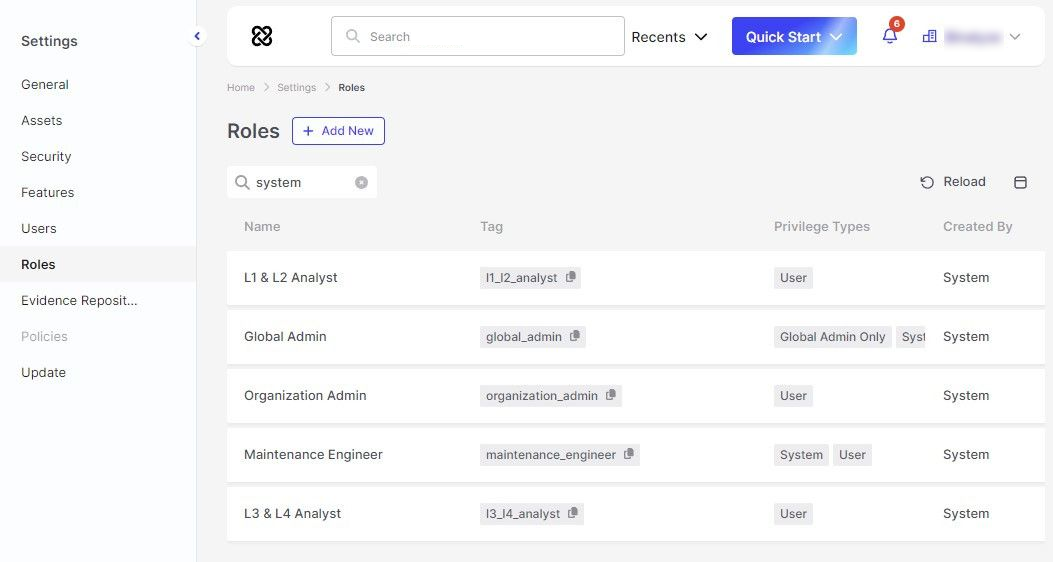
Microsoft Azure SSO Integration: Fig9
- You can make the roles on Azure SSO more than one, according to your needs. While doing this, make sure that the “tag” value in AIR and the “value” value in Azure App are the same.
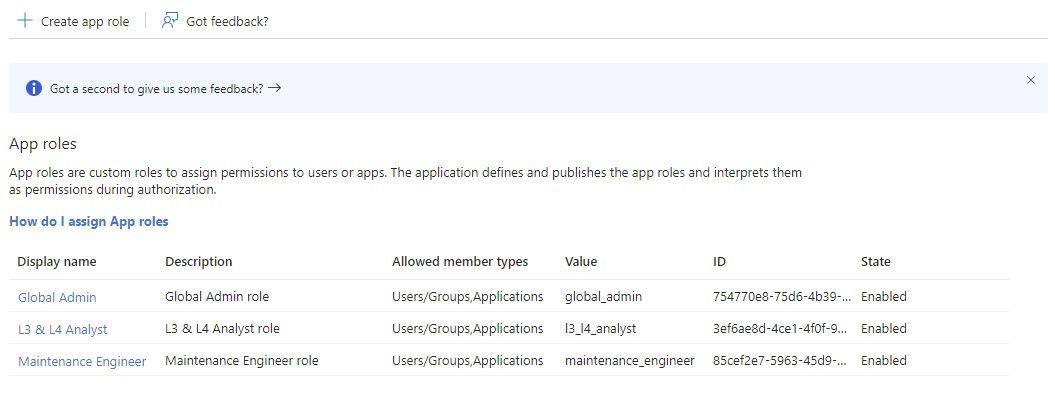
Microsoft Azure SSO Integration: Fig10
3. Managing Users and Groups
Section titled “3. Managing Users and Groups ”With your application configured, the next step is to manage the users and groups that will have access to it. Assign roles and permissions to the appropriate users and groups as follows:
- Return to the Microsoft Entra ID Directory, select Enterprise applications, filter by the application name, and click on it.
- In the left-hand panel, select Users and groups, click + Add user/group.
- Choose the users/groups and click Select.
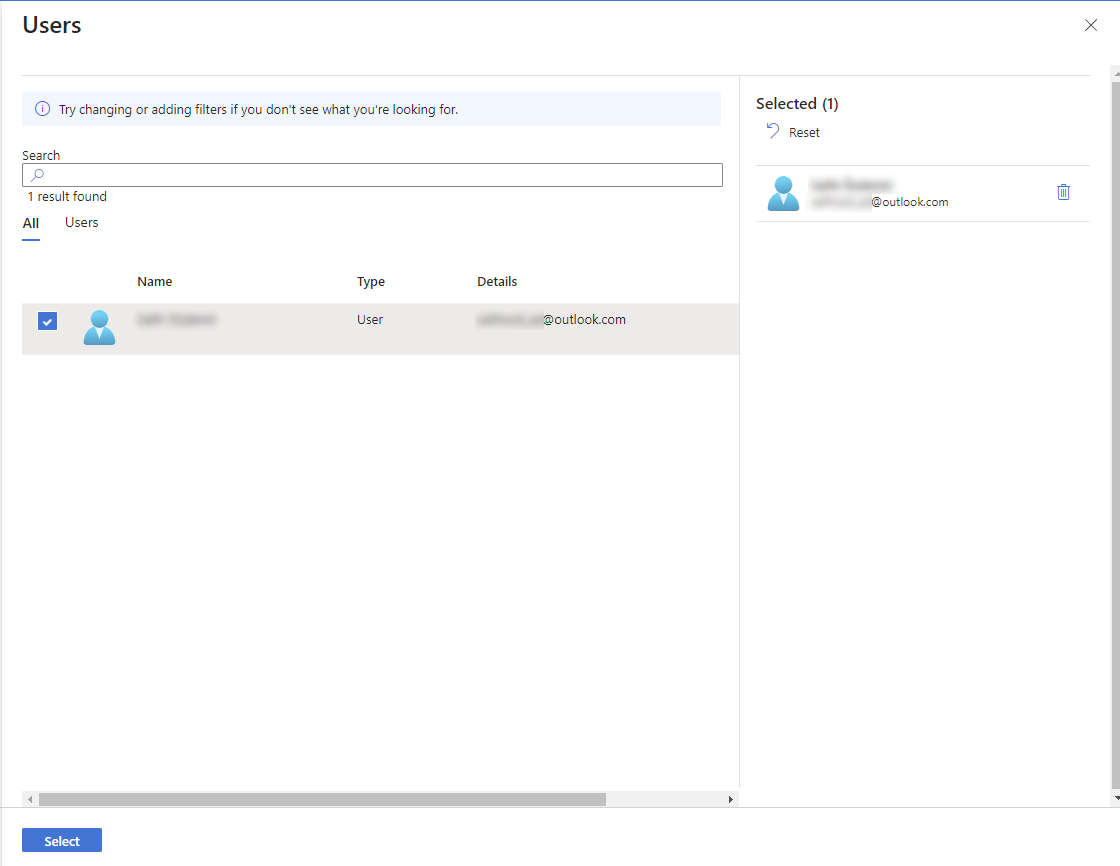
Microsoft Azure SSO Integration: Fig11
- Choose the roles to assign and click Select.
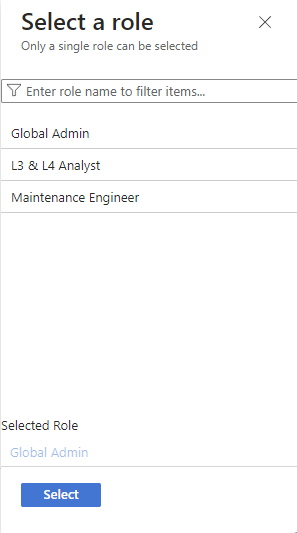
Microsoft Azure SSO Integration: Fig12
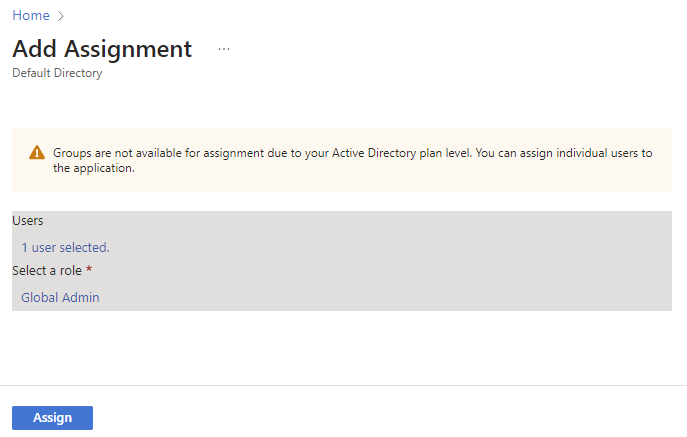
- Assign selected user(s) to the selected role by clicking Assign.
Microsoft Azure SSO Integration: Fig13
4. Configure SSO in AIR Console
Section titled “4. Configure SSO in AIR Console ”After configuring your application in Azure, you must enable and configure SSO in the AIR Console to allow users to authenticate using Azure AD credentials.
- Sign in to the AIR Console.
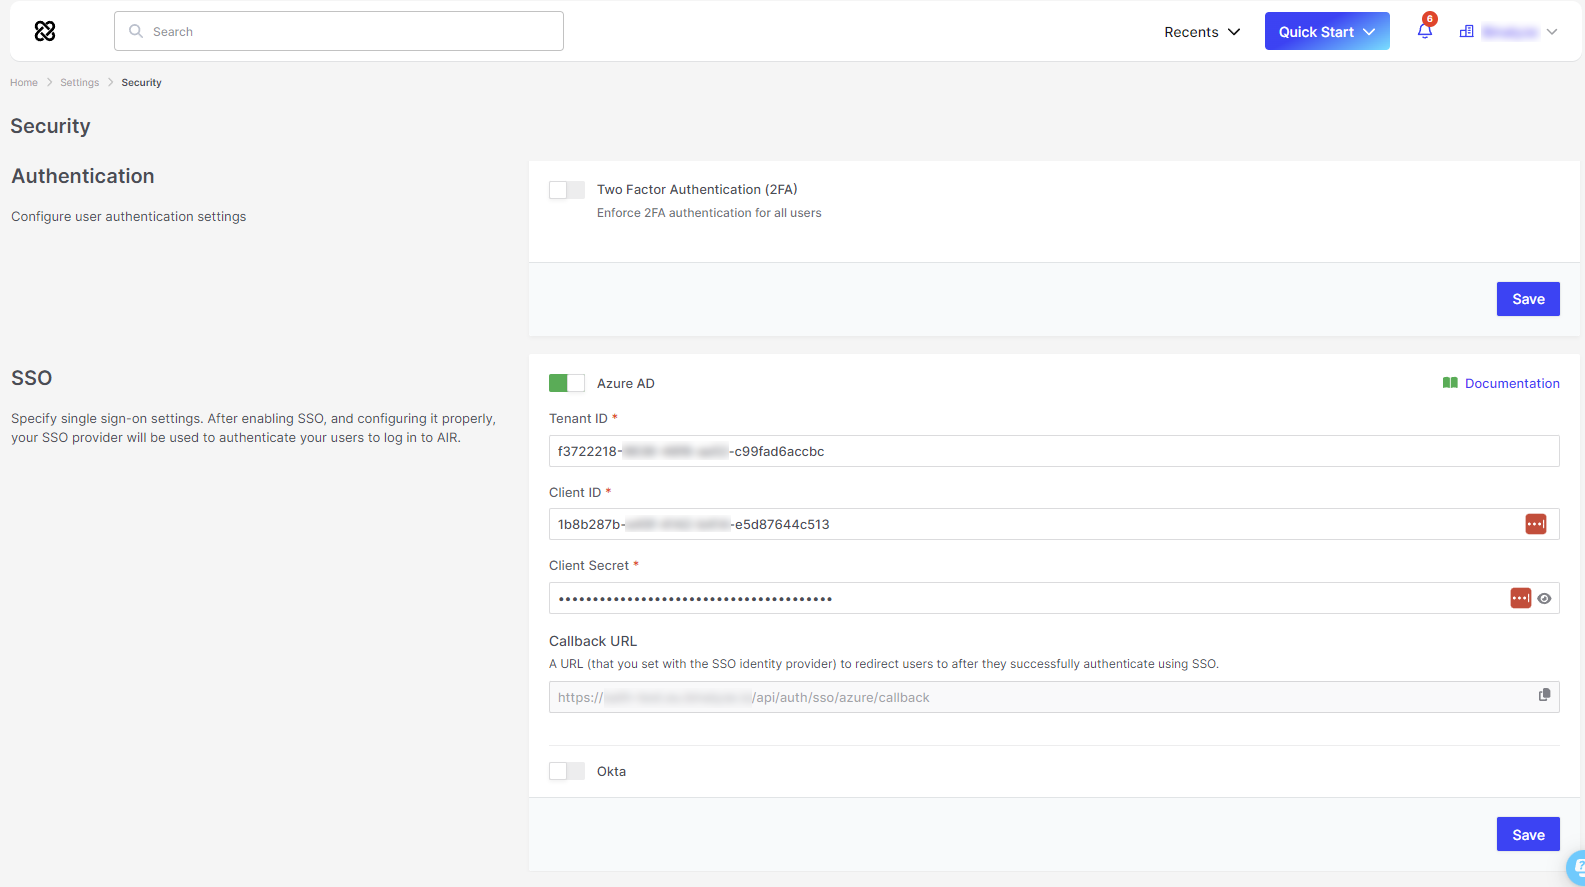
- Navigate to Settings, go to Security, and find the SSO section.
- Add Azure ID by clicking Add Provider, fill in the required fields with the OpenID Connect metadata document, Client ID, and Client Secret from the Azure application registration, and click Save.
Microsoft Azure SSO Integration: Fig14
5. Verification
Section titled “5. Verification ”The final step involves verifying that the SSO integration is working correctly. This ensures that users can log in to the AIR Console using their Azure AD credentials without any issues.
- After saving, check that a Sign in with Azure AD button appears on the AIR Console login page.
- Click the Sign in with Azure AD button to be redirected to the Microsoft login page for authentication.
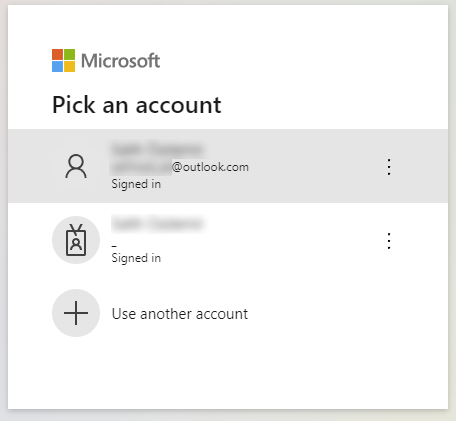
Microsoft Azure SSO Integration: Fig15
- Upon successful authentication, you will be redirected back to the AIR Console.