FortiAuthenticator SAML 2.0 SSO Integration with AIR
This guide explains how to integrate FortiAuthenticator as a SAML 2.0 Identity Provider (IdP) for AIR.
✅ This method supports IdP-initiated SAML SSO. Role mapping is handled via FortiAuthenticator Groups and AIR
roleTags.
Prerequisites
Section titled “Prerequisites”- Access to FortiAuthenticator with admin privileges
- Access to AIR as an administrator
- Users to be authenticated must have their email field populated
- Ensure network connectivity between AIR and FortiAuthenticator (via server address used in configuration)
Step 1: Prepare FortiAuthenticator
Section titled “Step 1: Prepare FortiAuthenticator”-
Log in to FortiAuthenticator with an admin account.
-
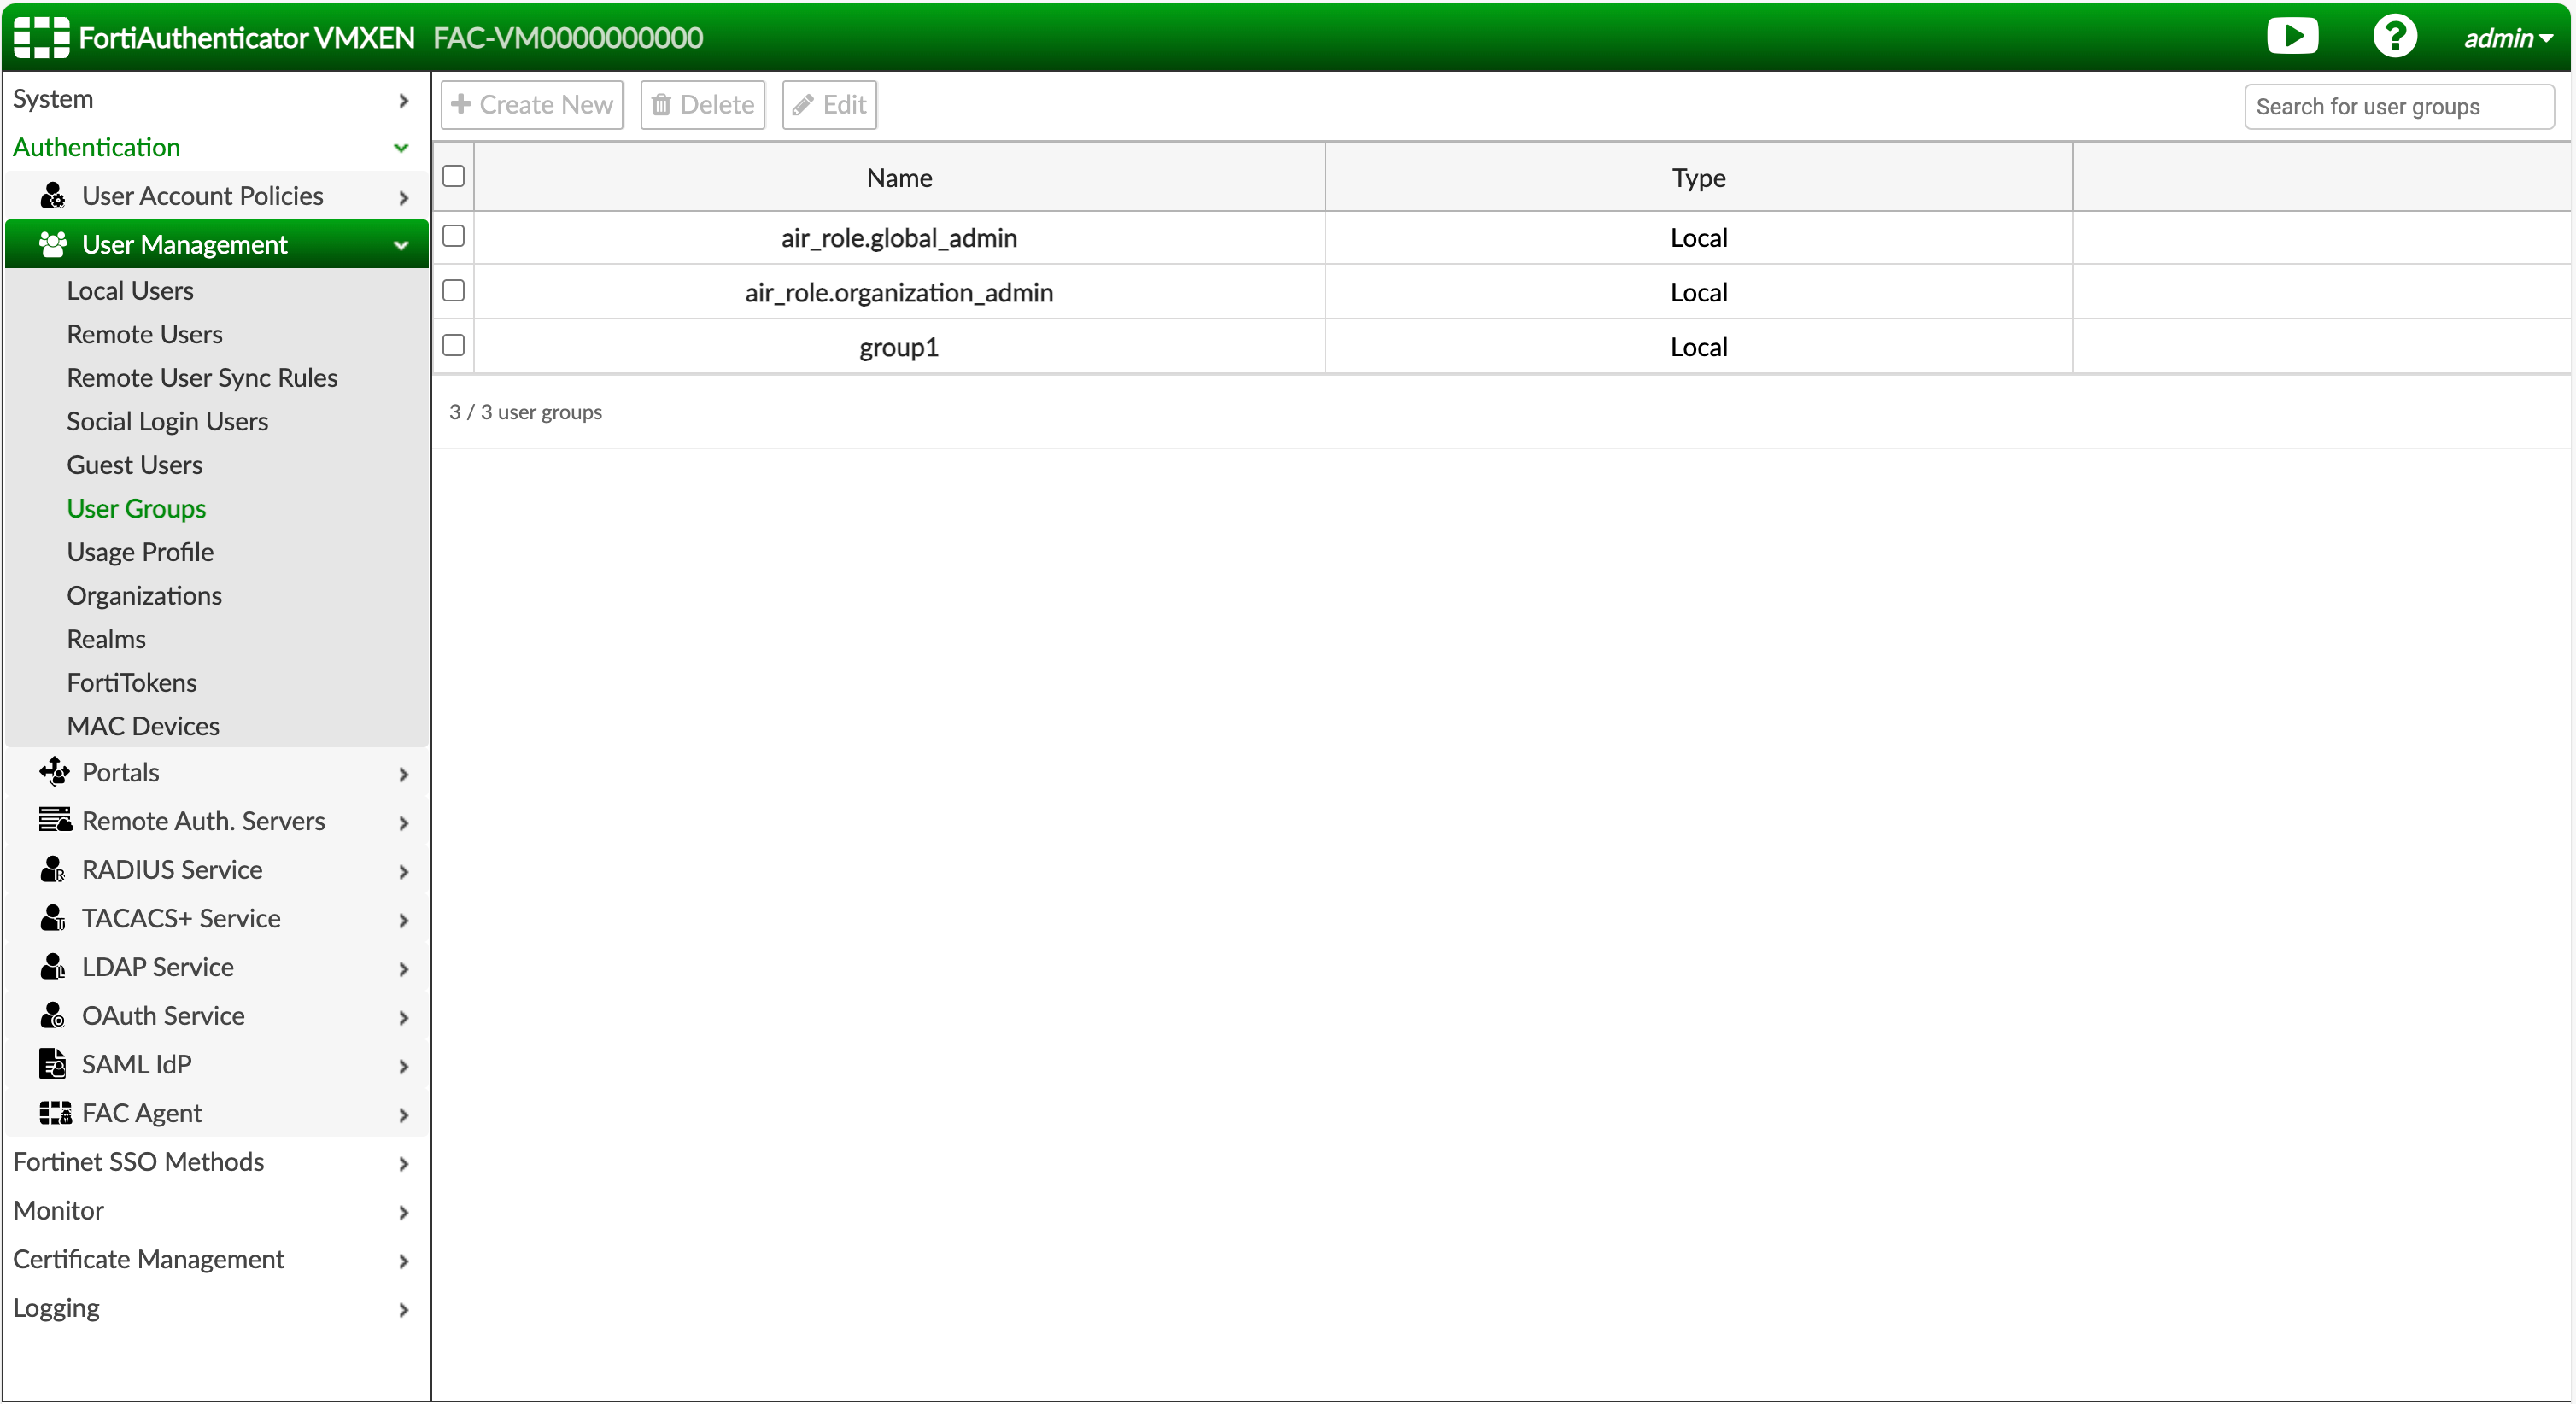
Go to Authentication → User Management → User Groups.
-
Create user groups that will act as AIR role mappings:
- Use the prefix
air_role.followed by the role tag used in AIR.
Example:air_role.global_admin - Only roles that will be actively used for login need to be created.
- Use the prefix
-
Assign users to their corresponding AIR role groups.
Step 2: Configure FortiAuthenticator as SAML IdP
Section titled “Step 2: Configure FortiAuthenticator as SAML IdP”-
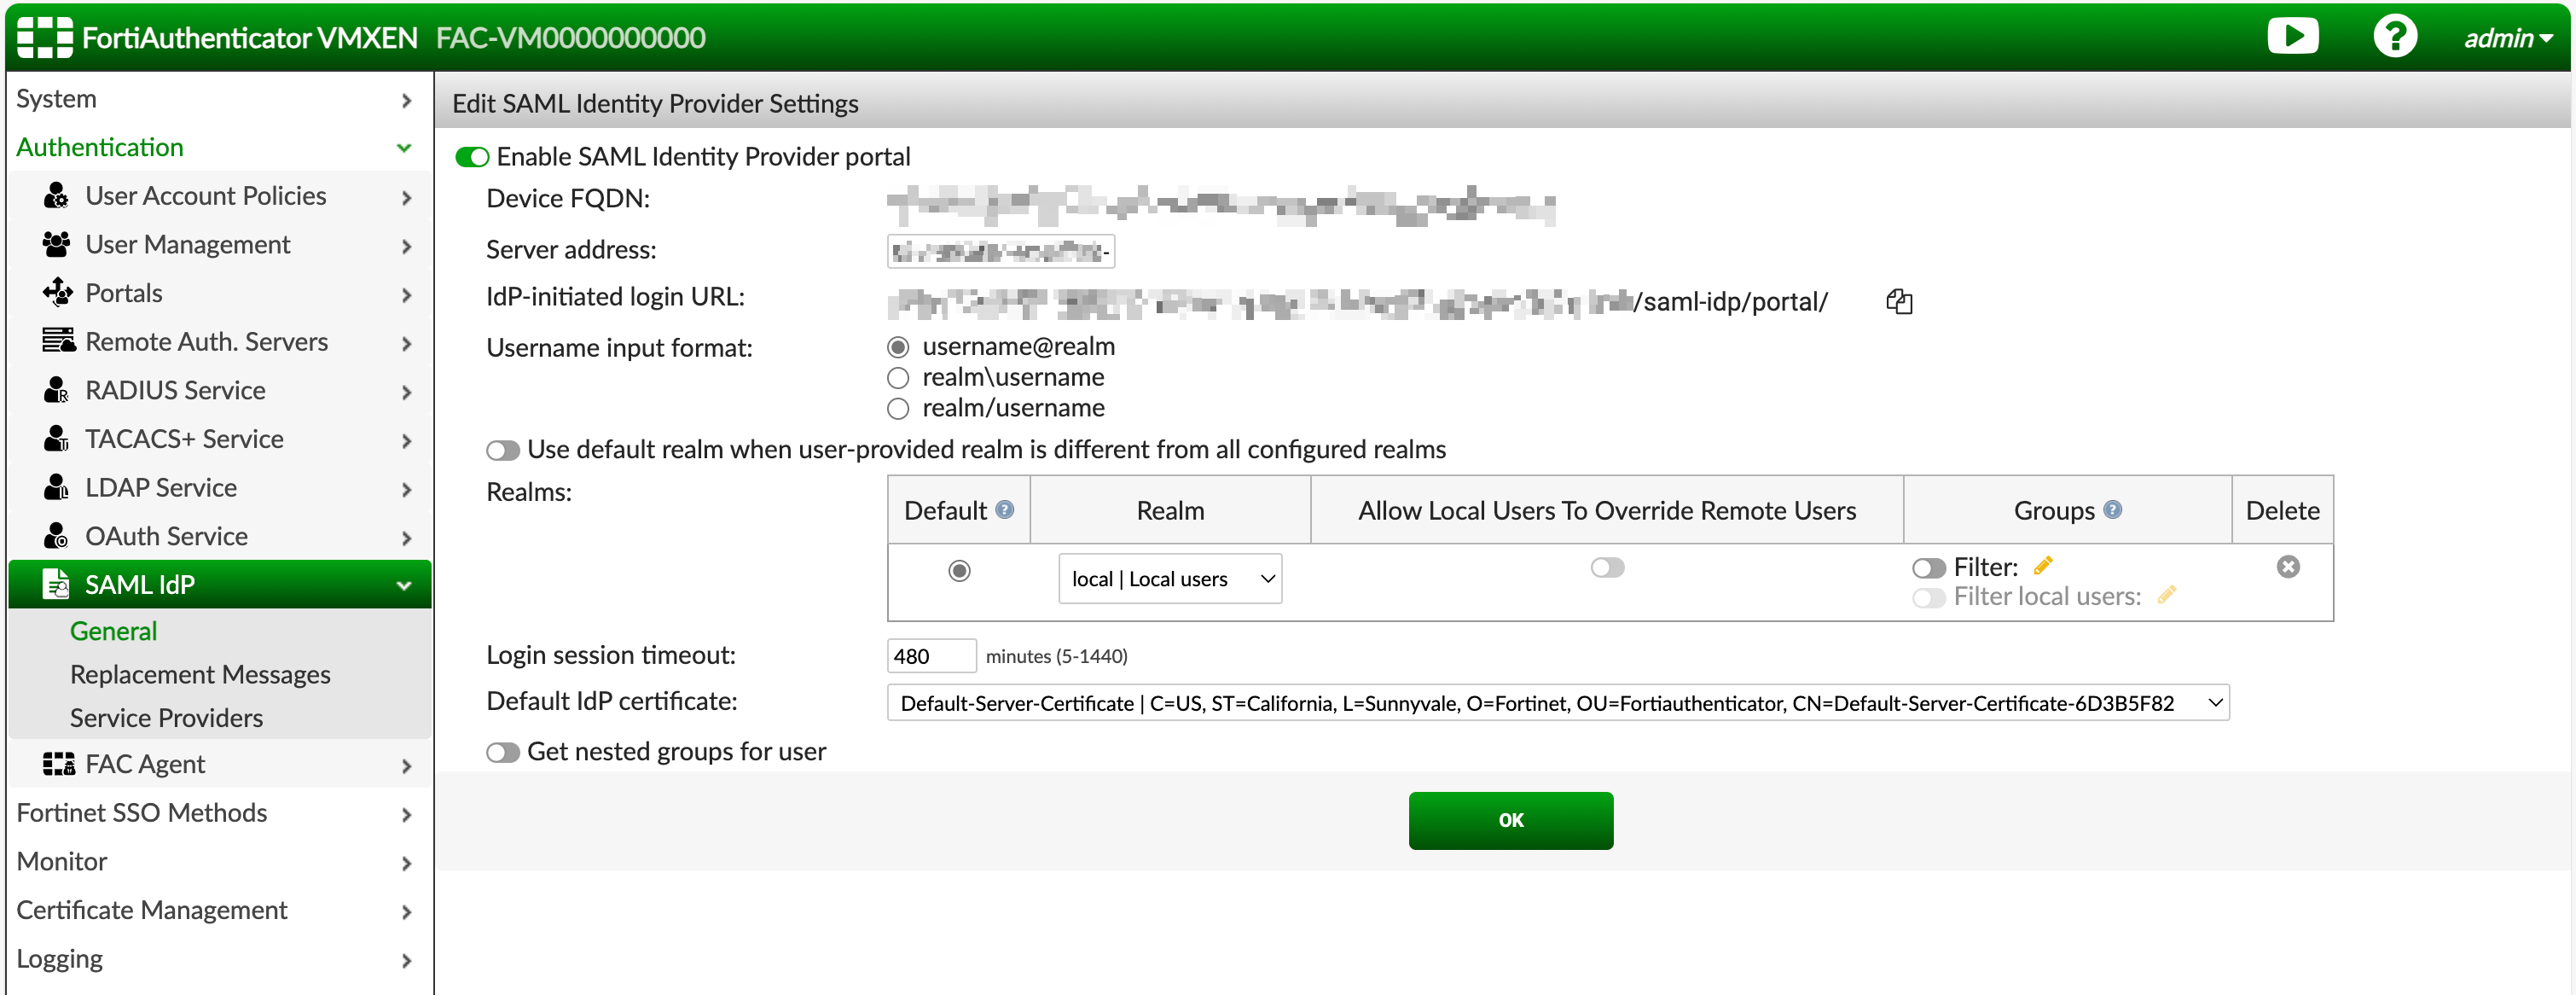
Navigate to Authentication → SAML IdP → General.
-
Enable “Enable SAML Identity Provider portal” setting.
-
In the Server Address field, enter the address AIR will use to reach FortiAuthenticator.
Make sure AIR can access this URL over the network. -
(Optional) Select a default IdP certificate.
This is recommended for metadata download compatibility. -
Click Save to store your settings.
Step 3: Create Service Provider in FortiAuthenticator
Section titled “Step 3: Create Service Provider in FortiAuthenticator”-
Go to Authentication → SAML IdP → Service Providers.
-
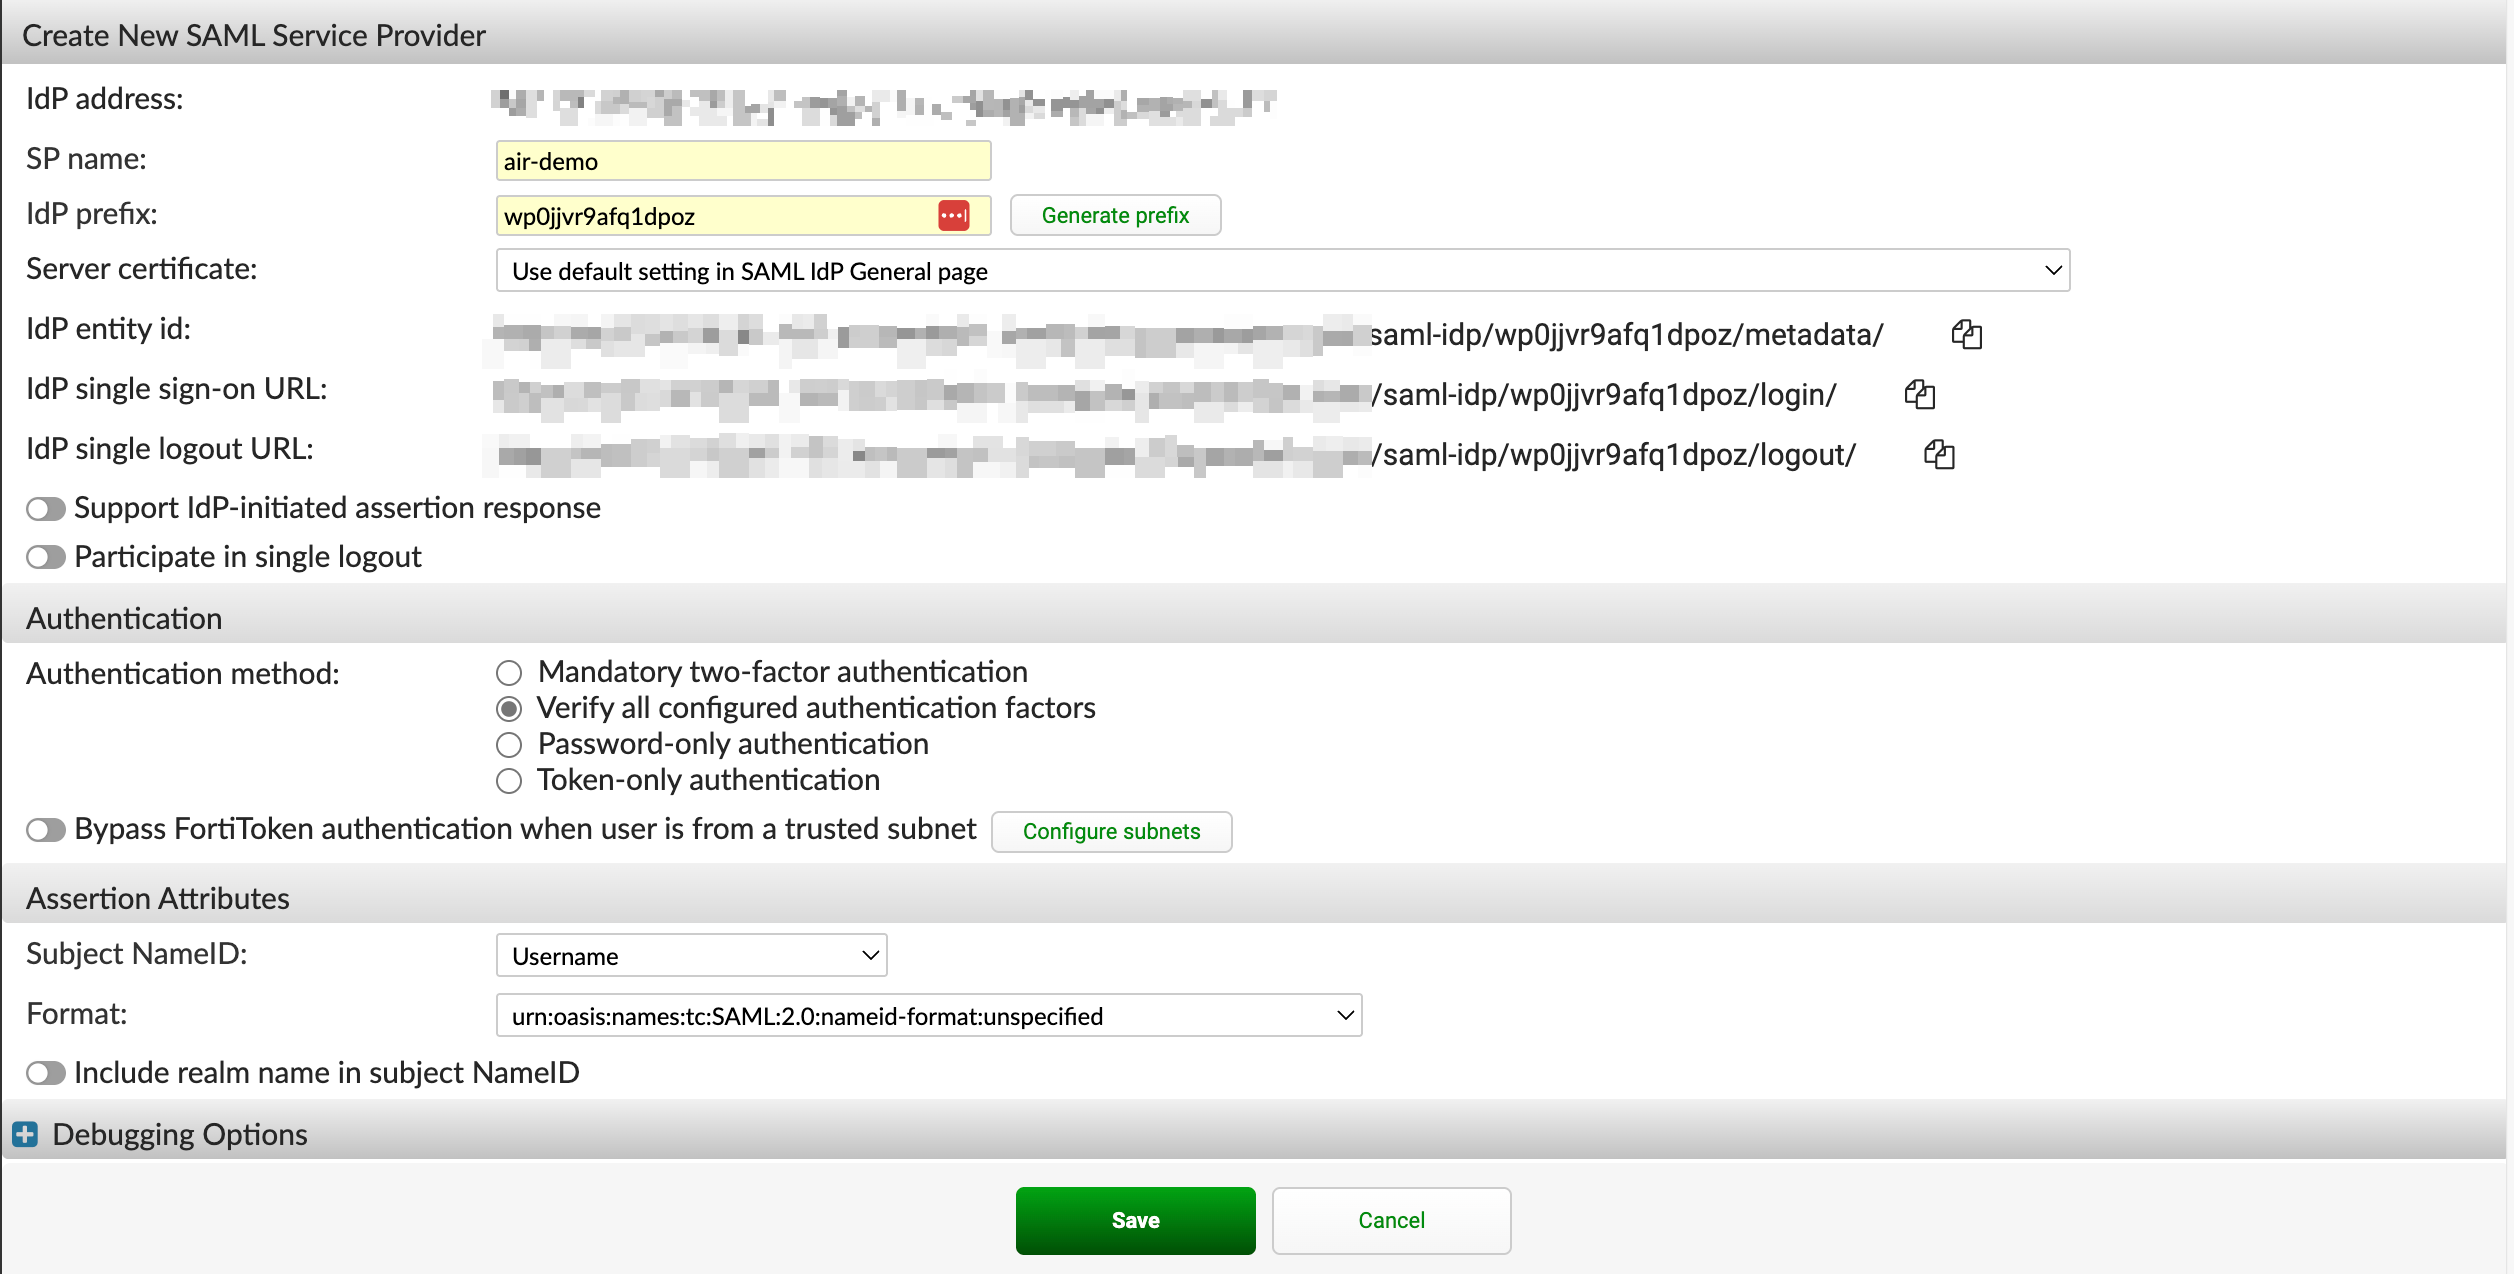
Click Create New to register the AIR as a new SP (Service Provider).
-
Fill in:
- SP Name: Choose a meaningful name (e.g.,
AIR-Instance-X) - IdP Prefix: Auto-generate or enter manually
- Server Certificate: Select one, or Use default setting in SAML IdP General page if using the default certificate
- SP Name: Choose a meaningful name (e.g.,
-
Click Save to create the SP.
Step 4: Configure SSO in AIR
Section titled “Step 4: Configure SSO in AIR”-
In a new tab, log in to AIR with an admin user.
-
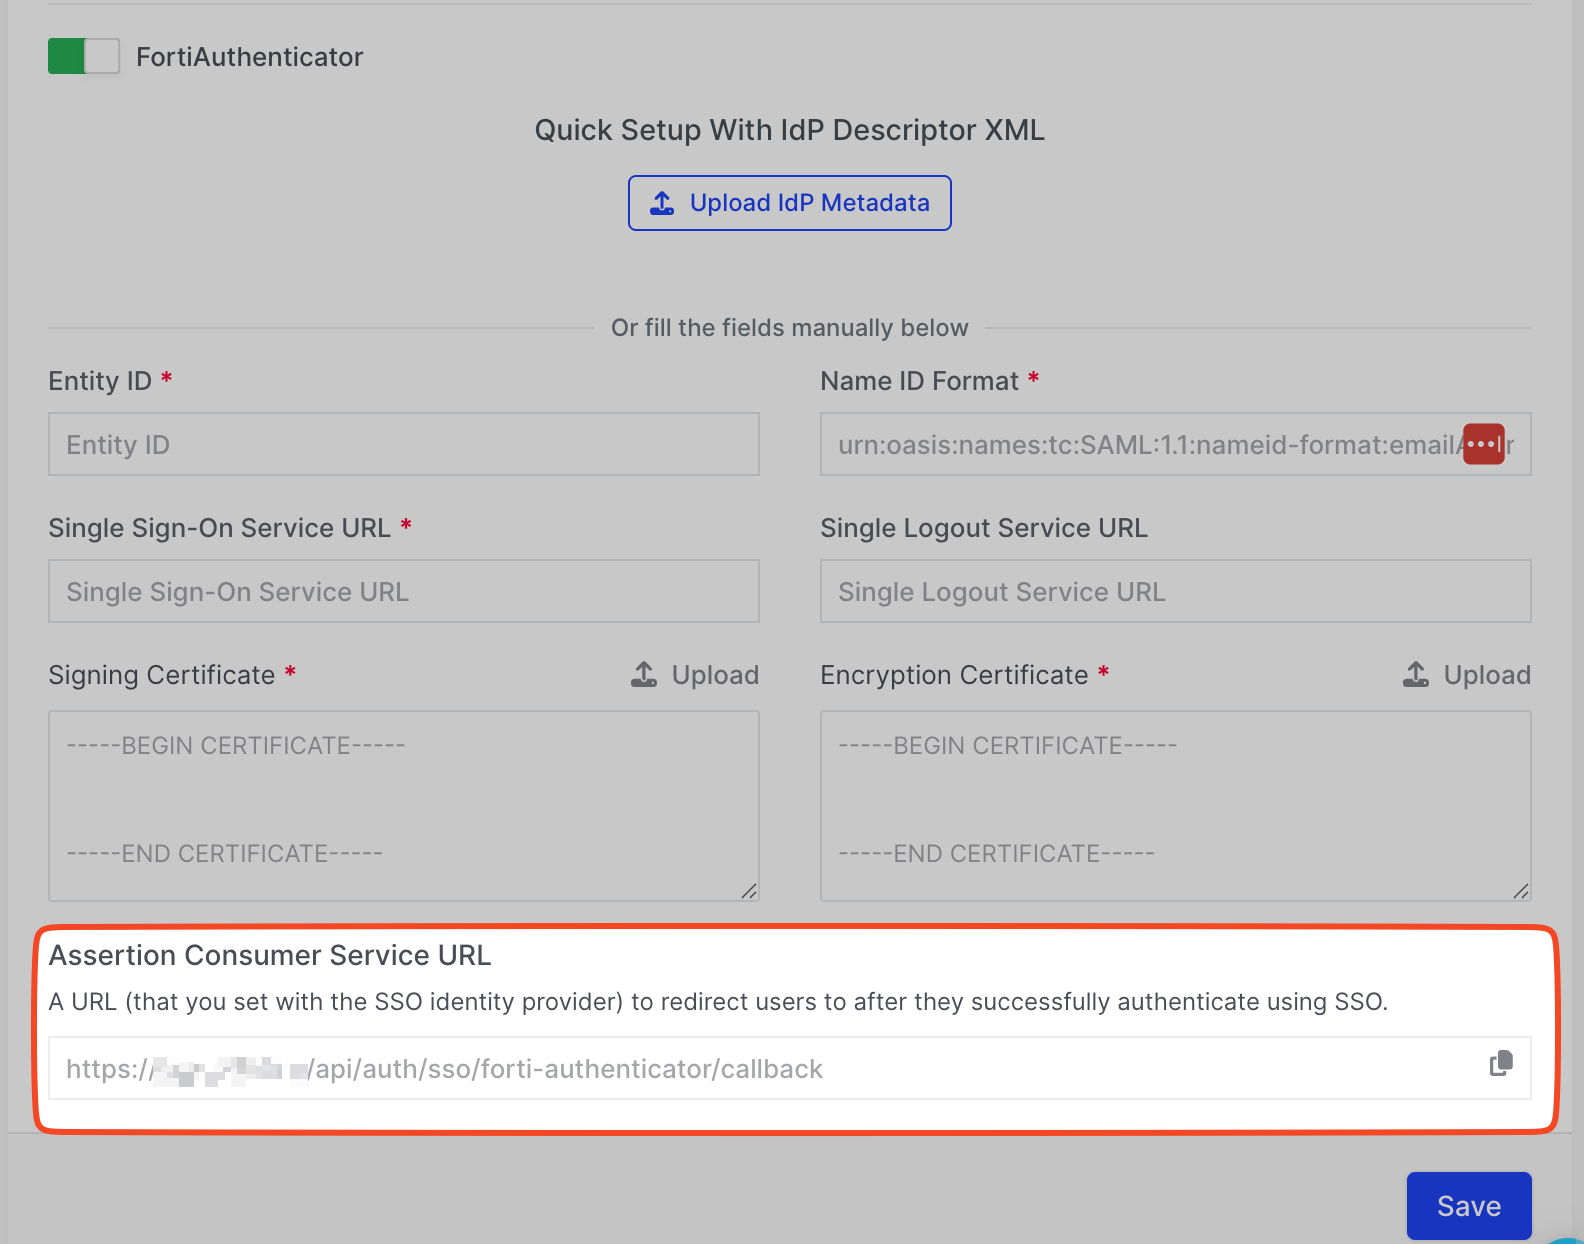
Go to Settings → Security, scroll to the SSO section.
-
Enable FortiAuthenticator and copy the ACS URL at the bottom.
Step 5: Complete SP Configuration in FortiAuthenticator
Section titled “Step 5: Complete SP Configuration in FortiAuthenticator”-
Go back to your created SP in FortiAuthenticator.
-
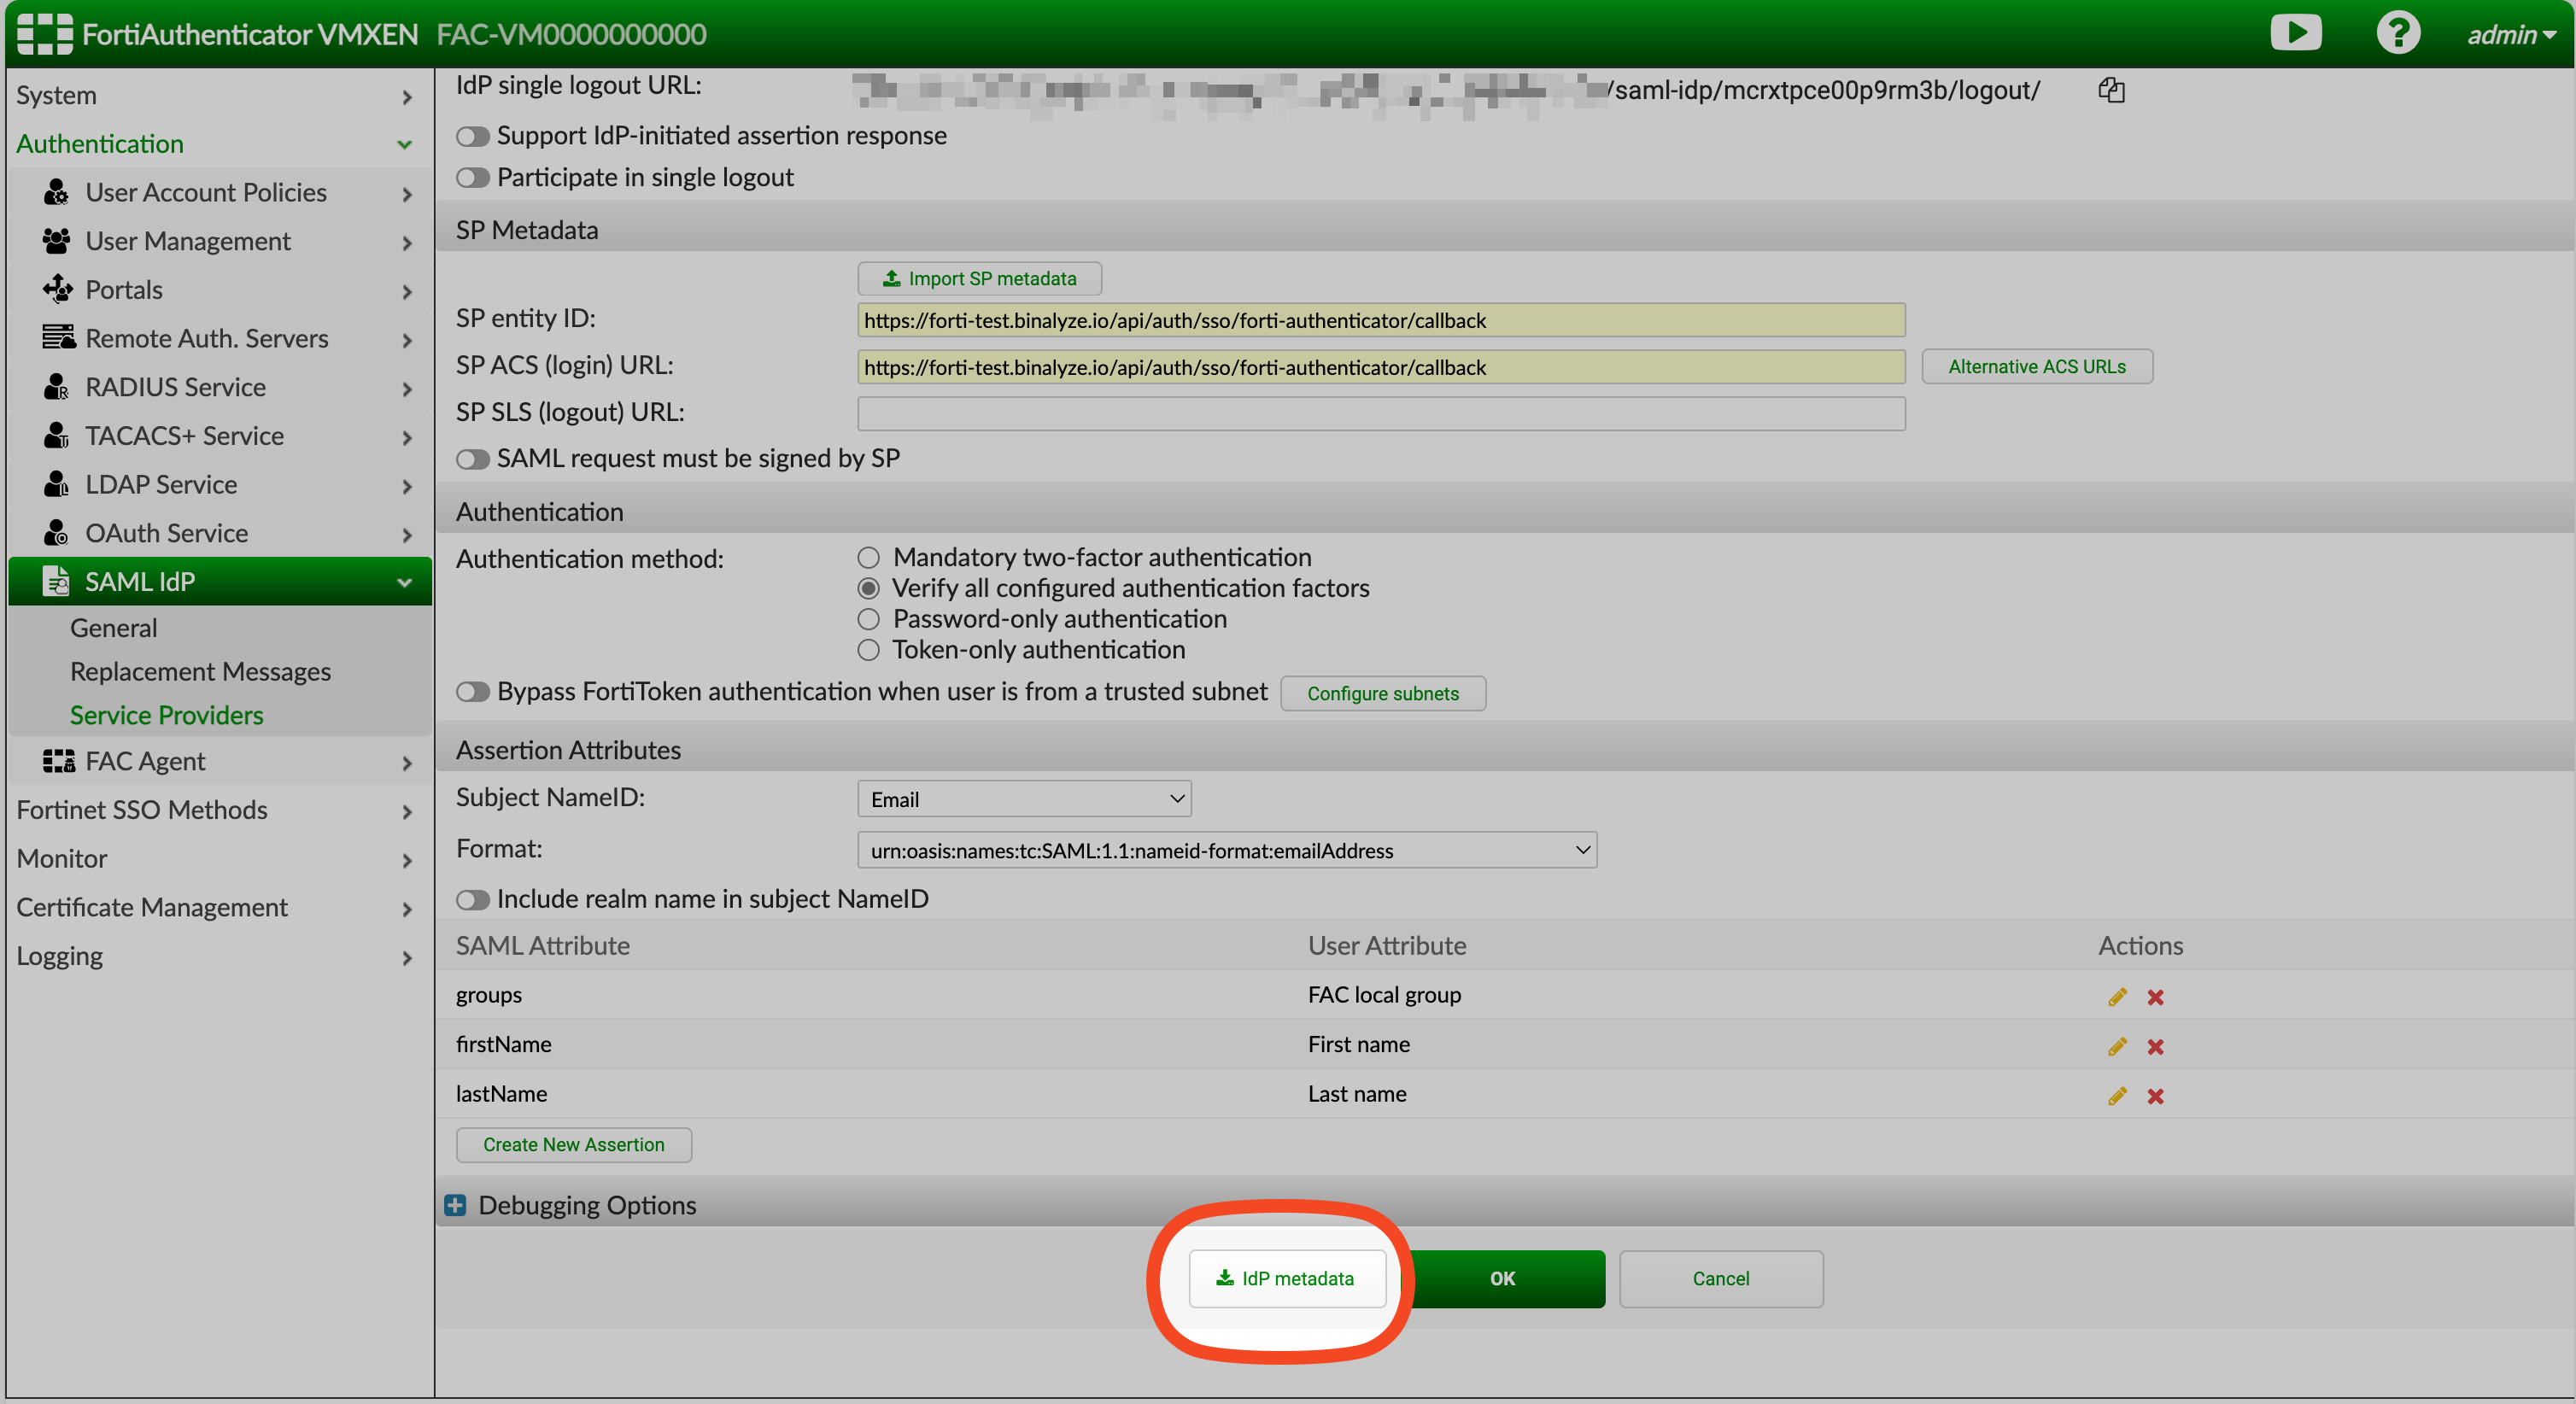
Under SP Metadata, fill in:
- SP Entity ID → Paste the ACS URL from AIR
- SP ACS (Login) URL → Paste the ACS URL again

-
Under Assertion Attributes, configure:
- Subject Name ID → Set to
email - Format →
urn:oasis:names:tc:SAML:1.1:nameid-format:emailAddress
- Subject Name ID → Set to
-
Add the following SAML assertions:
SAML Attribute User Attribute Required groupsGroup ✅ firstNameFirst Name ❌ lastNameLast Name ❌ 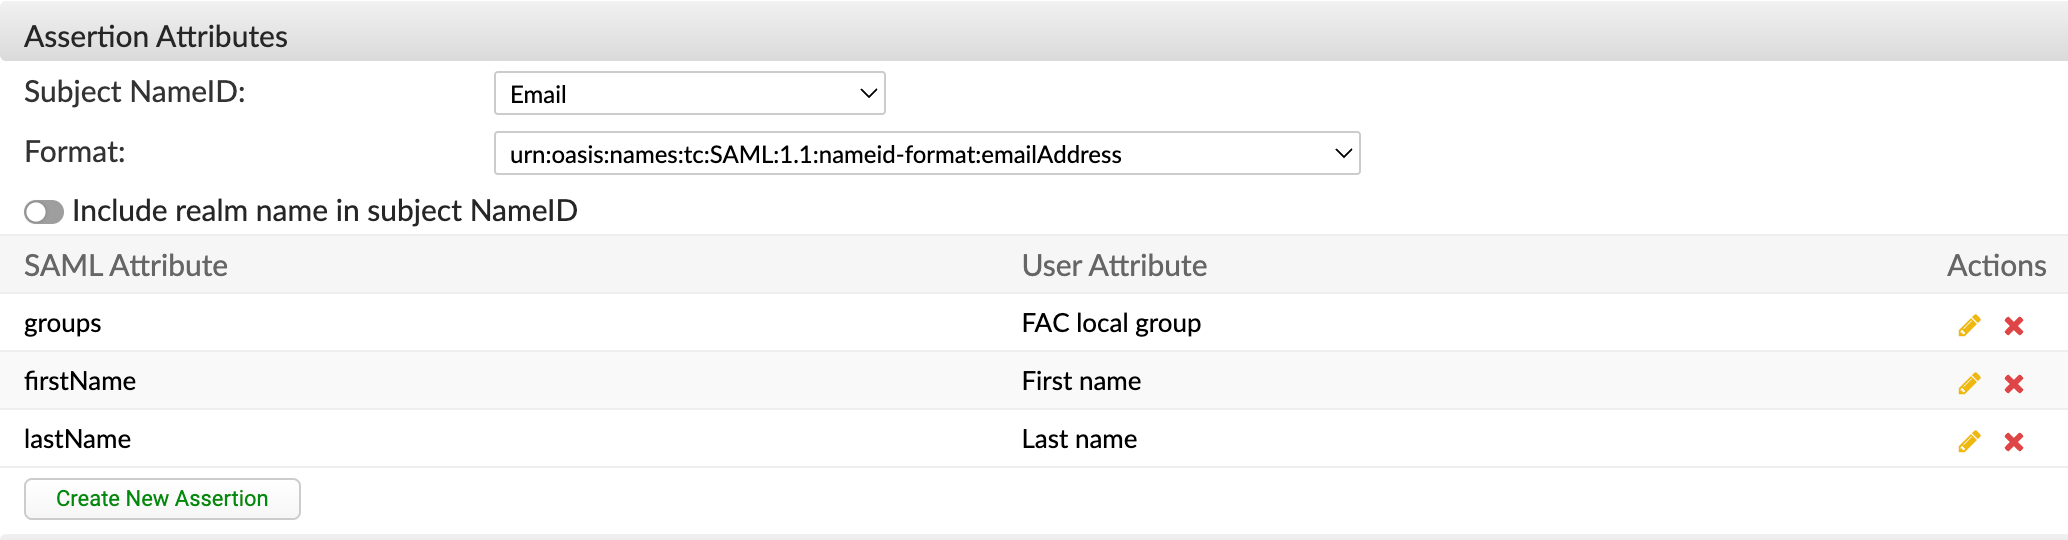
-
Click Save.
Step 6: Export IdP Metadata
Section titled “Step 6: Export IdP Metadata”-
Open the newly created SP entry.
-
Click Download IdP Metadata.
Step 7: Upload Metadata to AIR
Section titled “Step 7: Upload Metadata to AIR”-
Return to AIR → Settings → Security → SSO section.
-
Use the Upload IdP Metadata option to upload the file.
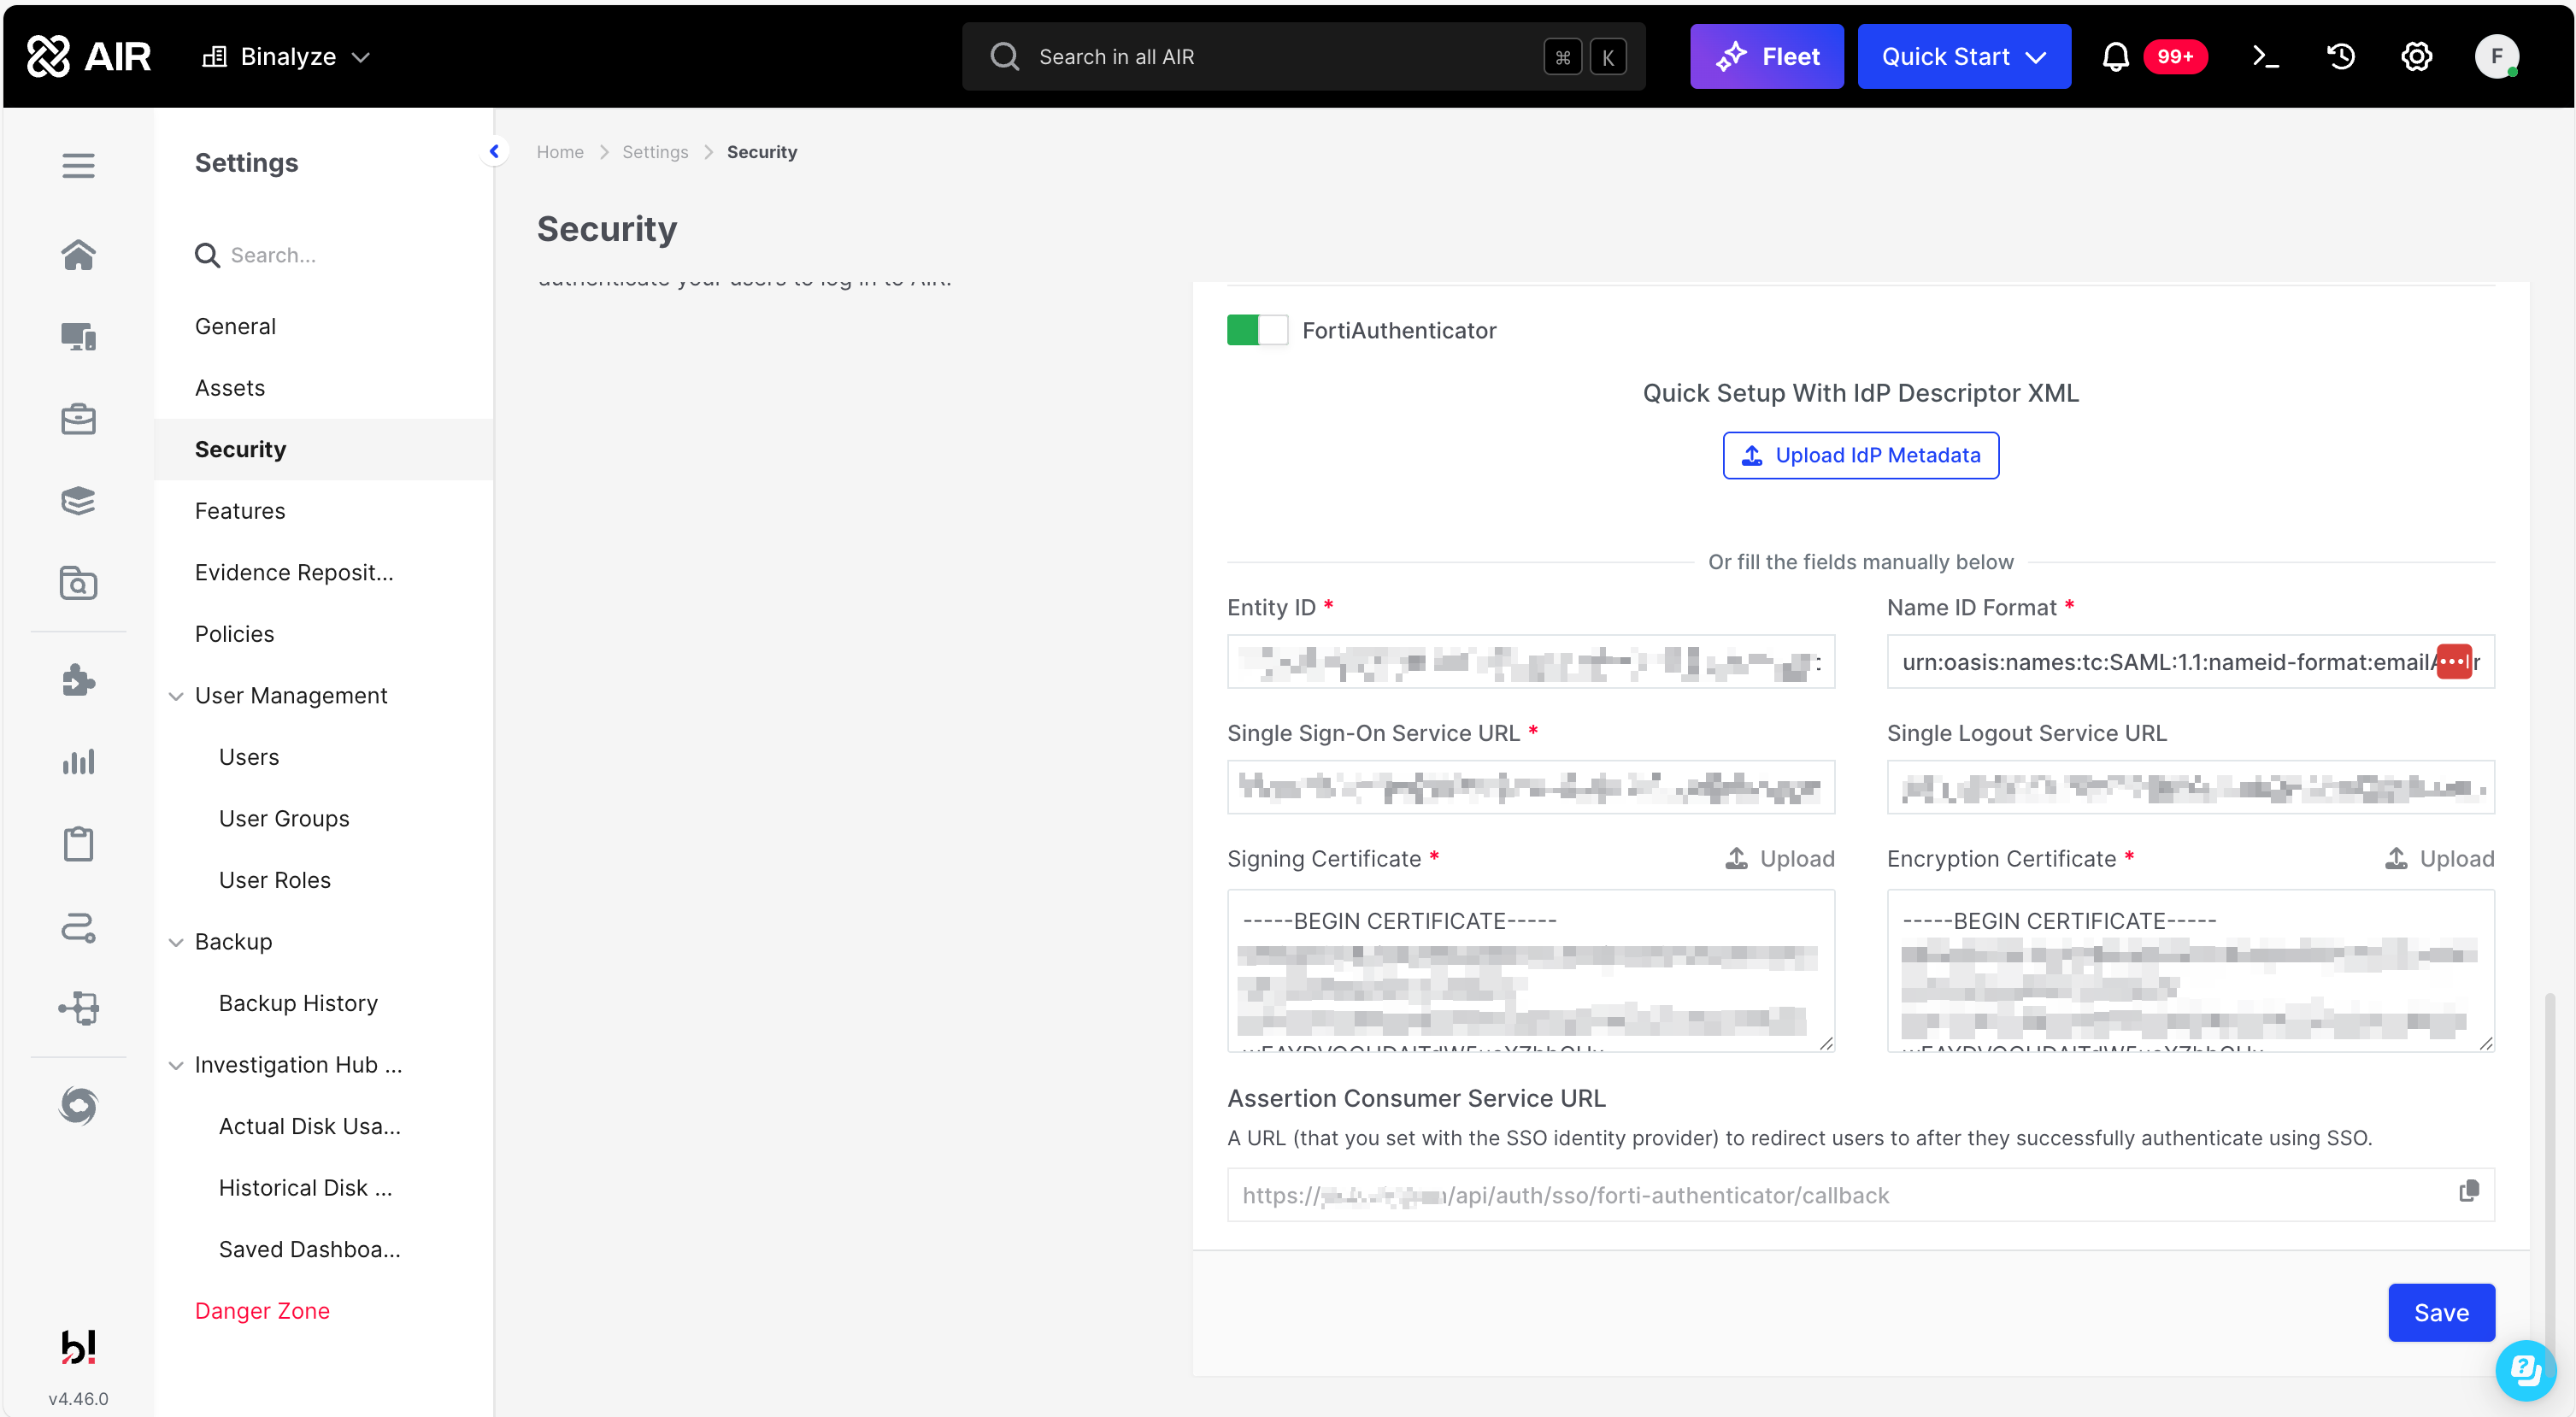
🔄 Alternatively, you can copy values from Forti and paste them into AIR manually.
-
Click Save.
Step 8: Test the Integration
Section titled “Step 8: Test the Integration”-
Log out of AIR.
-
Click Login with FortiAuthenticator on the login screen.
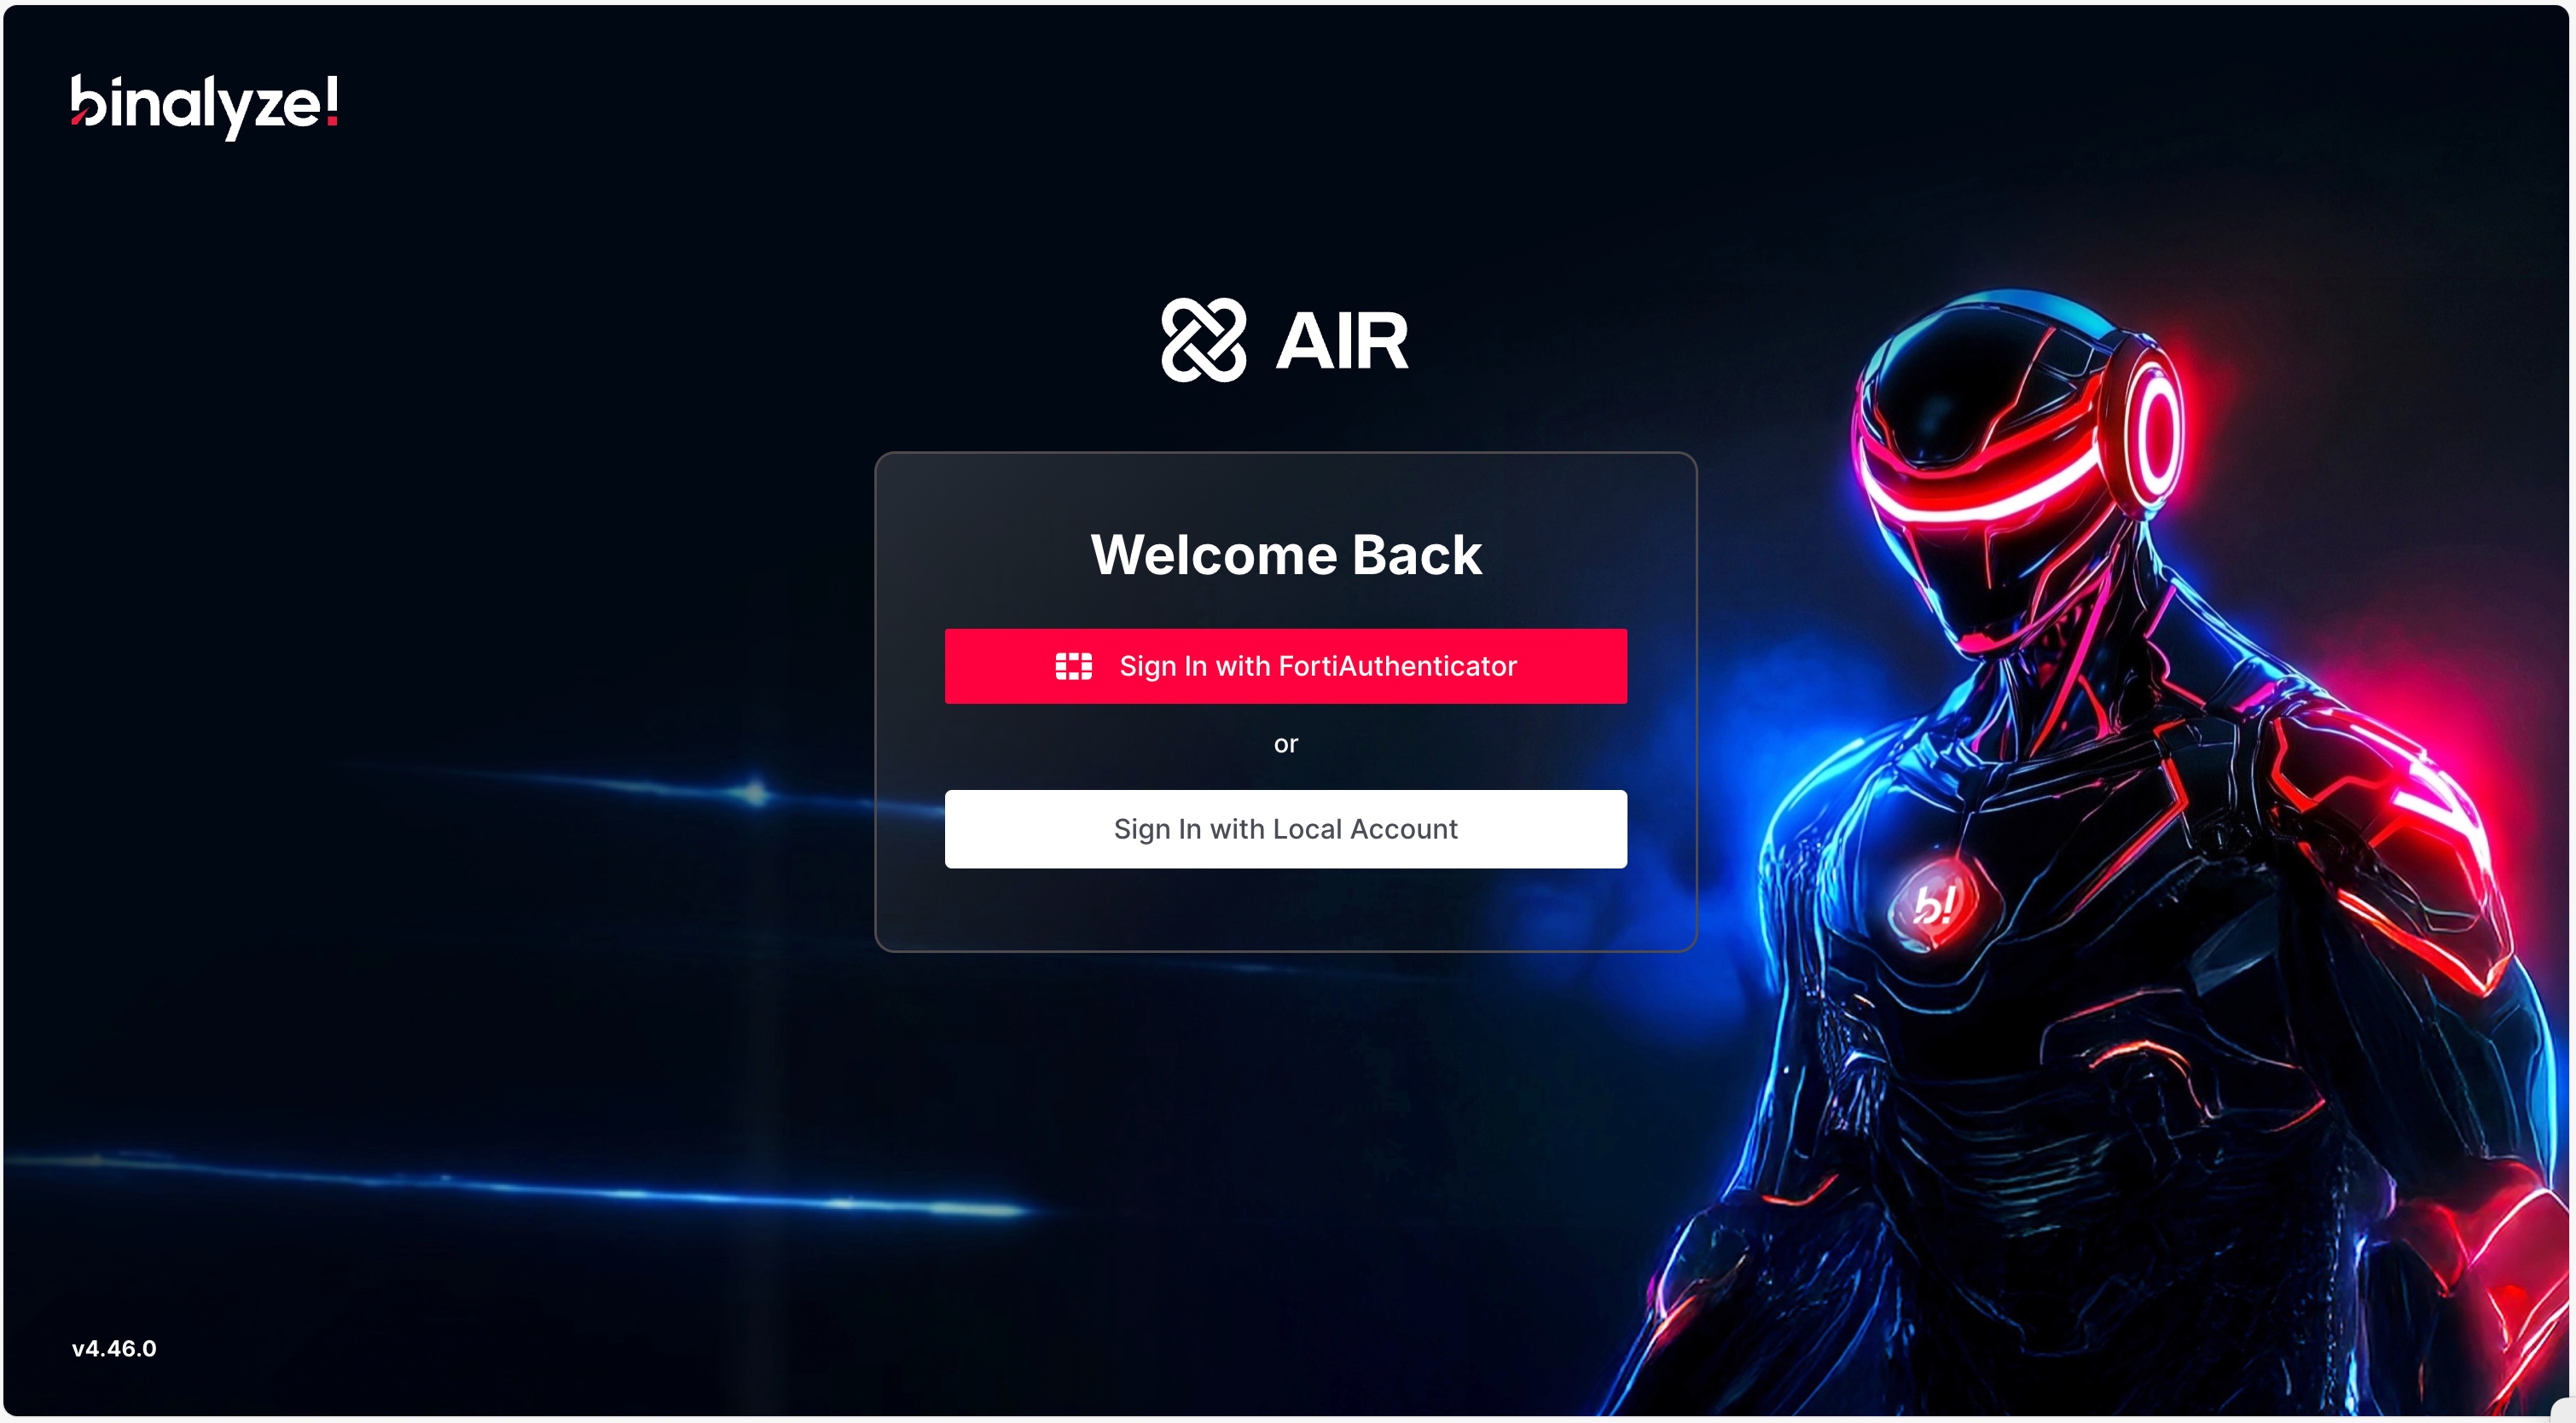
-
You’ll be redirected to FortiAuthenticator. After successful authentication, you’ll be redirected back to AIR.
Troubleshooting
Section titled “Troubleshooting”If login fails, check the following:
-
🔌 Network Issues: Make sure AIR can reach FortiAuthenticator’s Server Address.
-
👥 Role Mapping: Ensure the user is assigned to at least one Forti group named
air_role.XwhereXmatches a role tag in AIR.- View AIR role tags via Settings → User Management → User Roles.
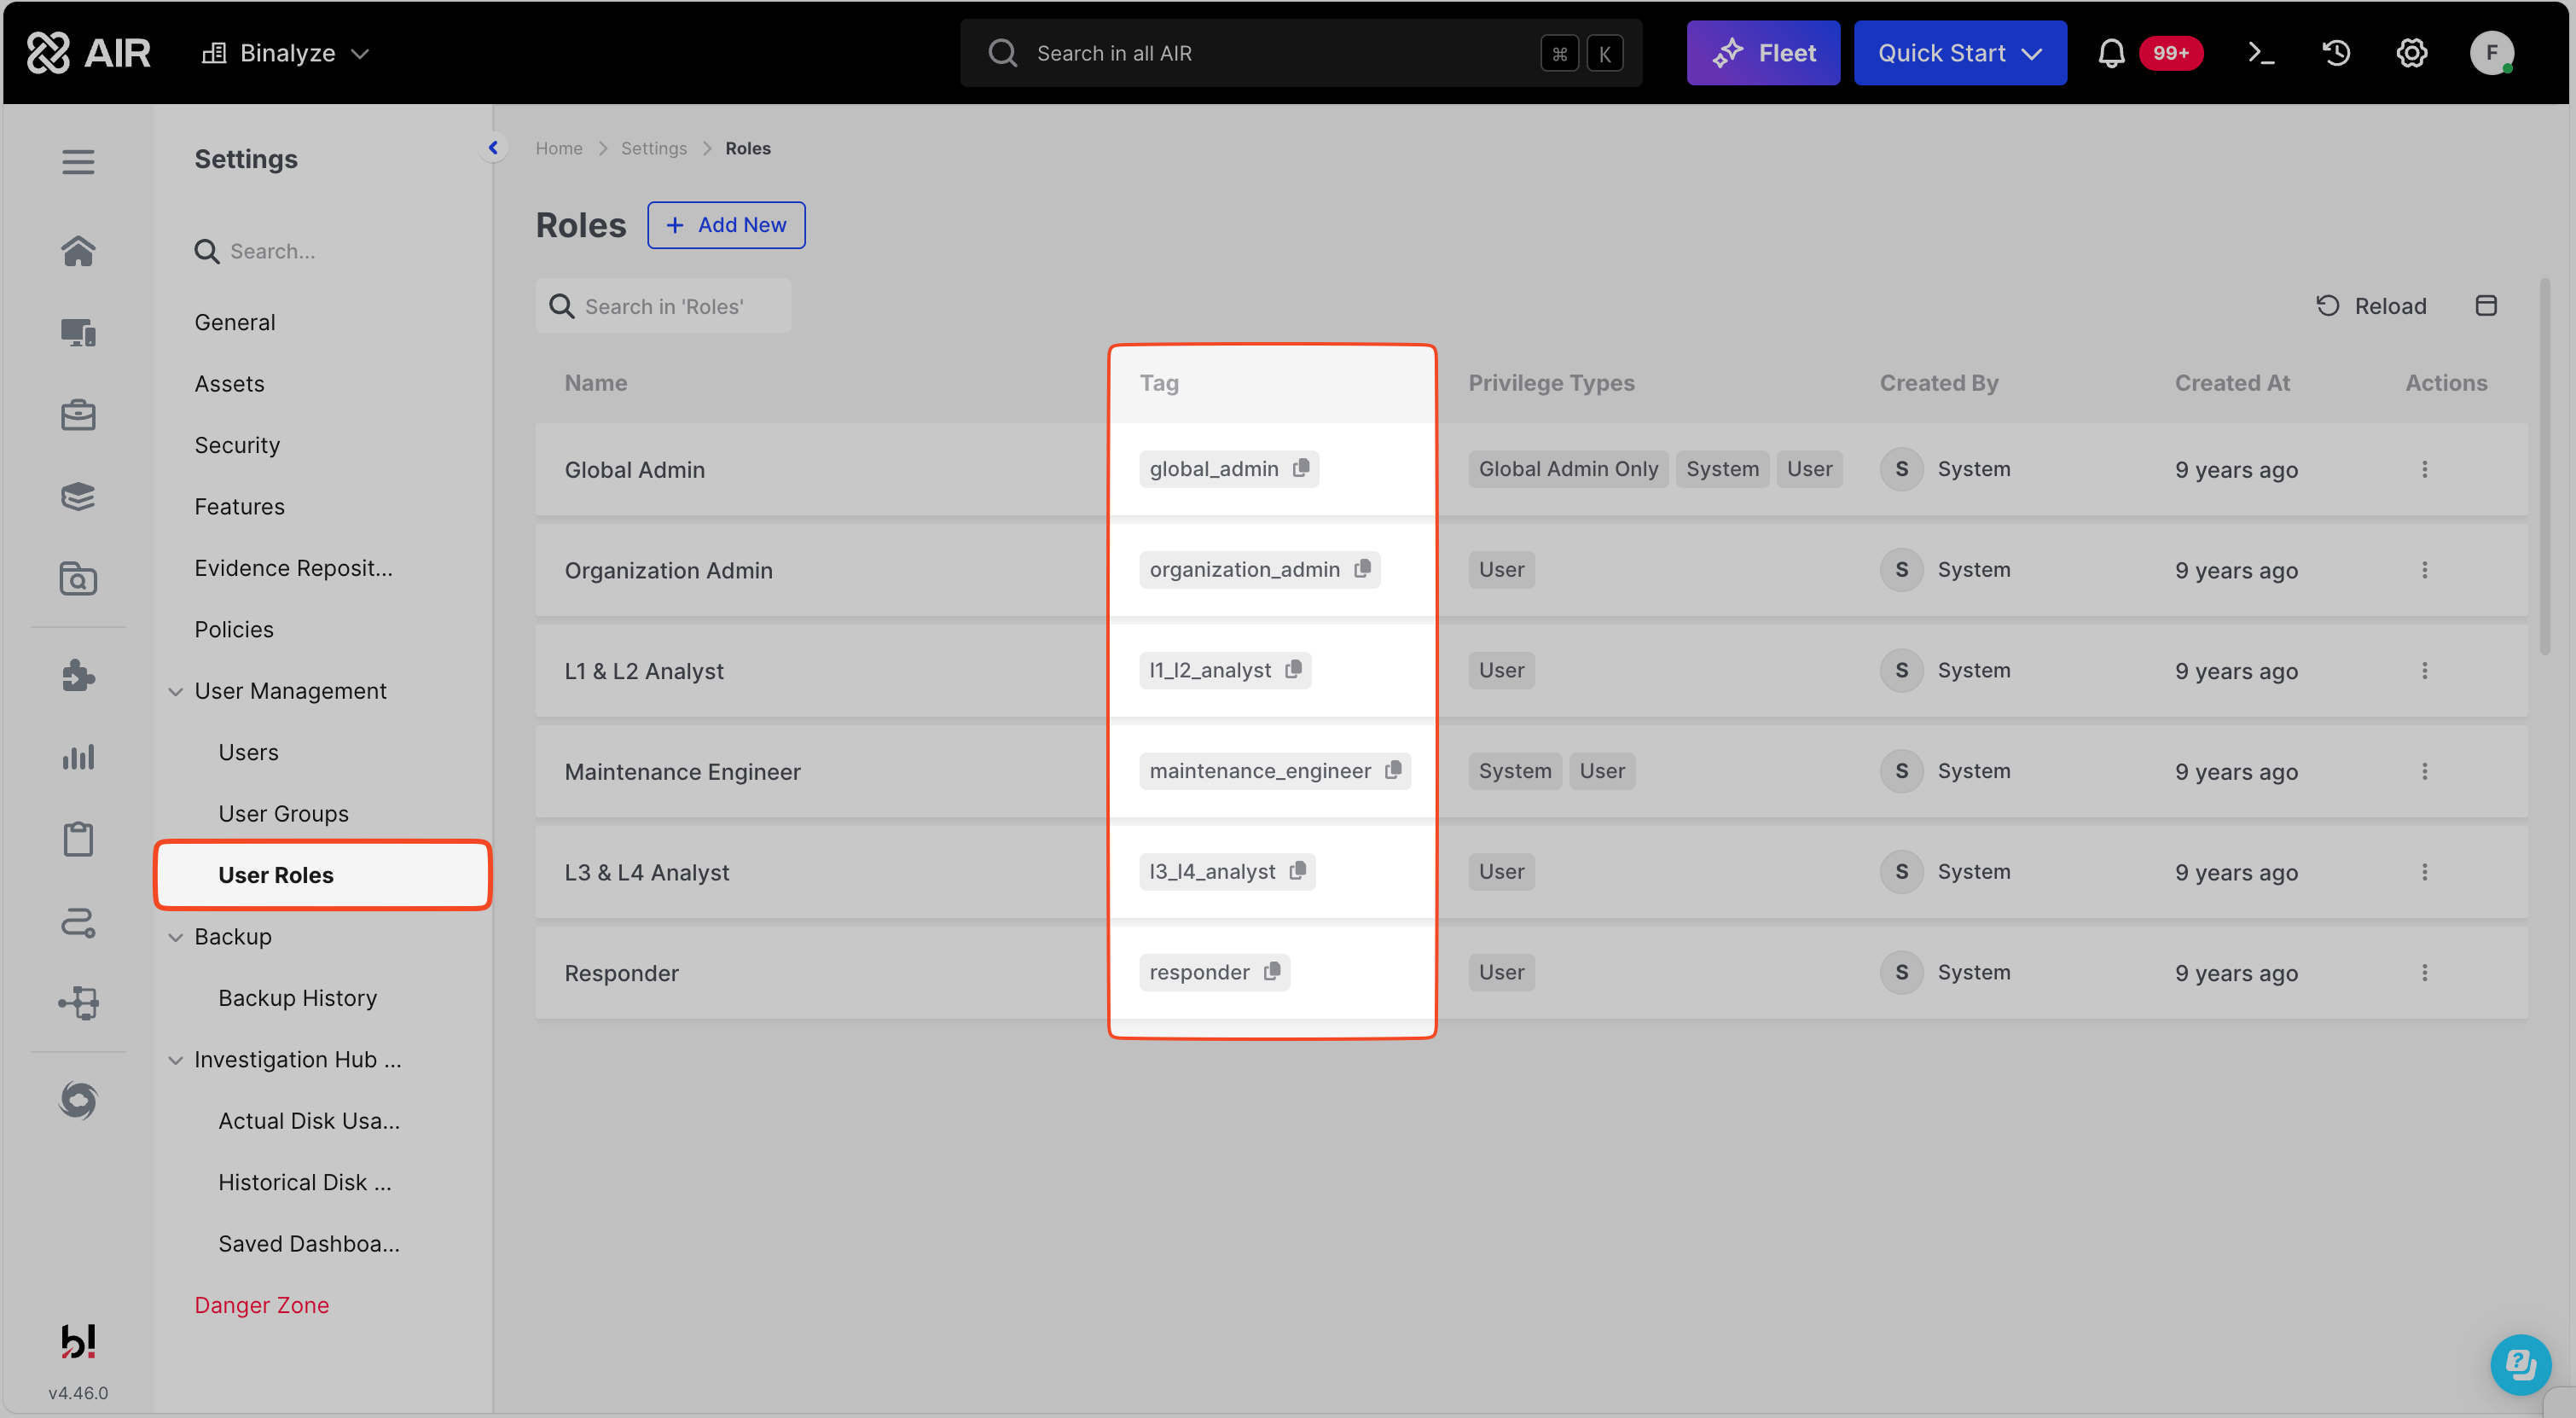
- View AIR role tags via Settings → User Management → User Roles.
-
📧 Email Field: Users without an email field in Forti cannot log in.
-
📄 Logs: If the issue persists, collect SAML logs from both AIR and Forti and contact support.
Example Group Mapping for Predefined Roles
Section titled “Example Group Mapping for Predefined Roles”| AIR Role Name | AIR Role Tag | Forti Group Name |
|---|---|---|
| Global Admin | global_admin | air_role.global_admin |
| Organization Admin | organization_admin | air_role.organization_admin |
| L1 & L2 Analyst | l1_l2_analyst | air_role.l1_l2_analyst |
| Maintenance Engineer | maintenance_engineer | air_role.maintenance_engineer |
| L3 & L4 Analyst | l3_l4_analyst | air_role.l3_l4_analyst |
| Responder | responder | air_role.responder |