Acquisition Profiles
Acquisition profiles in AIR define the specific types of data to be collected during an acquisition task. AIR offers two types of acquisition profiles:
- Device Acquisition Profiles: Used to collect evidence and artifacts from Windows, Linux, macOS, and IBM AIX machines—either via an installed Responder on networked assets, or using a portable Responder executed from external media (such as a USB drive) for off-network collections.
- Disk Image Acquisition Profiles: Extend collection capabilities to disk images via the File Explorer, enabling investigators to extract evidence and artifacts from forensic images without requiring a live system.
Both profile types enable you to customize and streamline data collection to meet the unique requirements of your investigation. Saved within the AIR Libraries, acquisition profiles can be easily shared, reused, or edited for further refinement, ensuring efficiency and consistency across investigations.
Using Out-of-the-Box Acquisition Profiles
Section titled “Using Out-of-the-Box Acquisition Profiles”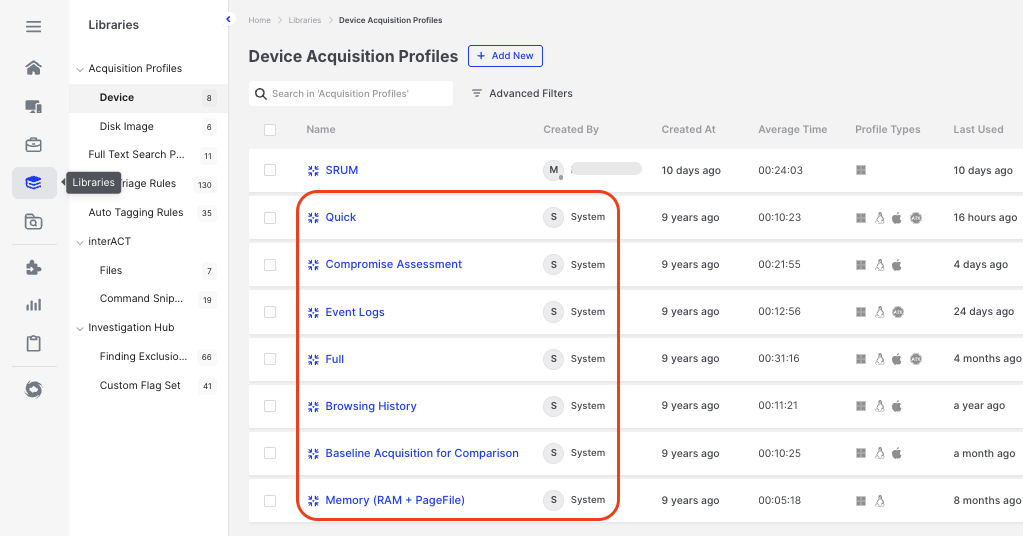
Acquisition Profiles: Built-in Profiles
As shown above, AIR comes with several predefined acquisition profiles that you can use immediately, for example:
- Quick: Designed for fast data acquisition with essential evidence types.
- Full: Collects a comprehensive and rich set of data from the assets.
- Compromise Assessment: Focuses on locations commonly abused by malicious actors, defined by the Binalyze threat hunting team.
These out-of-the-box profiles are ideal for common scenarios and provide an ideal quick start for your investigations.
Creating your own Acquisition Profiles
Section titled “Creating your own Acquisition Profiles”To create your own custom acquisition profile, follow these steps:
(1) Navigate to Acquisition Profiles
Section titled “(1) Navigate to Acquisition Profiles”- Go to the “Libraries > Acquisition Profiles” section from the main dashboard.
(2) Create a New Profile
Section titled “(2) Create a New Profile”- Click on the ”+ New Profile” Action Button.
- Provide your new profile with a name that will help you identify its purpose later.
(3) Select the Operating System(s) for your new profile
Section titled “(3) Select the Operating System(s) for your new profile”- Windows
- Linux
- macOS
- IBM AIX
- Or a cross-platform eDiscovery collection
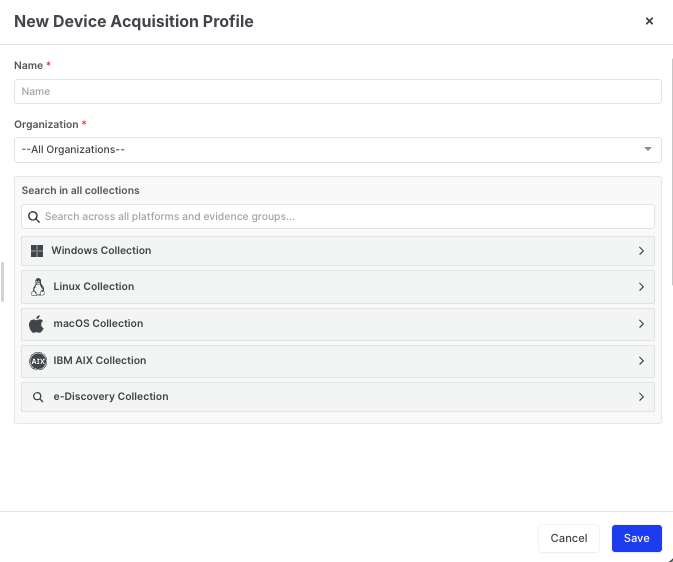
Acquisition Profiles: Supported platforms and eDiscovery option
(4) Select Evidence Types
Section titled “(4) Select Evidence Types”- AIR supports the most comprehensive, and ever-growing number of evidence types for collection and presentation in the Investigation Hub. To build your profile, choose the data you want to collect from the extensive options grouped under the following eight tabs:
- System
- System artifacts (e.g., registry, jump lists, UAL, Cron Jobs)
- Memory
- Memory files (e.g., RAM image, Page File, Memory Map)
- Network
- Network artifacts (e.g., IP Tables, TCP Tables, DNS Servers)
- Event Log Records
- AIR allows users to collect and present event logs or define specific channels for log collection. Learn more about Windows Event Records
- Disk & File System
- Collect disk & file System items (e.g., $mft, $Boot File, Mounts, fseventsd)
- Applications
- Data for specific applications (e.g., browsers, AV logs, RDM tools, Microsoft application data)
- Custom Content Profiles
- Select bespoke file locations for collection.
- osquery
- Use bespoke osquery commands to collect live system artifacts, including processes, network activity, and configuration files.
- System
-
Network Capture
Network Flow captures TCP/UDP connections and stores them as a CSV.
PCAP will capture IP packets and save them as a PCAP file.
The duration of the Network Capture is determined by the user.
- osquery
- Use your own bespoke osquery commands to collect live system artifacts, including processes, network activity, and configuration files.
- osquery
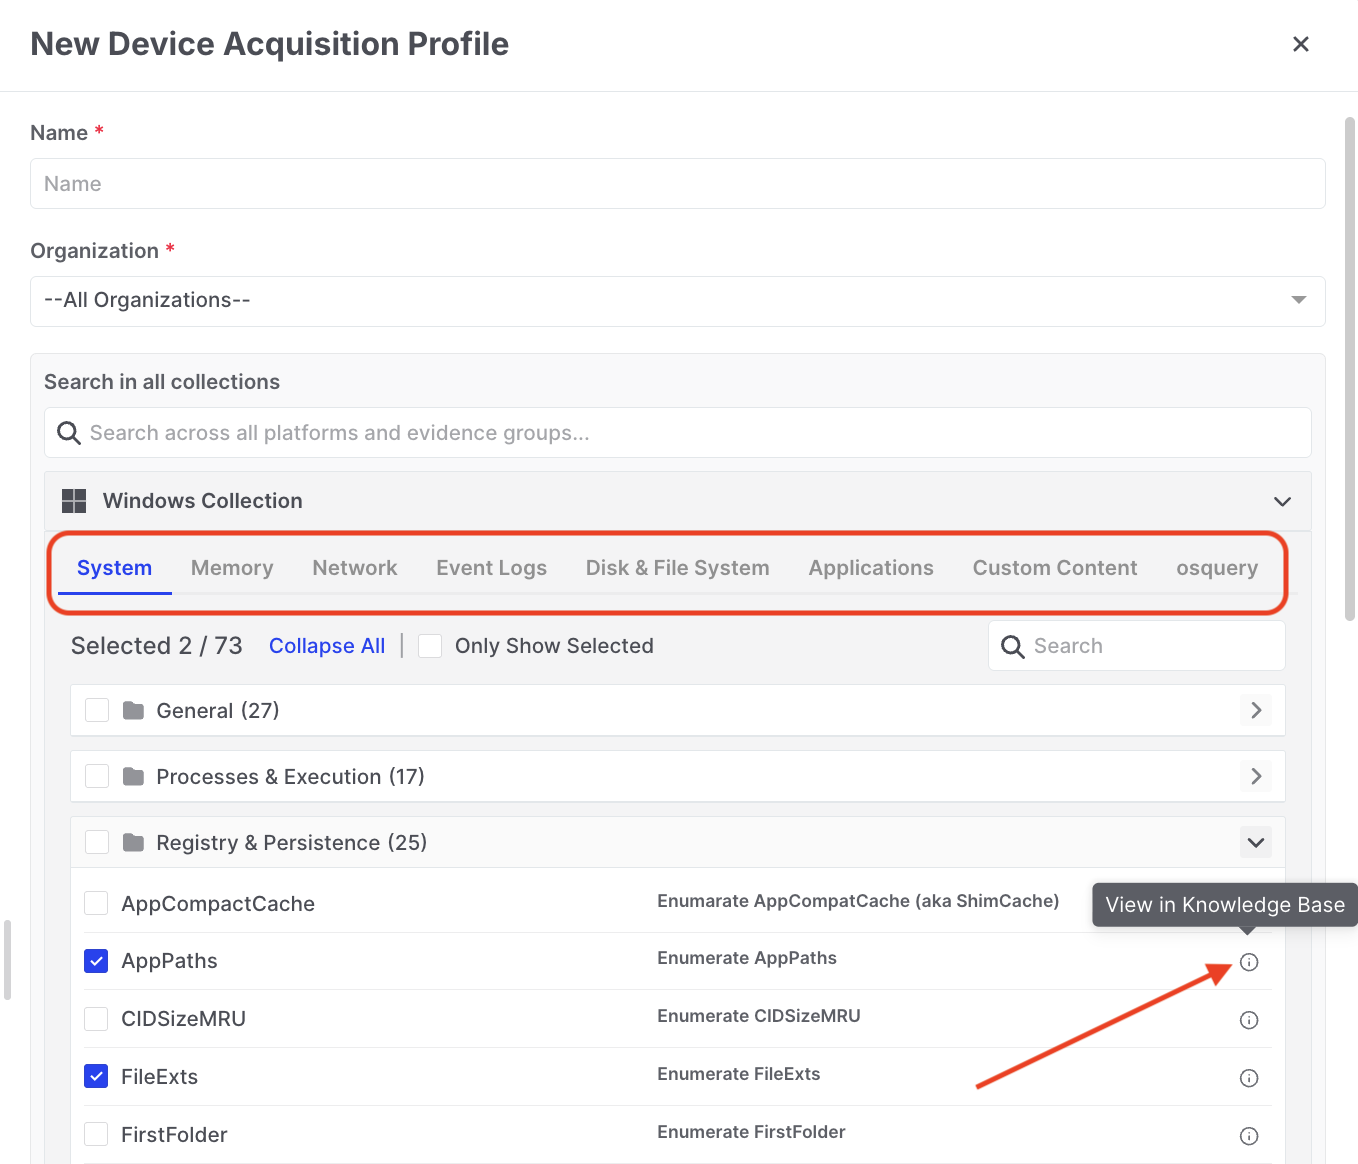
Acquisition Profiles: Choose items for collection from the 8 tabbed groupings
- Note that in the screenshot above, you can click the Info button at the end of each item in the collection list to open the Knowledge Base for a detailed explanation of the item and what we collect. :::
Searching Across All Collections
Section titled “Searching Across All Collections”With hundreds of evidence types available across multiple operating systems, finding specific collectors can be time-consuming. The Search in all collections feature enables you to instantly locate relevant collectors by keyword.
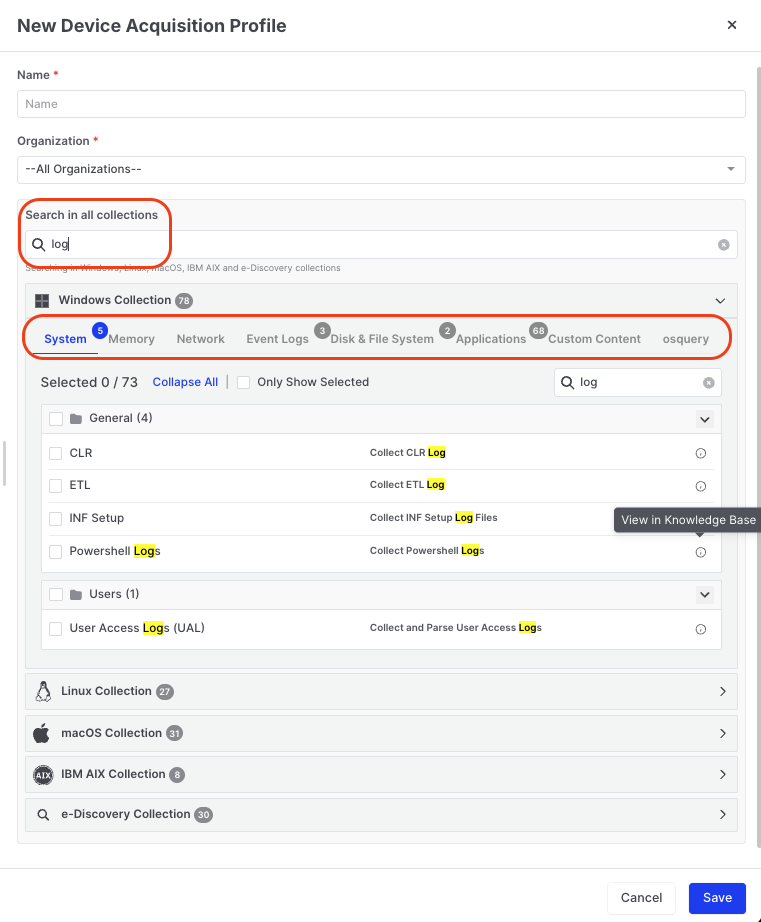
Acquisition Profiles: Search in all collections with badge indicators showing match counts
How it works:
- Enter a search term in the “Search in all collections” field at the top of the profile editor. In the example above we search for ‘log’.
- Results are displayed with badge indicators at two levels:
- Operating System level: Shows the total number of matches within each platform (e.g., Windows Collection: 78 matches, Linux Collection: 27 matches).
- Tab level: Shows how matches are distributed across tabs within each OS (e.g., System: 5, Event Logs: 3, Applications: 68).
- Matching text is highlighted in yellow within the collector names and descriptions, making it easy to identify relevant items.
- Use the secondary search field within each OS section to further filter results.
This feature is particularly useful when:
- Building targeted profiles for specific artifact types (e.g., searching “log” to find all log-related collectors).
- Investigating specific applications or services across multiple platforms.
- Quickly identifying which operating systems support collection of particular evidence types.
(5) Save the Profile
Section titled “(5) Save the Profile”- Once you have configured all the necessary settings, click “Save” to create your custom acquisition profile.
Managing Acquisition Profiles
Section titled “Managing Acquisition Profiles”- Edit Profiles: You can edit existing profiles by selecting the profile and making necessary changes.
- Delete Profiles: Remove profiles that are no longer needed to keep your list organized.
- Duplicate Profiles: Create a copy of an existing profile to use as a template for a new one.
- User Privileges for acquisition profiles can be managed via ‘Settings > Roles’
Best Practices
Section titled “Best Practices”- Check Profiles: Ensure your acquisition profiles are up-to-date with the latest evidence types and investigation requirements.
- Test Profiles: Test new profiles in a controlled environment to ensure they collect the intended data.
- Average Time Taken: In the Acquisition Profiles table, you can see the ‘Average Time’ taken by each profile. This can be useful when considering the performance and efficiency of individual profiles.
- The Profile Types column provides a quick visual reference to indicate which operating systems—Windows, Linux, or macOS—are supported by each acquisition profile.
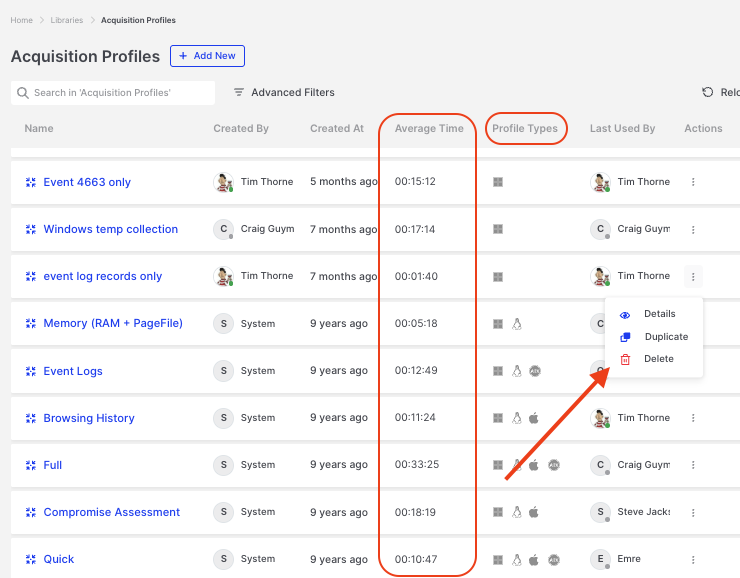
Acquisition Profiles: Average time to run profiles and action button to duplicate the profile
By using acquisition profiles in AIR, you can efficiently gather relevant data for your investigations, saving time and ensuring comprehensive evidence collection.