Getting Started with Tornado
1. Initial Configuration
Section titled “1. Initial Configuration ”-
Launch the Tornado application
-
Accept the license agreement
-
Configure initial settings:
- Settings
- Parselets
- Dark Mode (switch between light and dark modes)
- Send Feedback (provide Tornado feedback to Binalyze)
- Documentation (links to Tornado documentation)
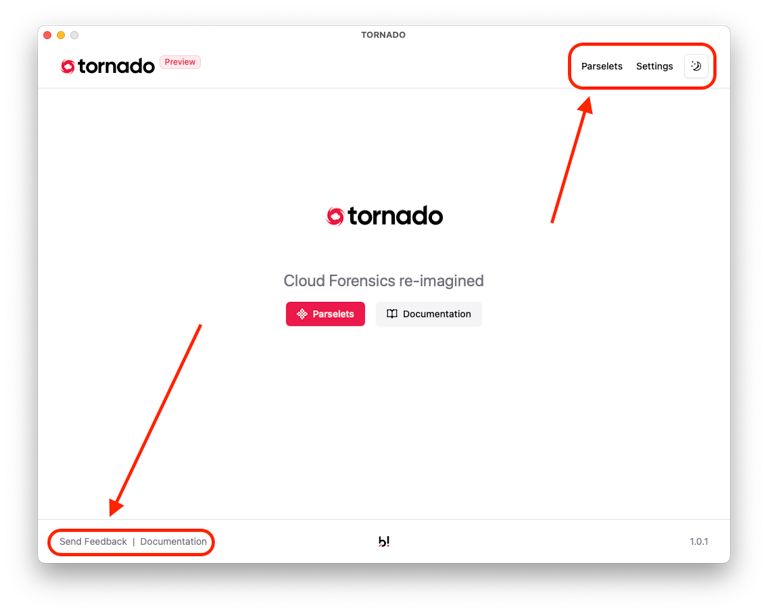
Getting Started with Tornado: Home Page
2. Network Configuration
Section titled “2. Network Configuration ”- Verify internet connectivity
- Check firewall settings
- Configure proxy (if needed)
Settings
Section titled “Settings”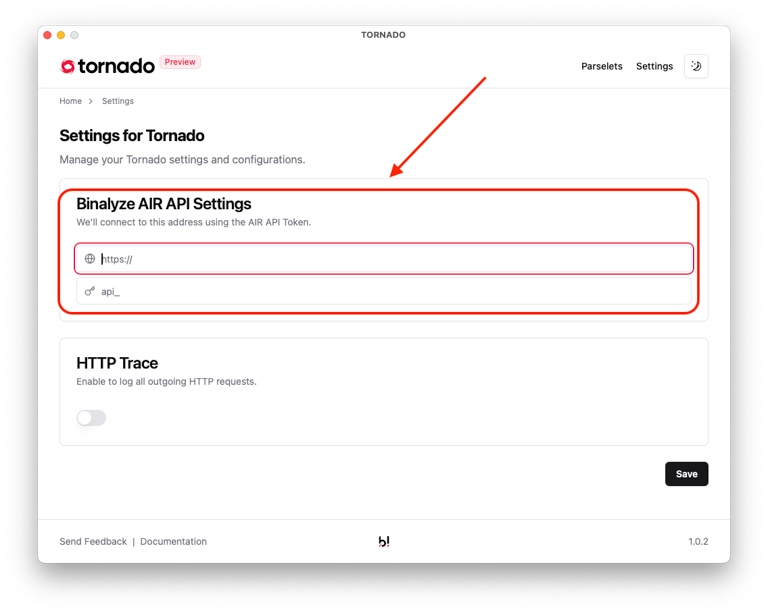
Getting Started with Tornado: Link with API
If you are an existing AIR customer using Binalyze Tornado, you can direct your collected data to the Investigation Hub by providing the AIR Console URL and an AIR API Token in the Settings window during setup.
API Tokens are generated in the AIR console at: Integrations > API Tokens - learn more about the AIR API here.

Getting Started with Tornado: Generate API Tokens in the AIR console
If you are a non- AIR customer, you can skip this section. In this case, the collected data will be available for download as an SQLite database, which you can analyze using your preferred tools or viewer.
HTTP Trace
Section titled “HTTP Trace”HTTP TRACE is a diagnostic HTTP method that echoes the full request received by the server back to the client. It is used to help identify issues such as header manipulation. For more details, visit the Tornado Troubleshooting and Feedback page.
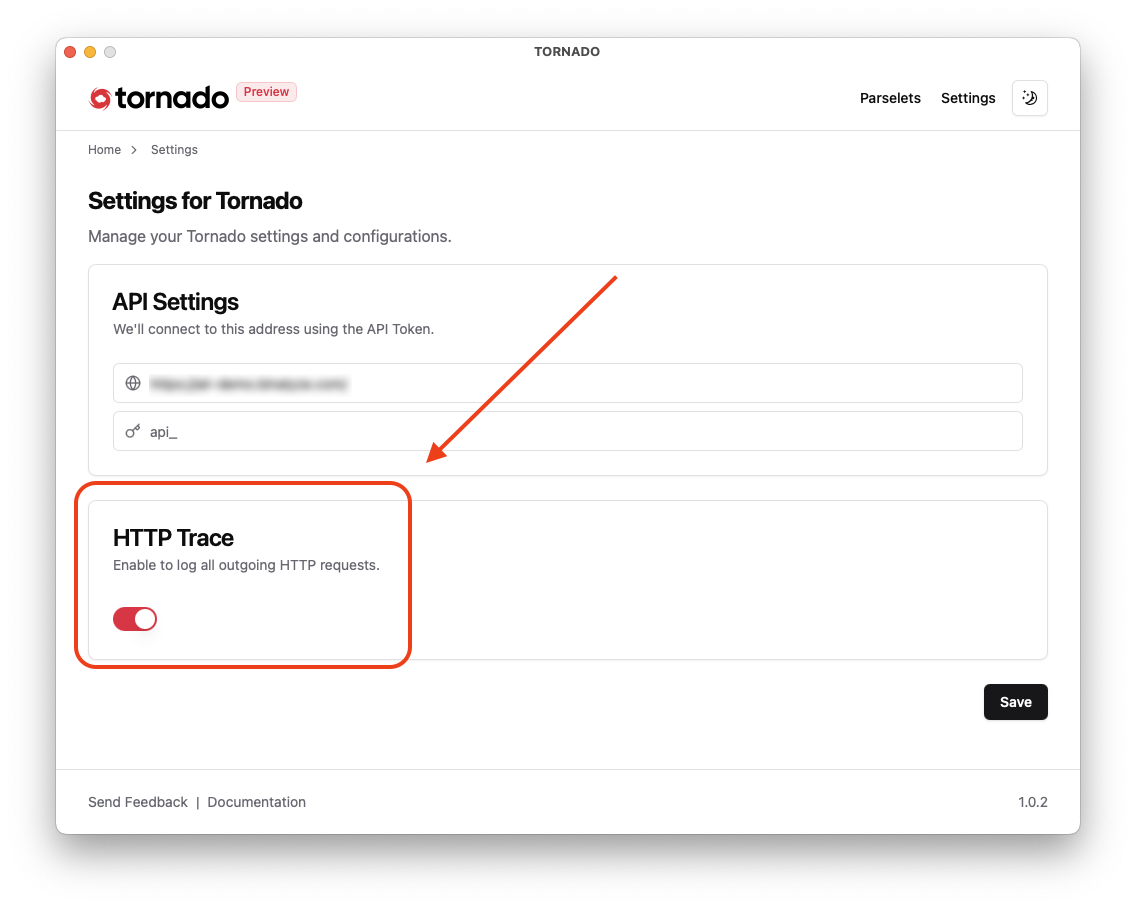
Getting Started with Tornado: HTTP Trace enabled
Parselets
Section titled “Parselets”Clicking on Parselets opens the Tornado Parselet window, where you can browse and select the specific parselet you wish to execute. Currently, Tornado supports Google Workspace and Microsoft 365:
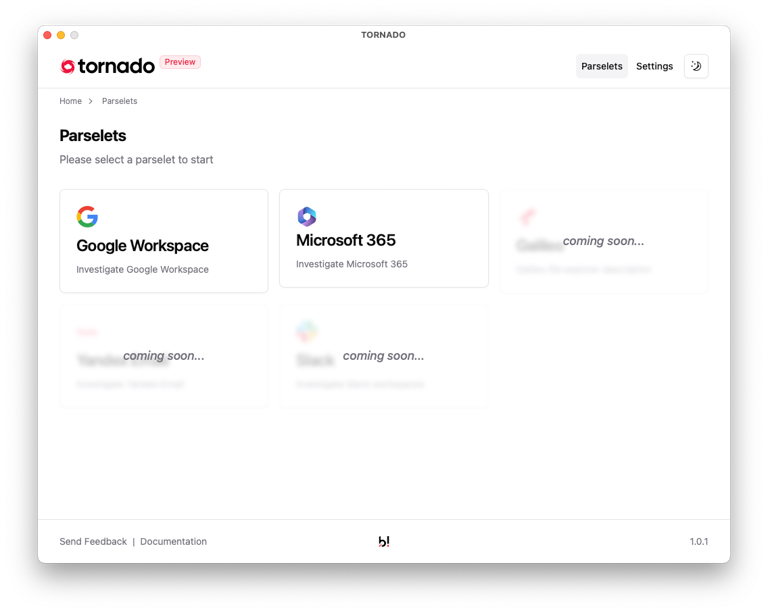
Getting Started with Tornado: Parselets
Google Workspace Configuration
Section titled “Google Workspace Configuration ”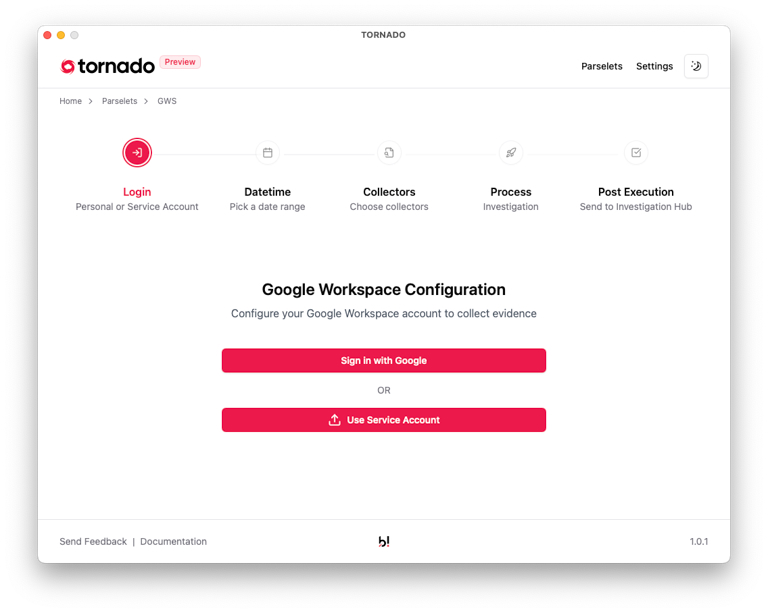
Getting Started with Tornado: Configuration
In the Google Workspace Configuration window, you can sign in using an individual user’s account or Service Account credentials, depending on your preferred authentication method. For more details about these two login methods, please visit our “Accessing Google Workspace” page.
When choosing to sign in with Google as a regular user, you will be directed to the Sign in with Google window, where you can authenticate using your standard Google account credentials.
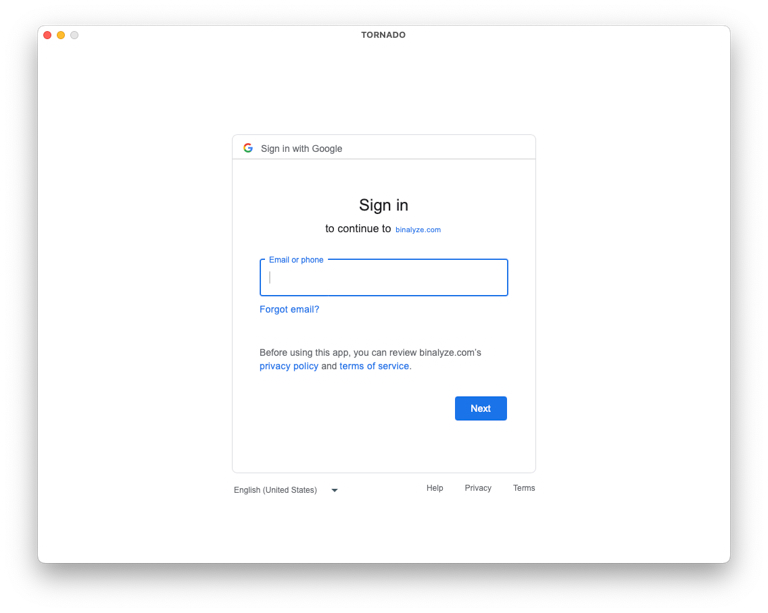
Getting Started with Tornado: Sign in with Google
Setting Up Your Collection
From this point, the Tornado wizard will guide you step by step through the process of configuring your collection:
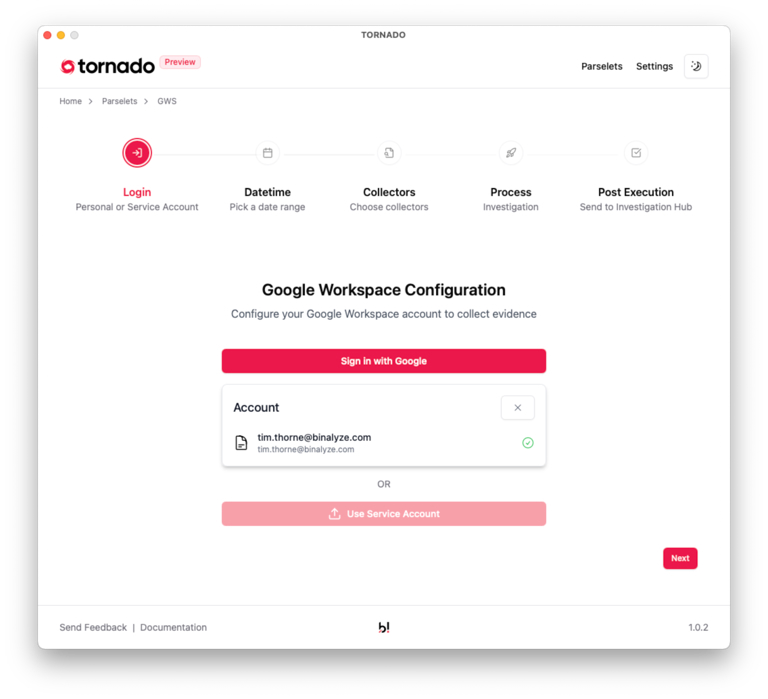
Getting Started with Tornado: Google Workspace Configuration
Date range picker
Section titled “Date range picker”There is a Date range picker to allow users to narrow the focus of their investigations:
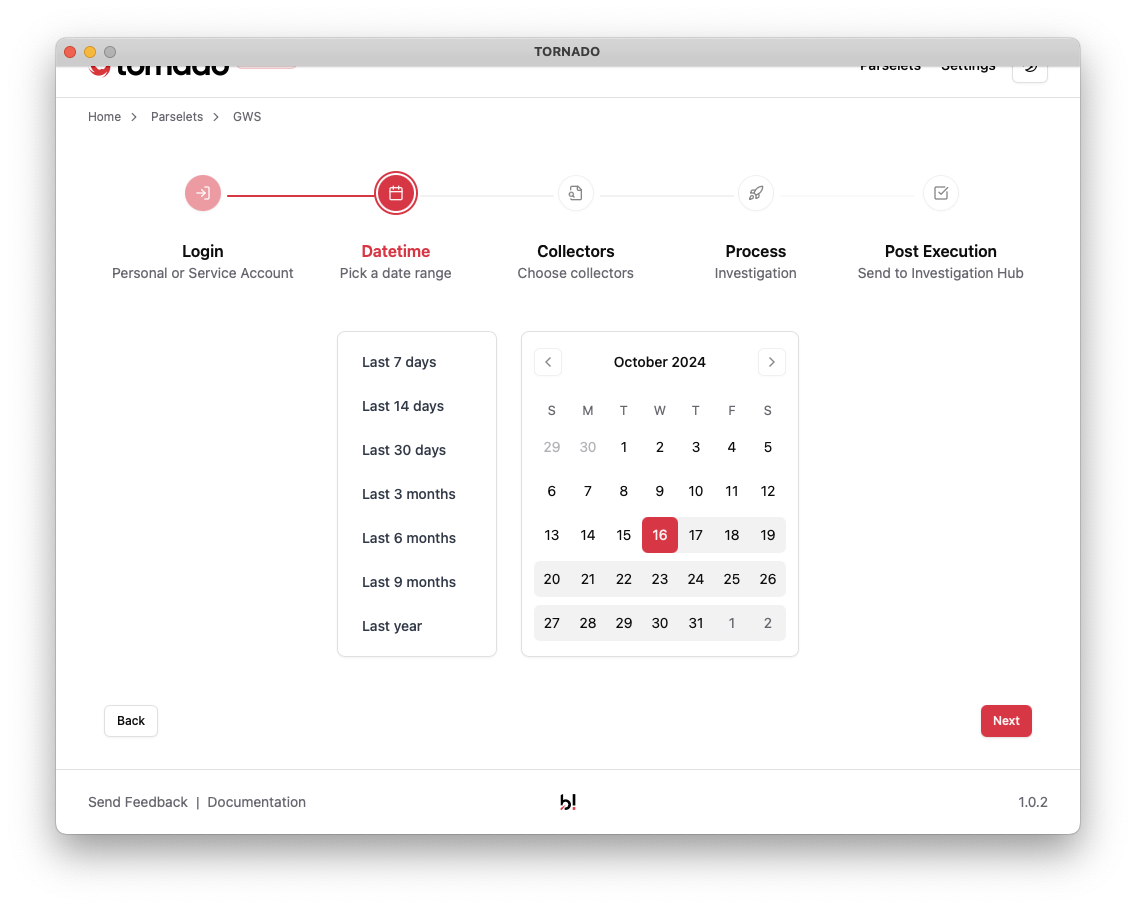
Getting Started with Tornado: Date rage selection in Tornado
Collectors
Section titled “Collectors”The collectors available to you in Tornado depend on the type of account used to log in. Using a Service Account provides access to a wider range of collectors. For detailed information, please refer to the Tornado Collectors page.
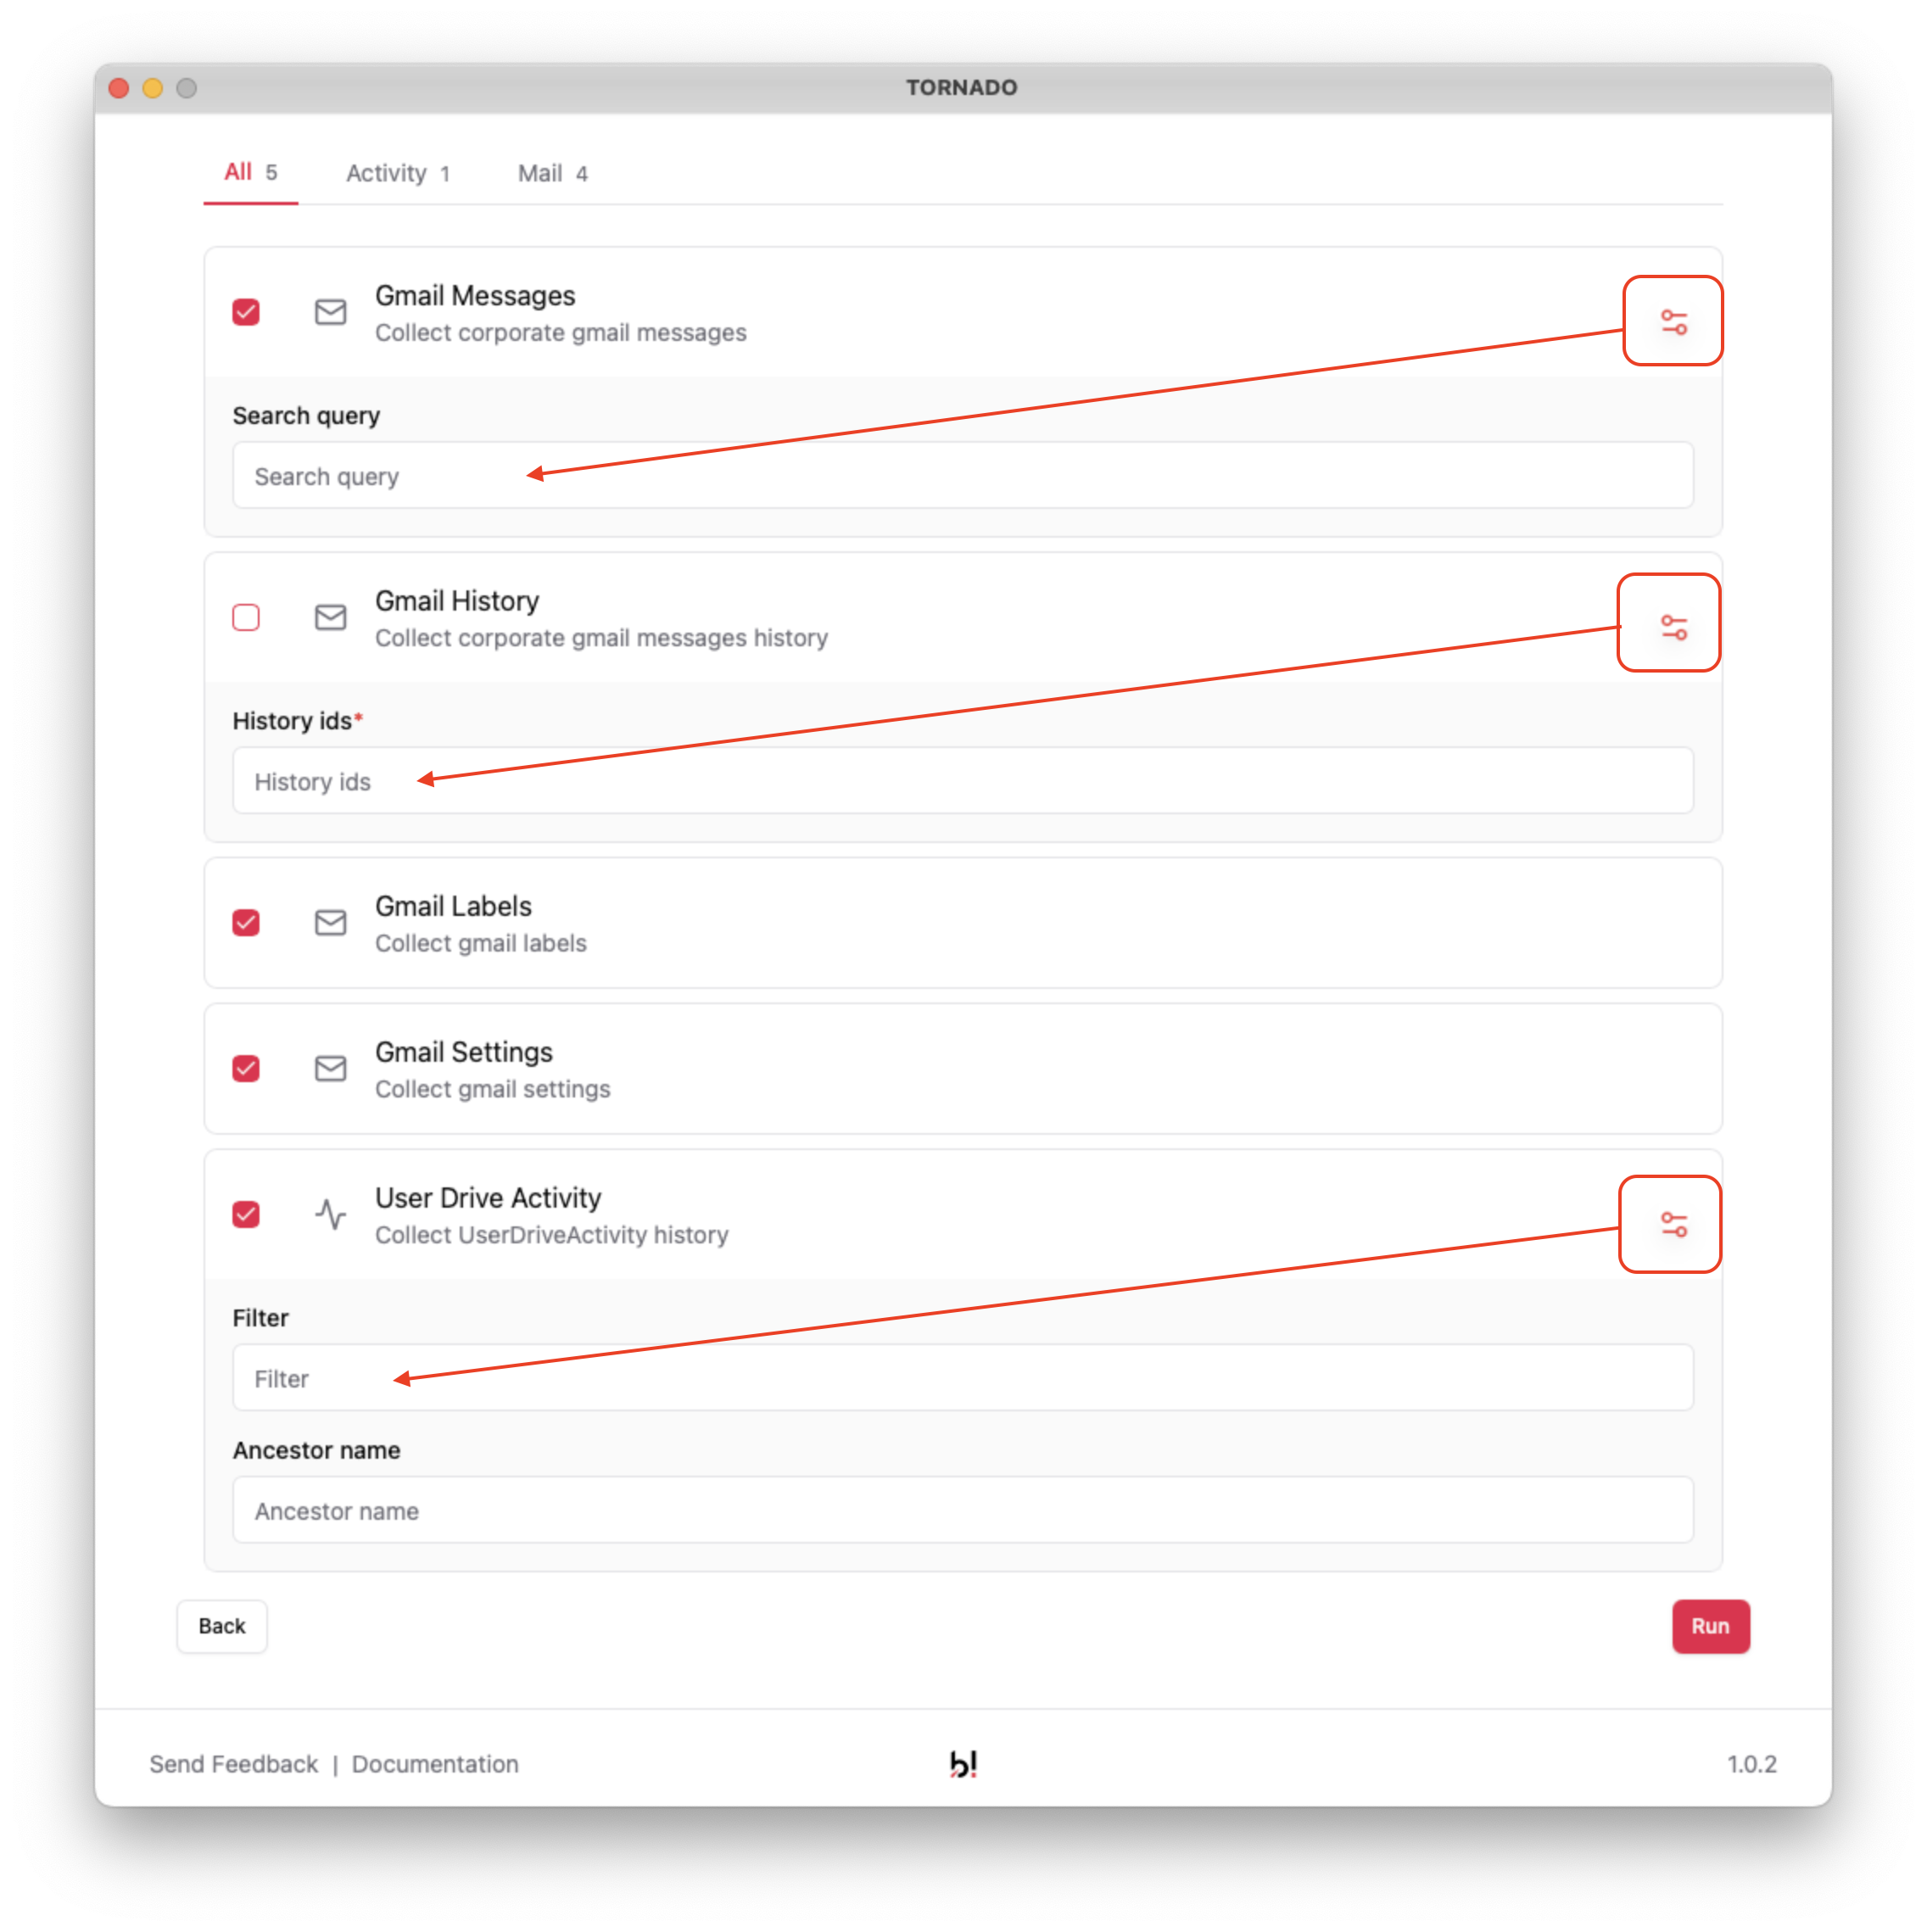
Getting Started with Tornado: Collectors
To help investigators narrow their focus, certain collectors come equipped with built-in filters. These filters, as shown above, allow for more precise data collection, enabling targeted investigations and reducing unnecessary data collection.
Process
Section titled “Process”Selecting ‘Run’ takes the user to the ‘Process’ stage in the Tornado wizard.
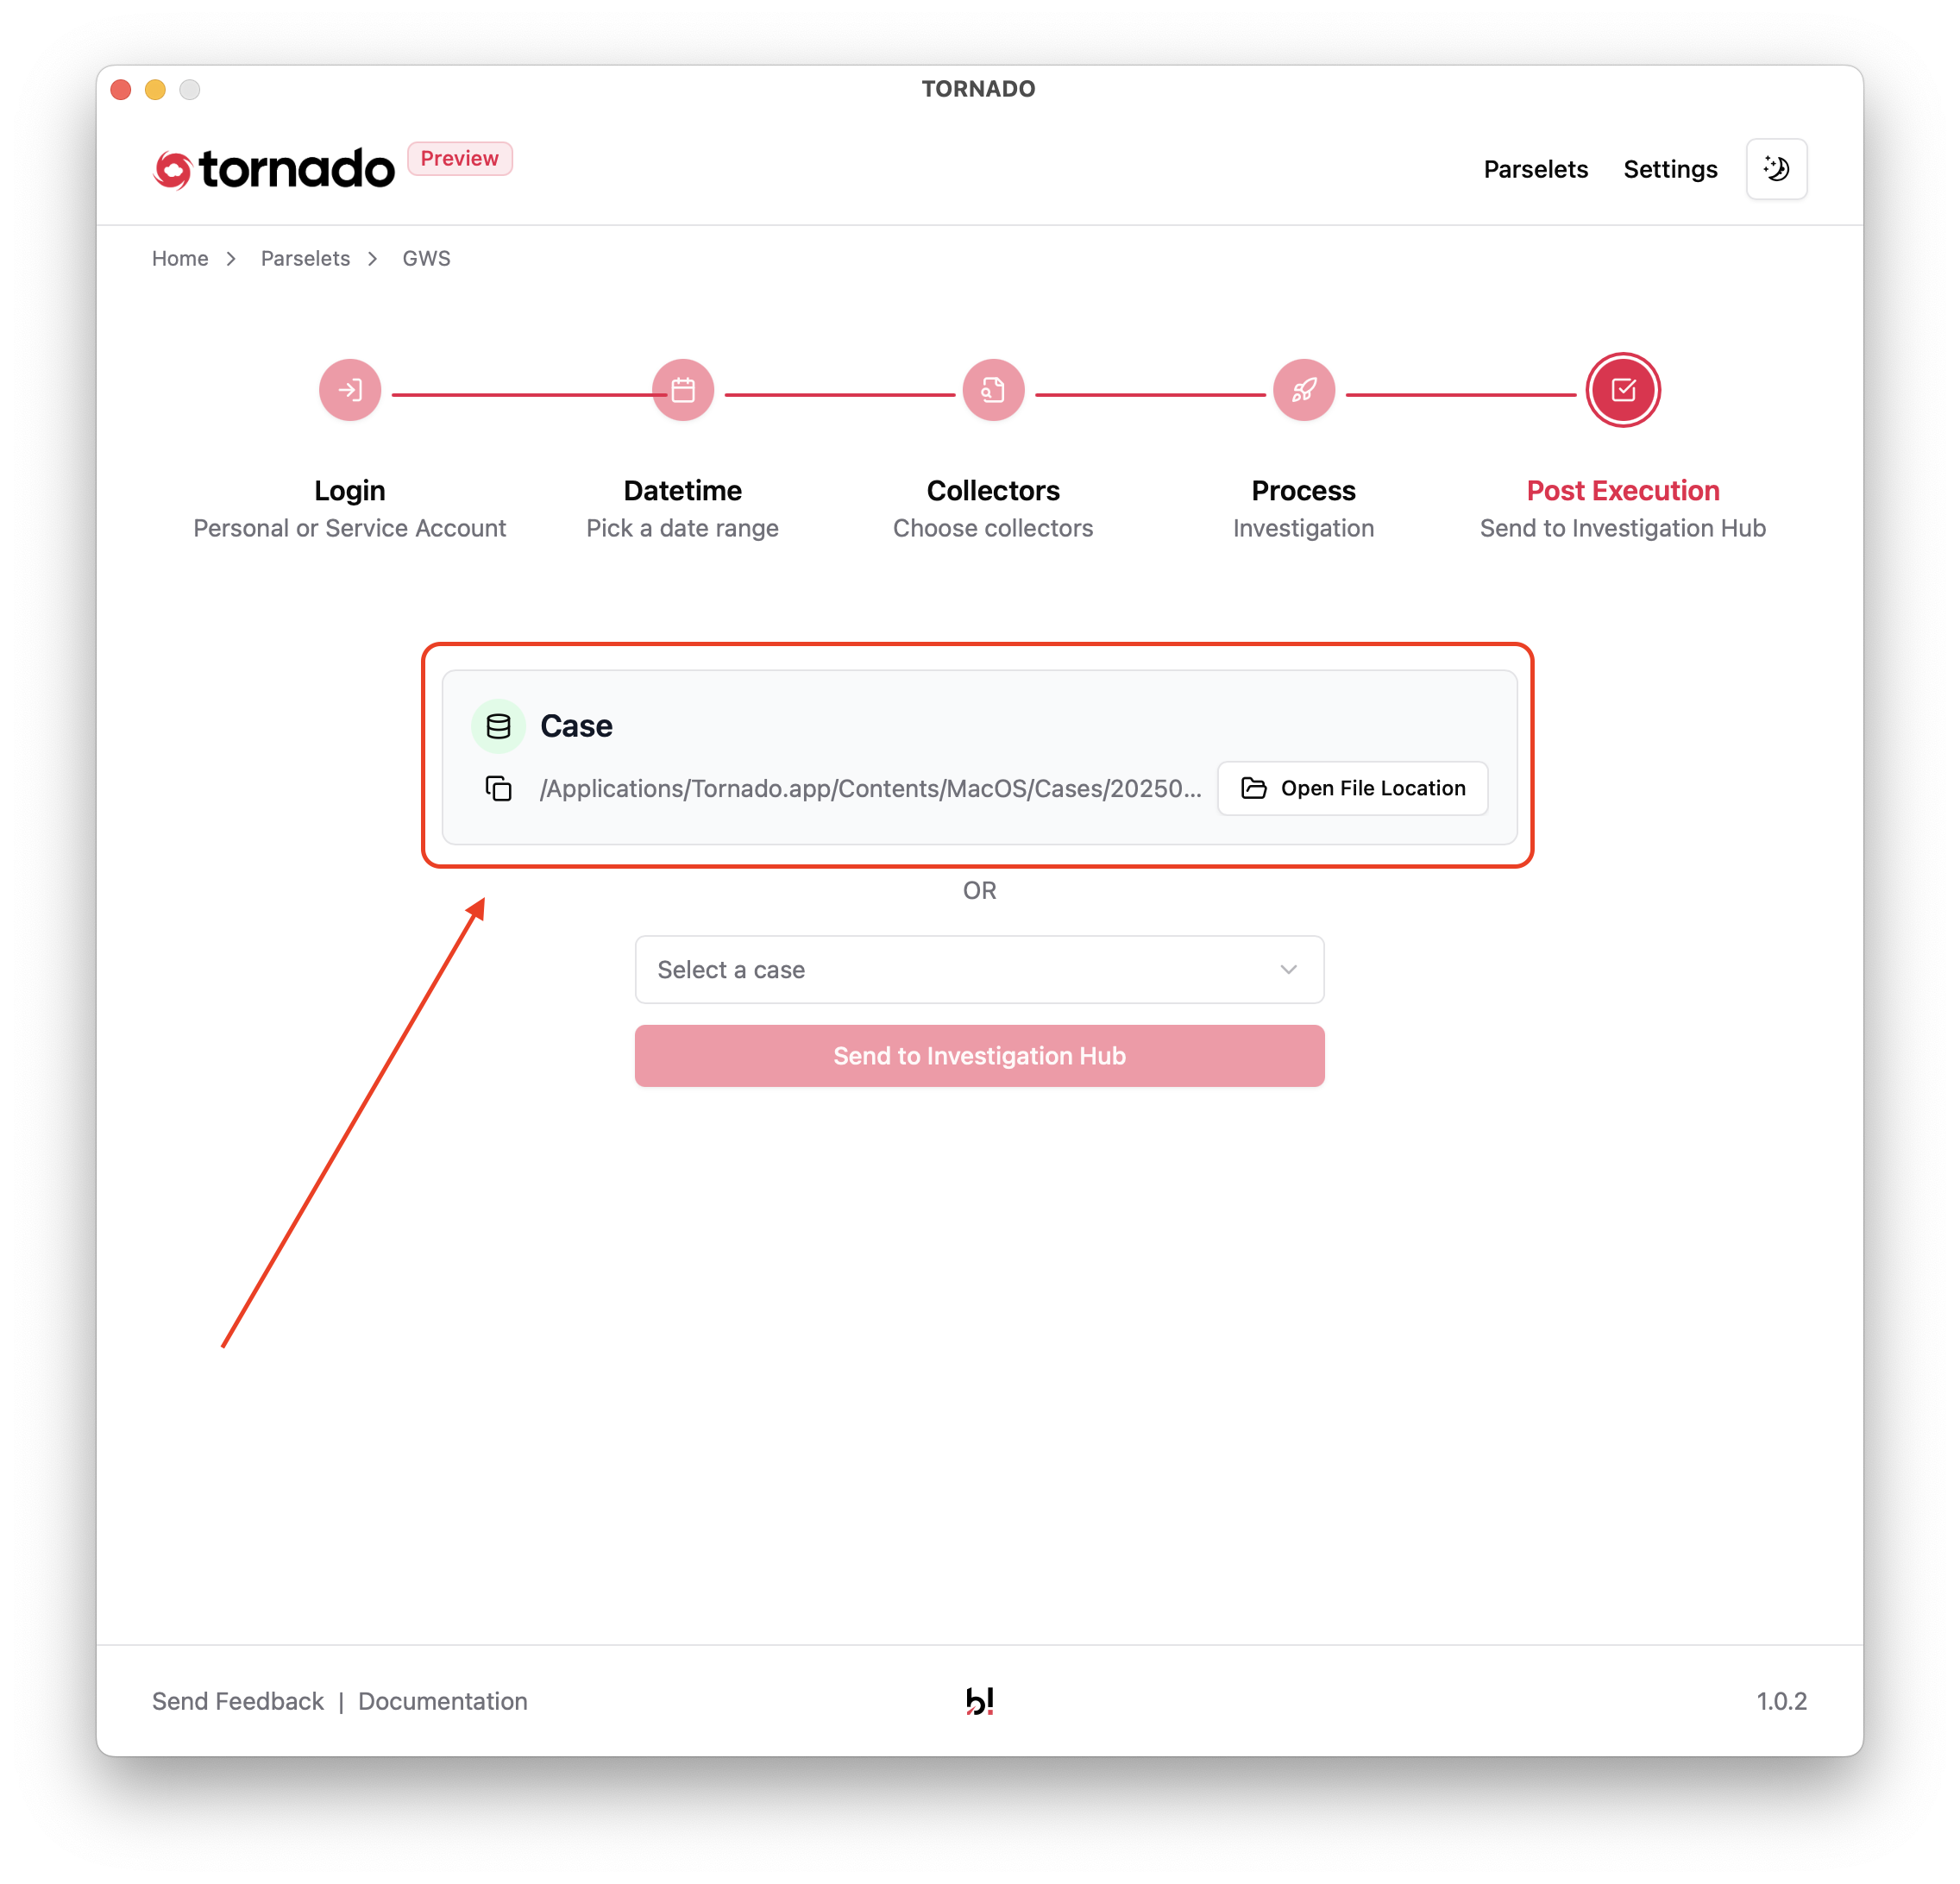
Post Execution
Section titled “Post Execution”If the collection is complete and the user does not have access to AIR with an API Token, a link to the file path of the collected data will still be displayed. This ensures that the collected data remains accessible for further analysis:
Getting Started with Tornado: Post Execution
In the specified location, the user will find the Case.ppc file, which is a ZIP archive. Once unzipped, it contains a SQLite database that can be opened and viewed using your preferred DB/SQLite browser:
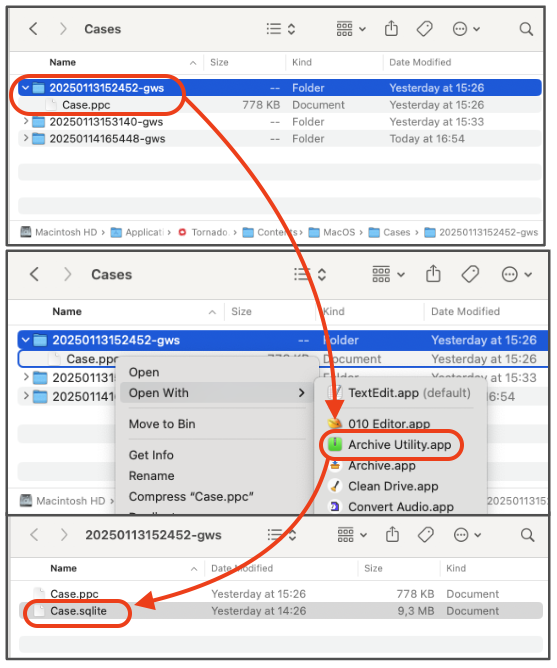
Getting Started with Tornado: Case.ppc
For users with access to AIR, you will need to select a Case (e.g., in the screenshot, the case is named TT-Demo-Script) and then click the ‘Send to Investigation Hub’ button. After a few moments, Tornado will provide a link to the Case in the Investigation Hub, where you can inspect the collected data:
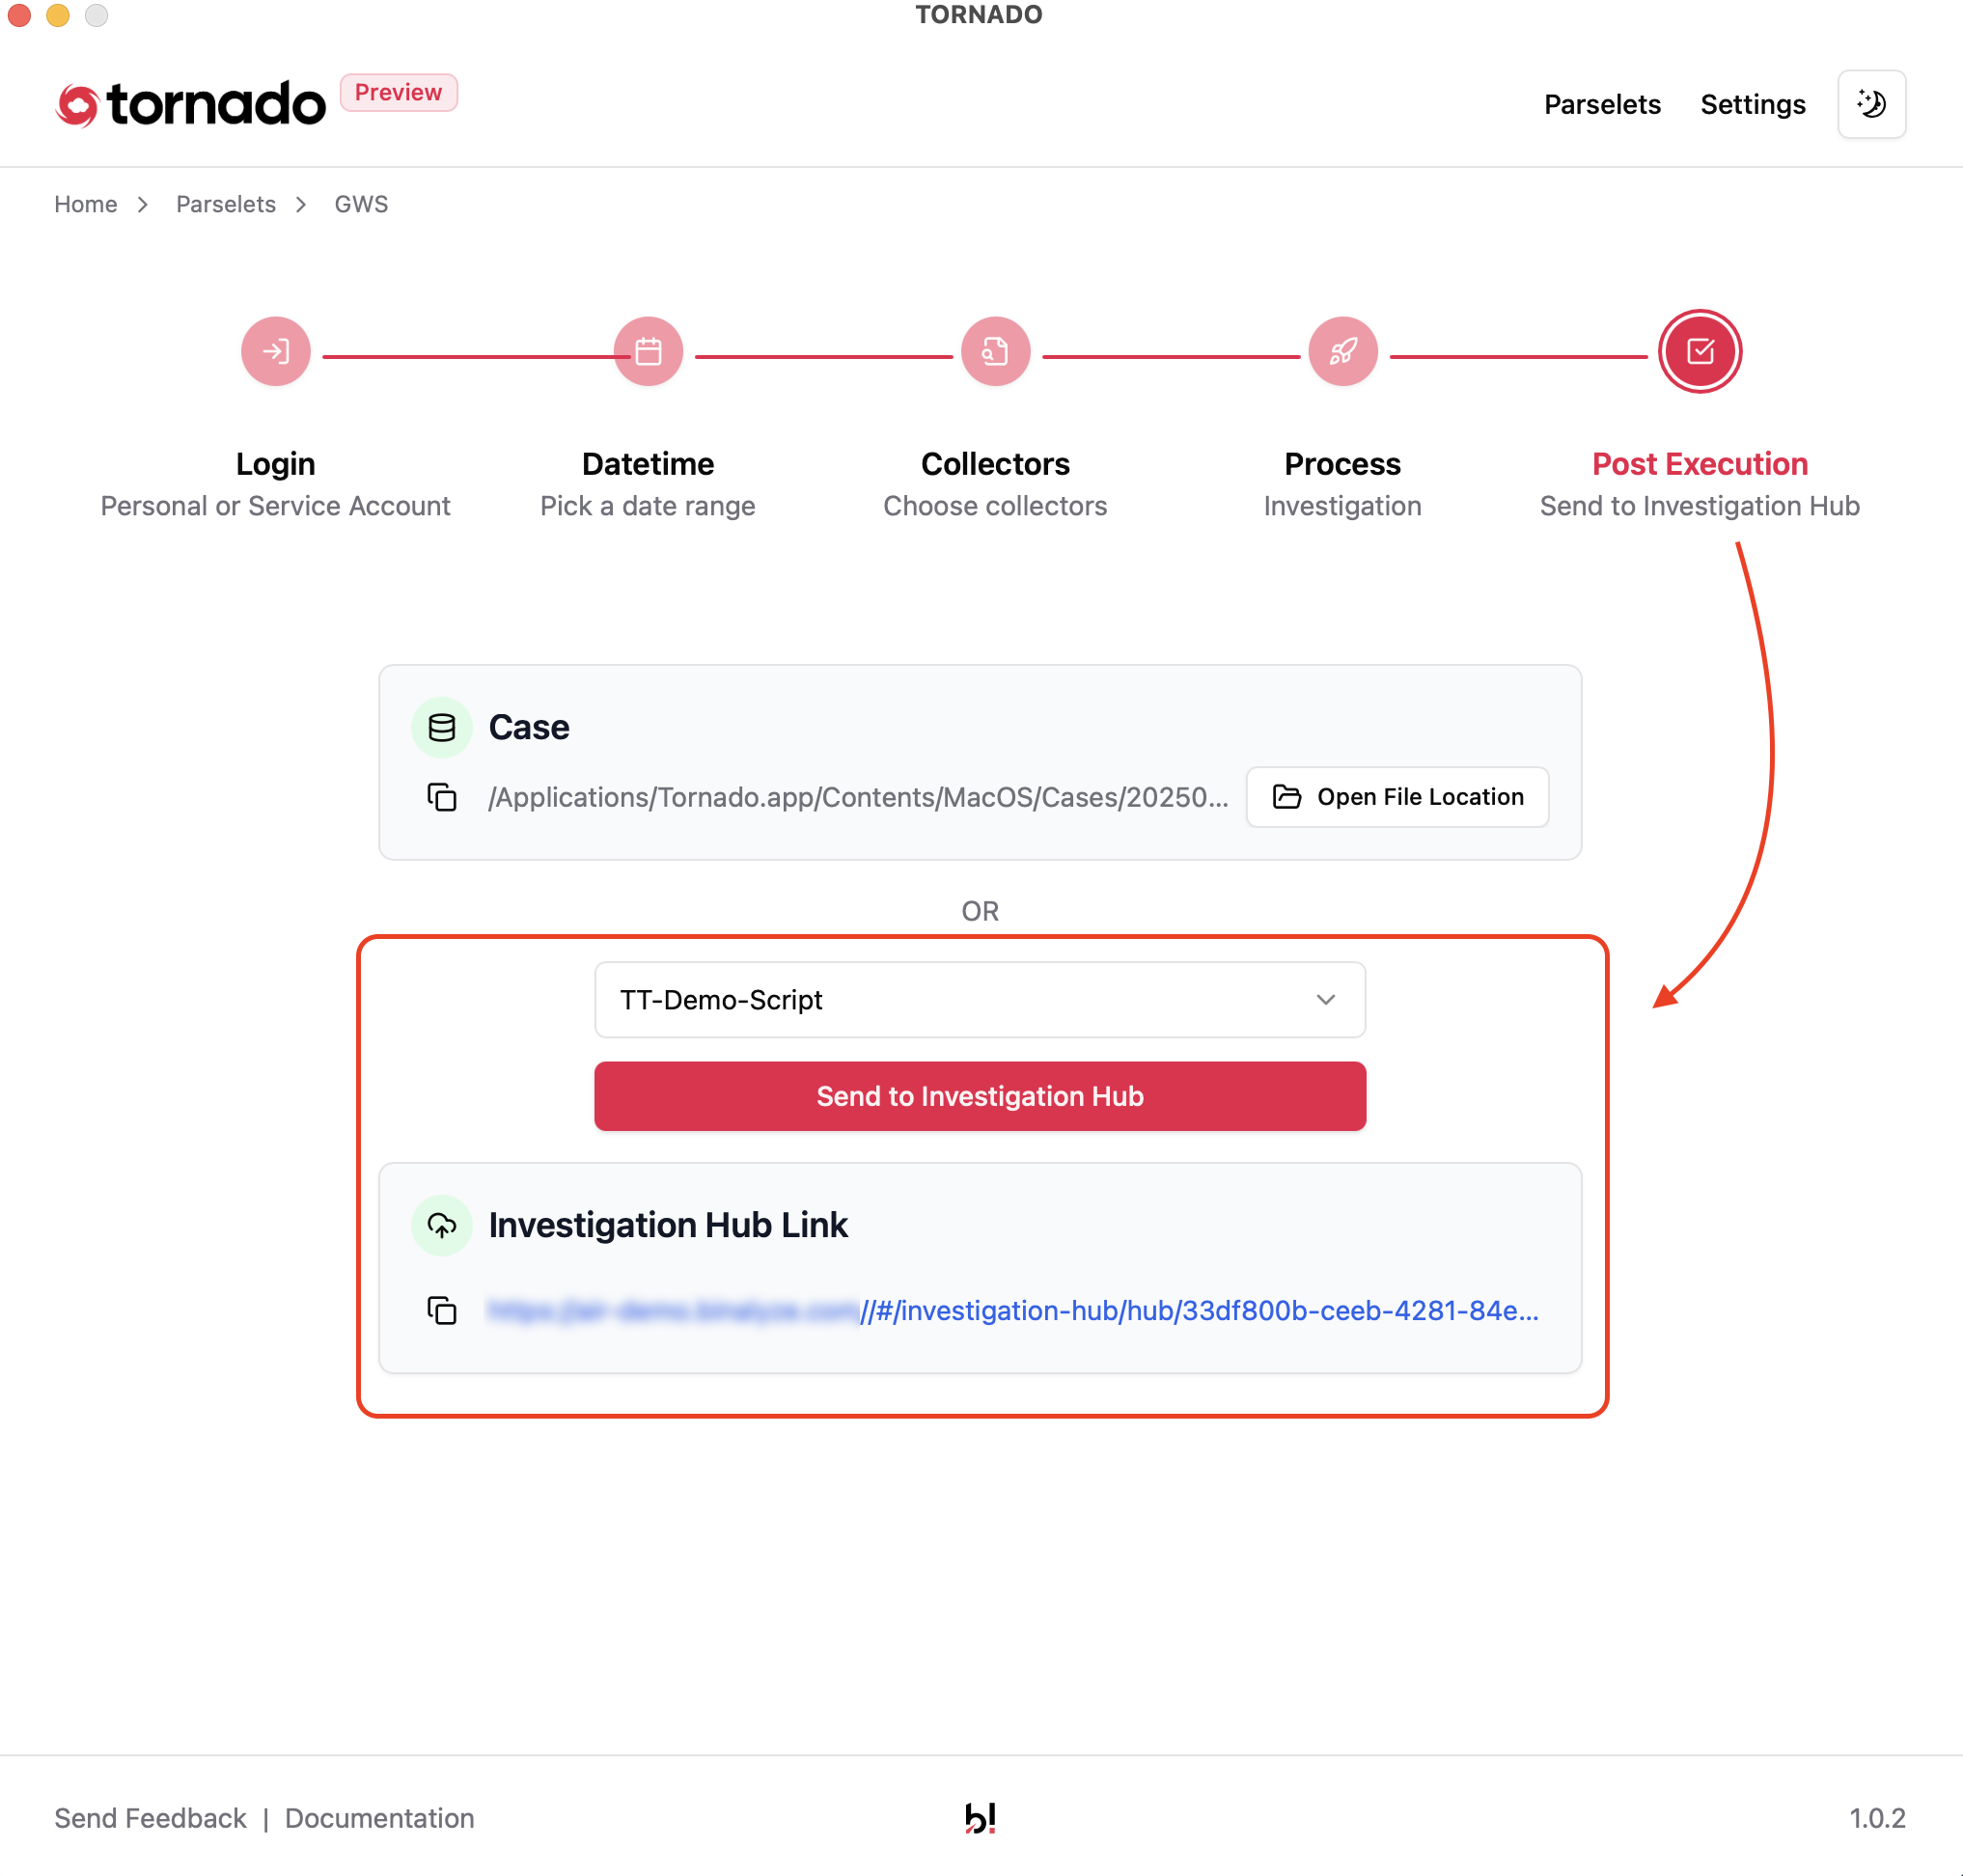
Getting Started with Tornado: Send to Investigation Hub
In the screenshot below of the Investigation Hub, you can see how GWS collections are organized by collector type in the secondary menu. The table and details windows are displayed in the standard Investigation Hub layout, providing a consistent and intuitive user experience.
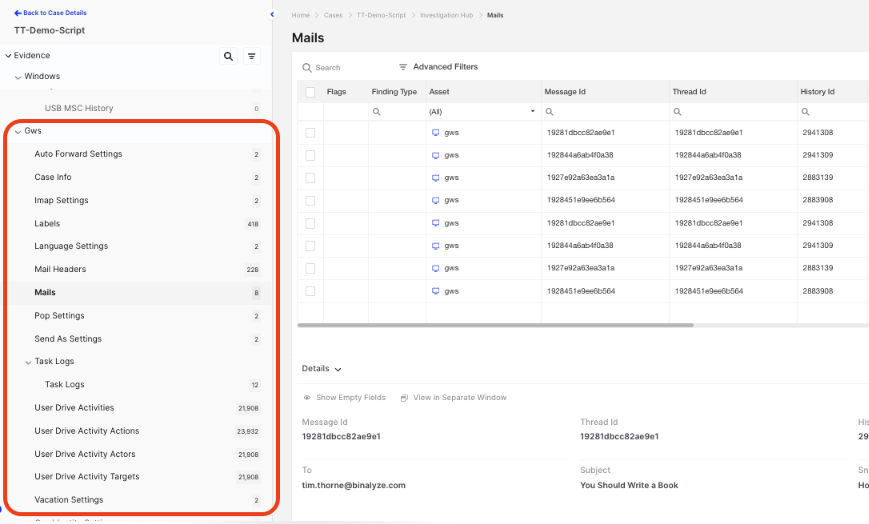
Getting Started with Tornado: Tornado data presented in the Investigation Hub
Troubleshooting
Section titled “Troubleshooting ”Common Installation Issues
Section titled “Common Installation Issues ”-
WebView2 Installation
- Automatic prompt if missing
- Follows standard Windows installation
- Restarts automatically after installation
- No manual intervention required
-
macOS Security Blocks
- Error: “App cannot be opened”
- Solution: Allow in Security & Privacy
- Check Gatekeeper settings
-
Linux Permission Issues
# If permission denied chmod +x ./tornado # If binary not found export PATH=$PATH:/path/to/tornado
Next Steps
Section titled “Next Steps ”1. First Launch
Section titled “1. First Launch ”- Start the Tornado application
- Complete initial setup
- Familiarize with interface
2. Authentication Setup
Section titled “2. Authentication Setup ”- Prepare cloud service credentials
- Configure authentication methods
- Test connectivity
3. Begin Collection
Section titled “3. Begin Collection ”- Select data sources
- Configure collectors
- Start your first collection
Remember: Tornado is distributed as a portable application that requires minimal setup. On Windows, any required components, such as WebView2 Runtime, are automatically installed during the first launch.