Scheduling Tasks
Scheduling tasks in AIR not only enables the automation of acquisitions and DRONE analysis, but it transforms AIR into a proactive DFIR platform. By setting up scheduled tasks for regular collections and automated DRONE analysis, AIR can proactively identify issues that might well go unnoticed by other security systems.
Instead of waiting for alerts from external sources, AIR takes the initiative to regularly collect and analyze assets according to a predefined schedule and acquisition profile. This proactive approach allows organizations to stay ahead of potential threats and vulnerabilities by detecting issues early on, even before they manifest as security incidents.
By integrating task scheduling into security operations, organizations can enhance their defense strategies and strengthen their overall security posture. Additionally, it ensures that the ‘best evidence’ is automatically acquired and forensically preserved, facilitating further investigation when needed.
Investigators simply use the tasking wizard to schedule tasks for the following activities:
- Evidence collections.
- Hunt/Triage/Threat Hunting.
- Disk and Volume Imaging.
- Auto Asset Tagging.
To set up a scheduled task, please follow the steps below:
Step 1 - Assets
Section titled “Step 1 - Assets”- Choose the Asset(s) on which you wish to schedule tasks - the Bulk Action Bar will be available if you choose more than one asset.
- Create a Task Name if required.
- Allocate the task to a case.
- Select ‘Schedule for later’
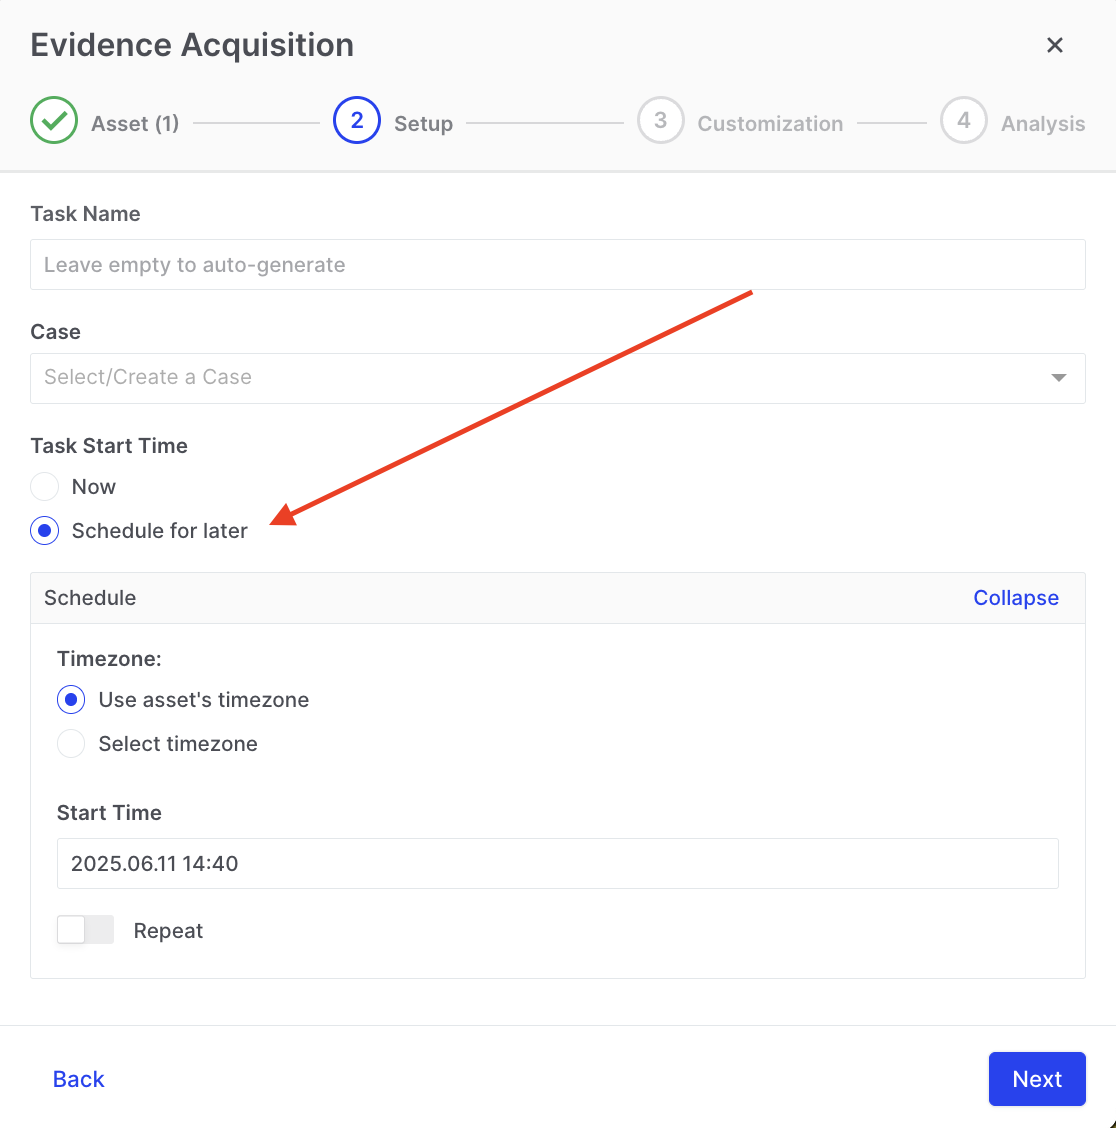
Scheduling Tasks: Schedule for later
Step 2 - Setup
Section titled “Step 2 - Setup”- Select the time zone that determines when the task is executed. You have the flexibility to execute the task in the local time zone of each selected asset or simultaneously across all assets by choosing a single time zone.
- Select a start date and time for the task.
- If required, toggle the Repeat switch on and set the cadence or recurrence rate.
- Select when or whether you want to end the schedule.
- Lastly, choose the acquisition profile you wish to apply to the scheduled task.
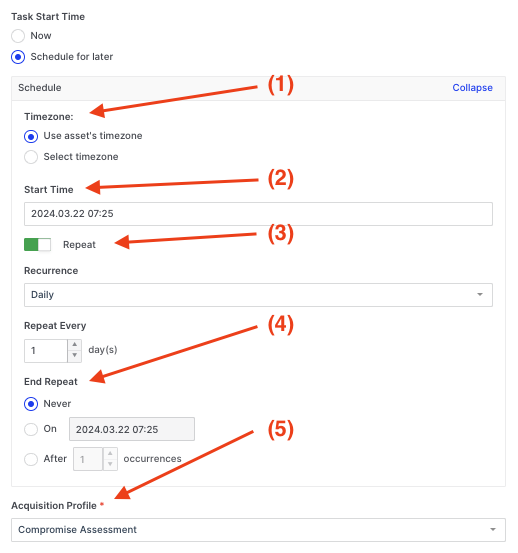
Scheduling Tasks: Setting up the scheduled task
User Privileges for Task Scheduling:
Section titled “User Privileges for Task Scheduling:”- AIR administrators can now restrict users from scheduling tasks or editing existing ones:
- Schedule Task: Enables users to “Schedule for later.” Without this privilege, this option is disabled, and a tooltip explains the restriction.
- Update Scheduled Task: Allows users to edit scheduled tasks. If this privilege is not granted, the “Edit” button is disabled, accompanied by an explanatory tooltip.
Step 3 - Customization
Section titled “Step 3 - Customization”- This step allows you to use the policies already set as an organizational policy or, if you have the necessary privileges, make changes to:
- Where the collected evidence is to be saved.
- Apply a Resource limit to the task assignment to reduce potential impacts on the asset.
- Enable compression and encryption to be applied to the collected evidence.
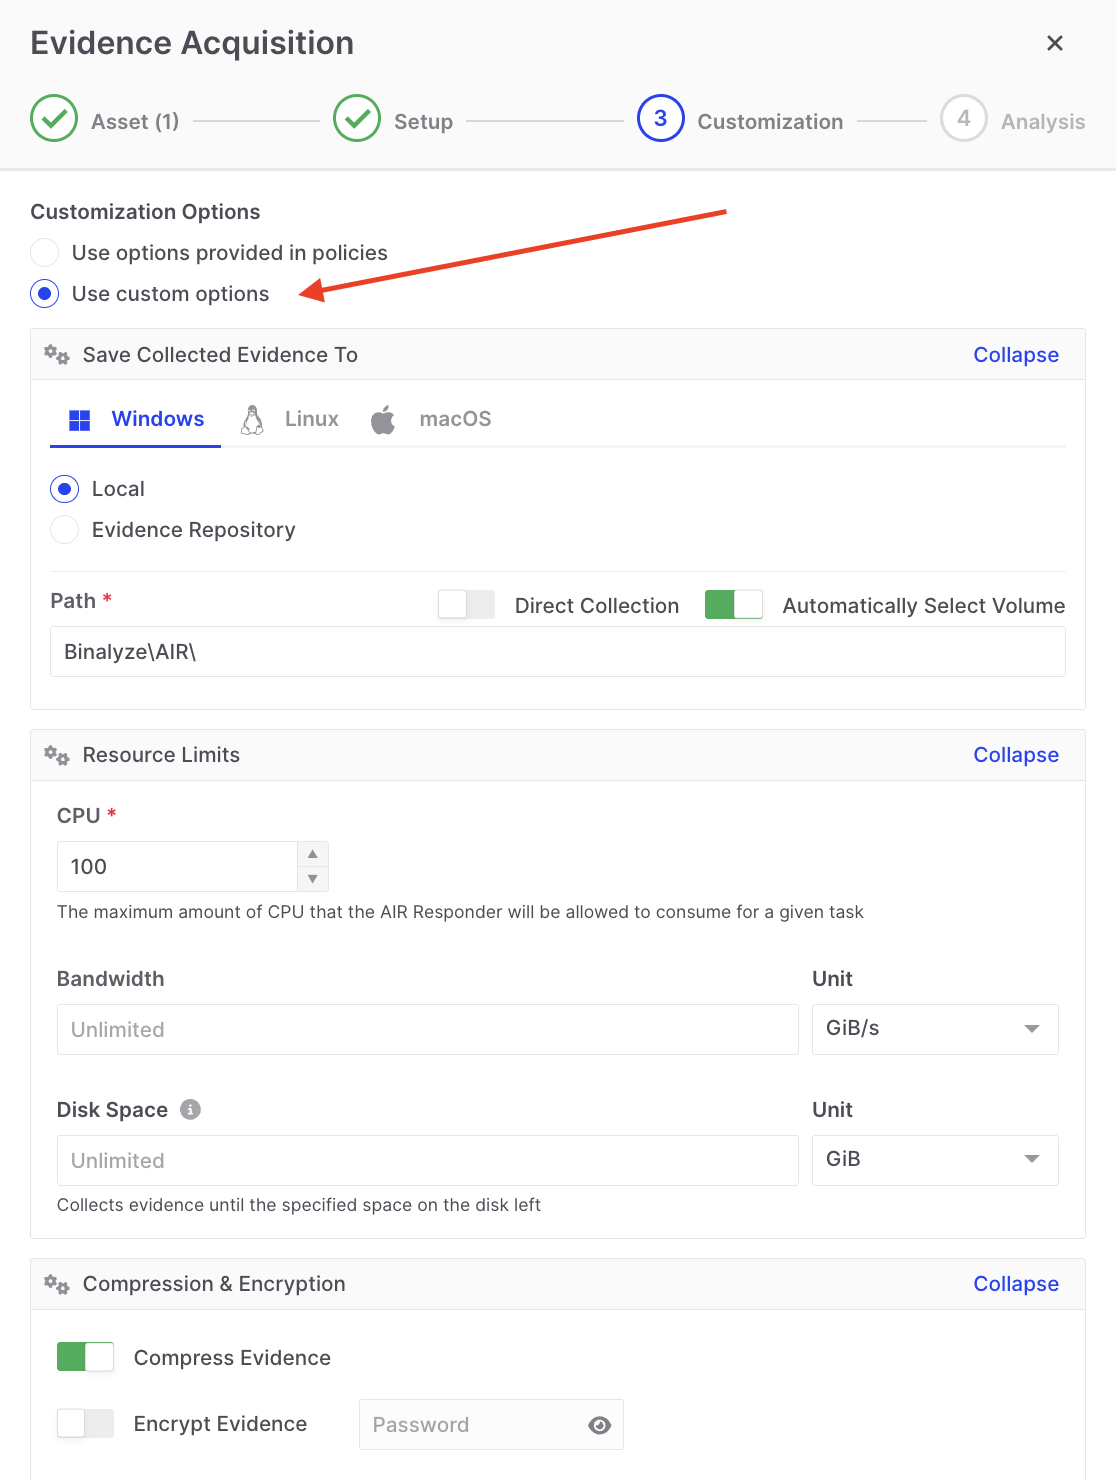
Scheduling Tasks: Customization of options
Step 4 - Analysis
Section titled “Step 4 - Analysis”In this final step, you can enable or disable the DRONE and MITRE ATT&CK Analyzers.
We highly recommend keeping both analyzers active as they have minimal impact on resources. The MITRE ATT&CK analyzer runs on live assets and, when combined with other analyzers, facilitates immediate identification of potentially compromised assets. This allows for efficient prioritization of investigative efforts.
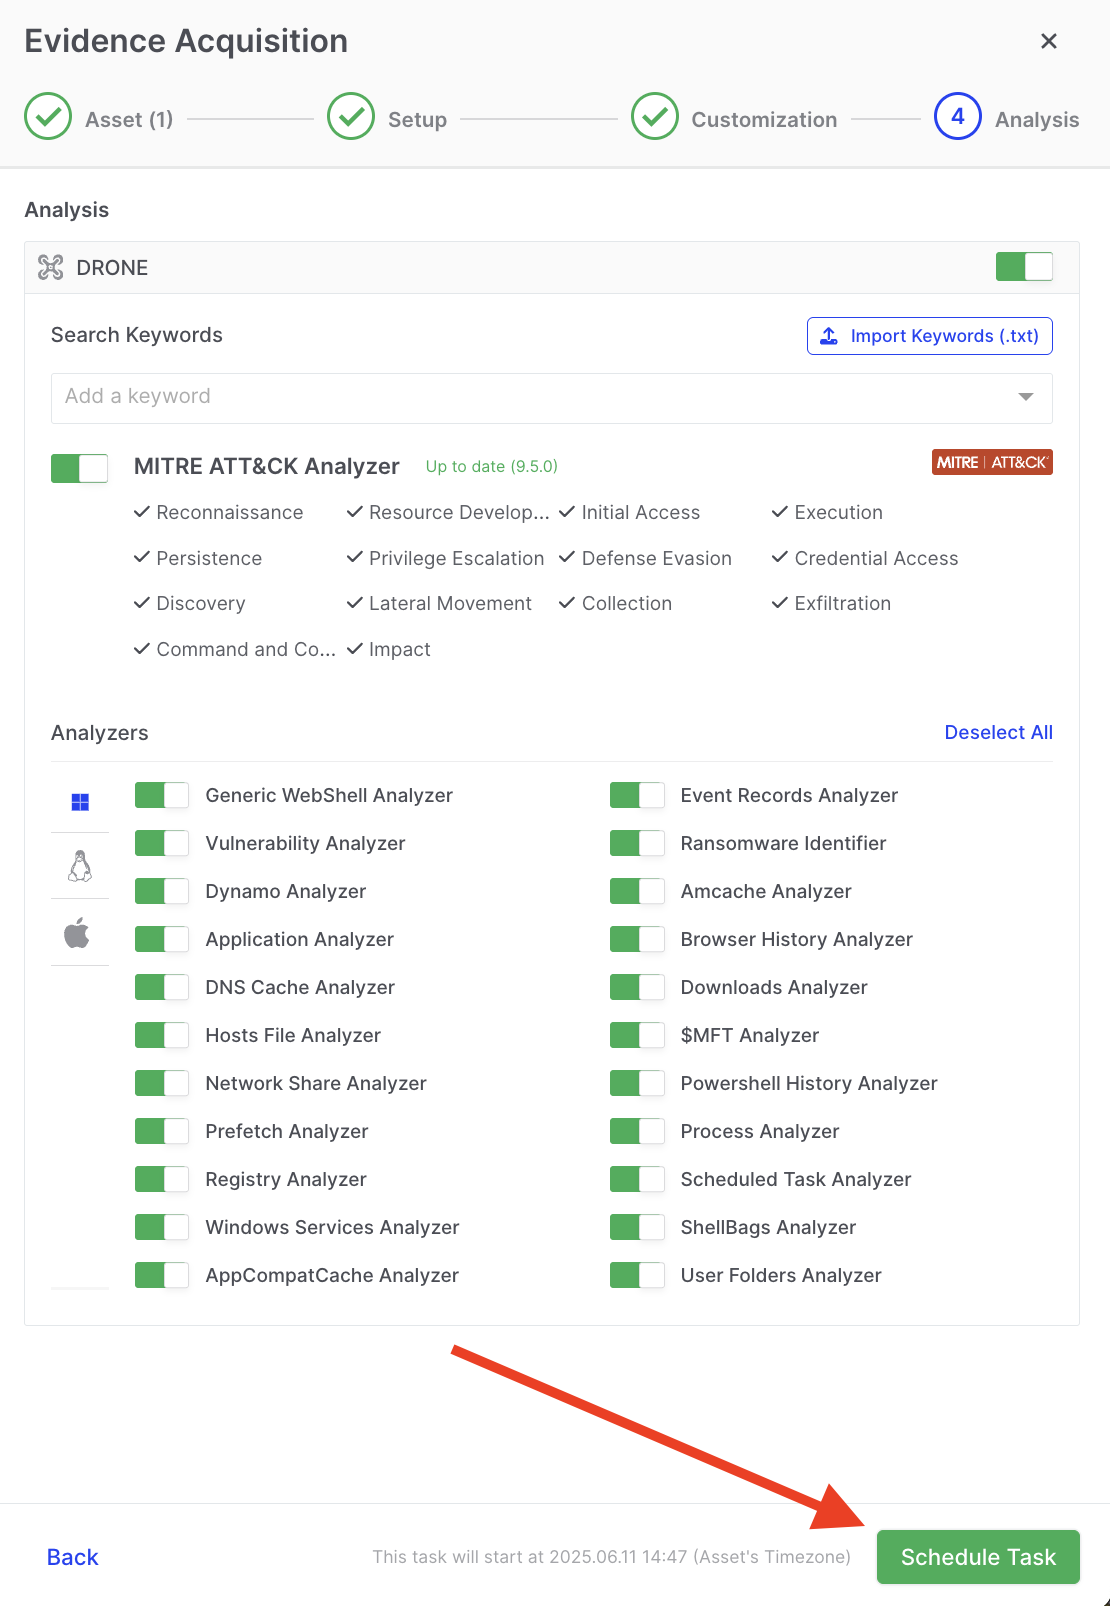
Scheduling Tasks: Toggle options for DRONE
The results of all tasks, along with their associated reports, are accessible via the Investigation Hub.
Section titled “The results of all tasks, along with their associated reports, are accessible via the Investigation Hub.”Links to these reports within the Investigation Hub can be found in the following three locations:
- Tasks, via the main menu.
- The page for the individual Asset > Acquisitions.
- And finally, Case Acquisitions, if the task is sent to a Case.
How to edit existing Scheduled Tasks
Section titled “How to edit existing Scheduled Tasks”Managing scheduled tasks has never been easier. The Edit Scheduled Task feature allows you to modify existing scheduled tasks, eliminating the need to cancel and reconfigure them.
You can easily add or remove assets without needing to restart the task, saving valuable time and enhancing workflow efficiency. After selecting the assets, you can then update the task setup, customize options, and manage follow-up actions, streamlining the task management process for a smoother and faster workflow.
To modify a scheduled task, go to your Task listings page and filter by Status > Scheduled to display only the scheduled tasks:
From the filtered results, selecting the ‘eye’ icon presents you with the Task Details and the ellipse with Edit or Delete Task options:
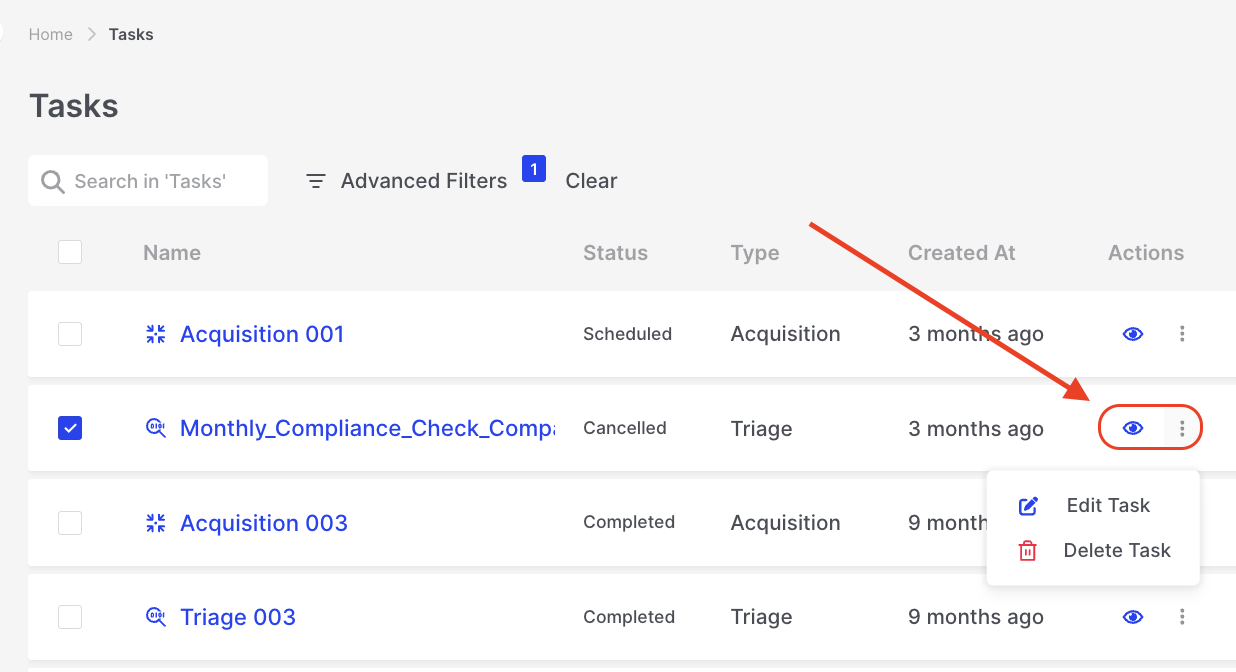
Scheduling Tasks: Edit or Delete Task options
The Edit Scheduled Task Wizard will now open, allowing the user to toggle off the “Only Selected Assets” switch (as shown below). This now reveals all other available assets that can be added to the scheduled task:
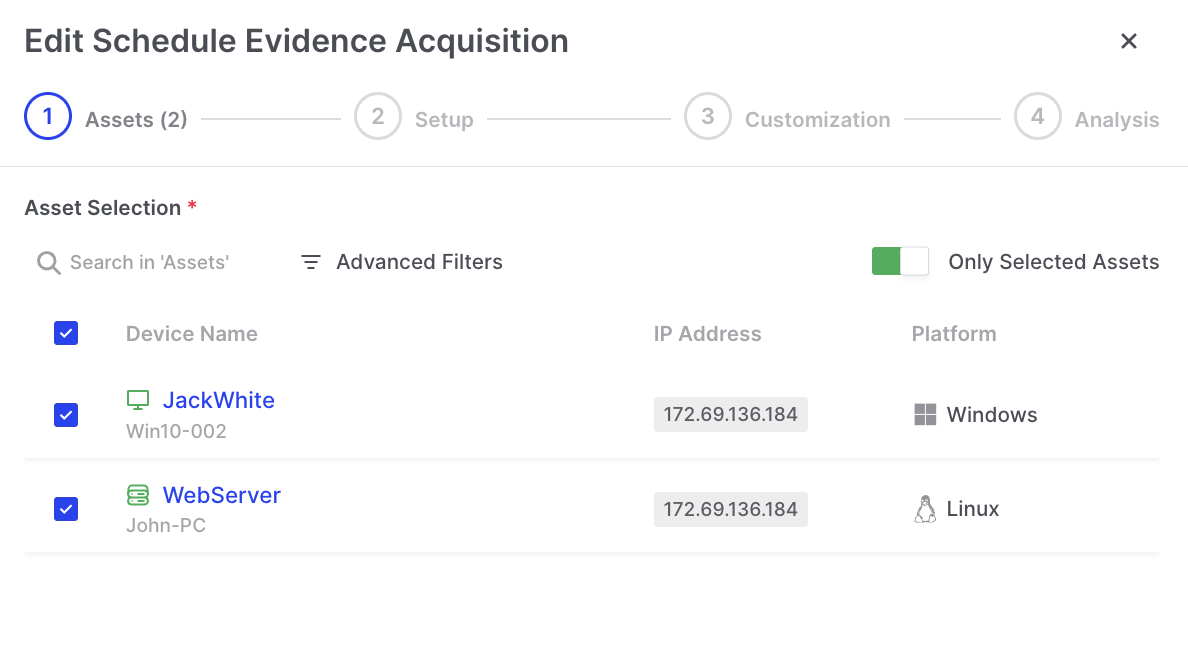
Scheduling Tasks: Select the assets requiring an edit to scheduled task
Step 2, the Setup, allows you to edit the Task Name, the Schedule, and even the acquisition profile to be used:
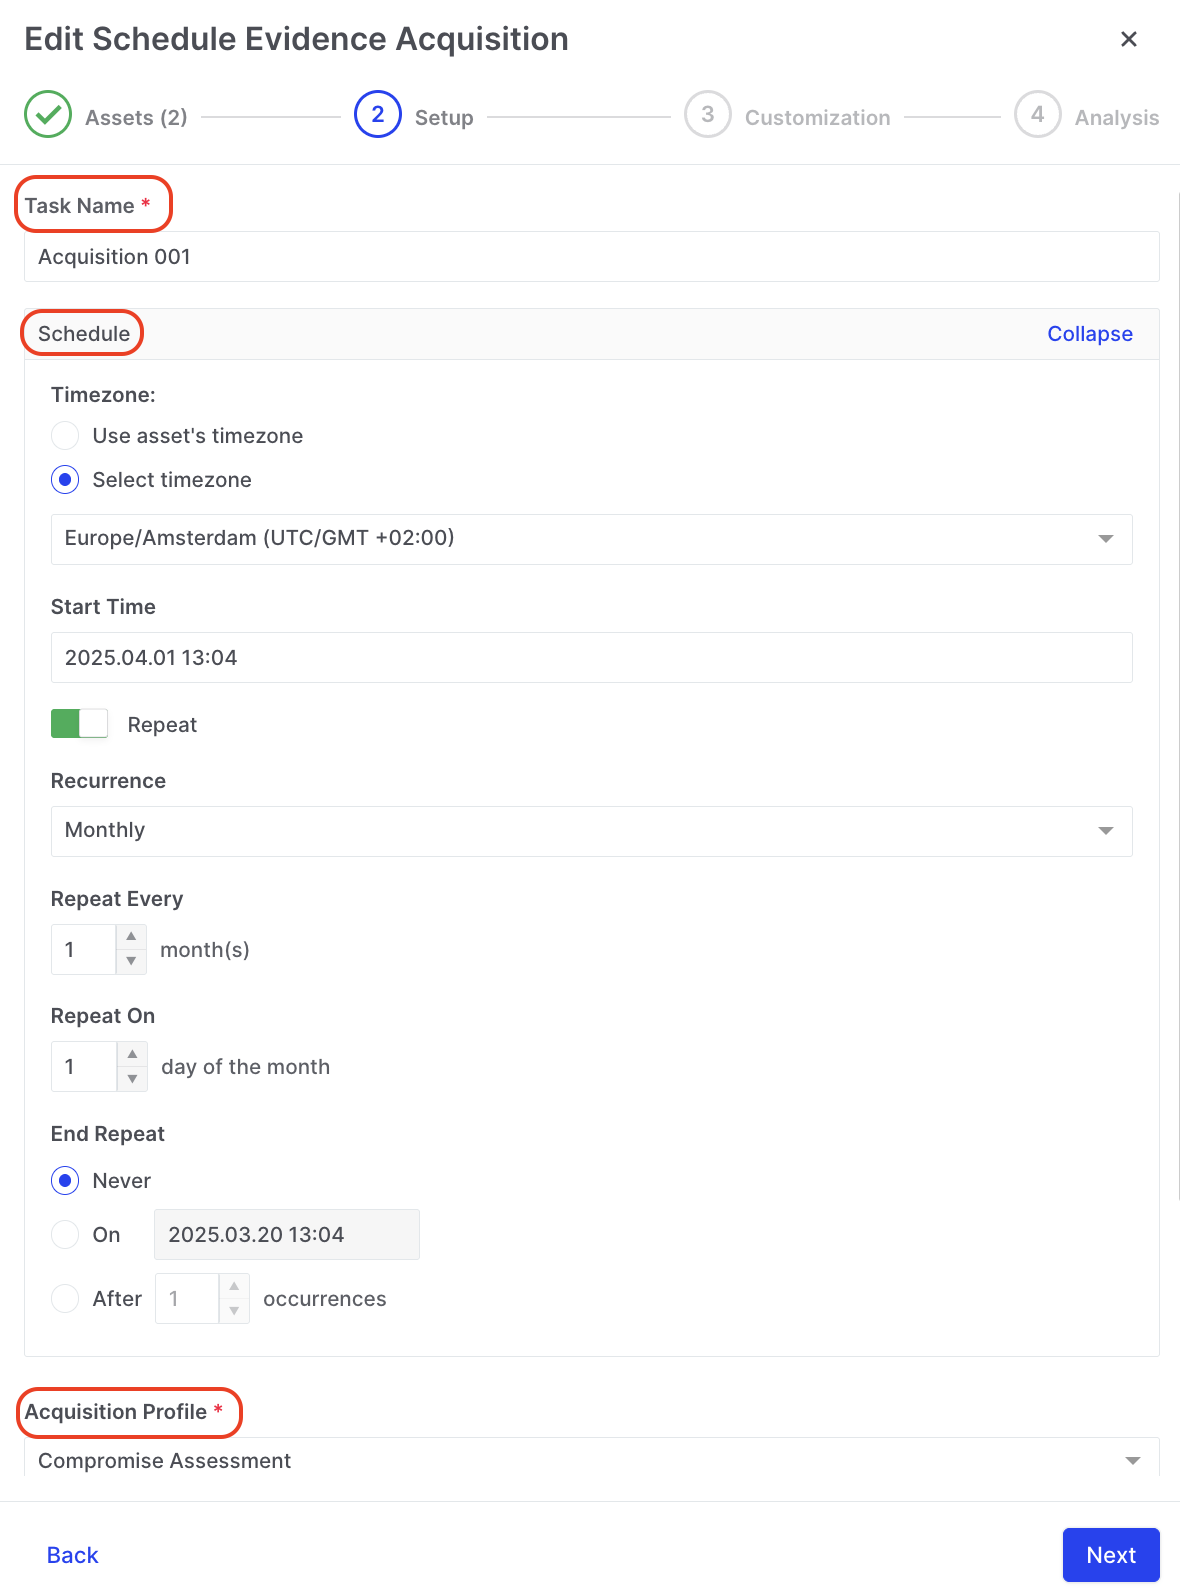
Scheduling Tasks: Edits
Steps 3 and 4, Customization and Analysis, are fully configurable, allowing you to edit the scheduled task as needed.