Disk and Volume Imaging
The acquisition of physical disk images and volume images can be done via an Acquire Image Task in the UI or by using commands in an interACT session.
In addition to NTFS and FAT, AIR also supports the logical imaging of ext4 and ext3 volumes, as well as physical disk imaging, which is possible from all operating systems supported by the AIR Responder.
In the AIR UI, select Assets from the Main Menu, then navigate to Devices and select the asset you wish to image. In the Asset Info window, click the Asset Actions button to reveal a drop-down menu listing the actions available for that asset. Acquire Image is one such option:
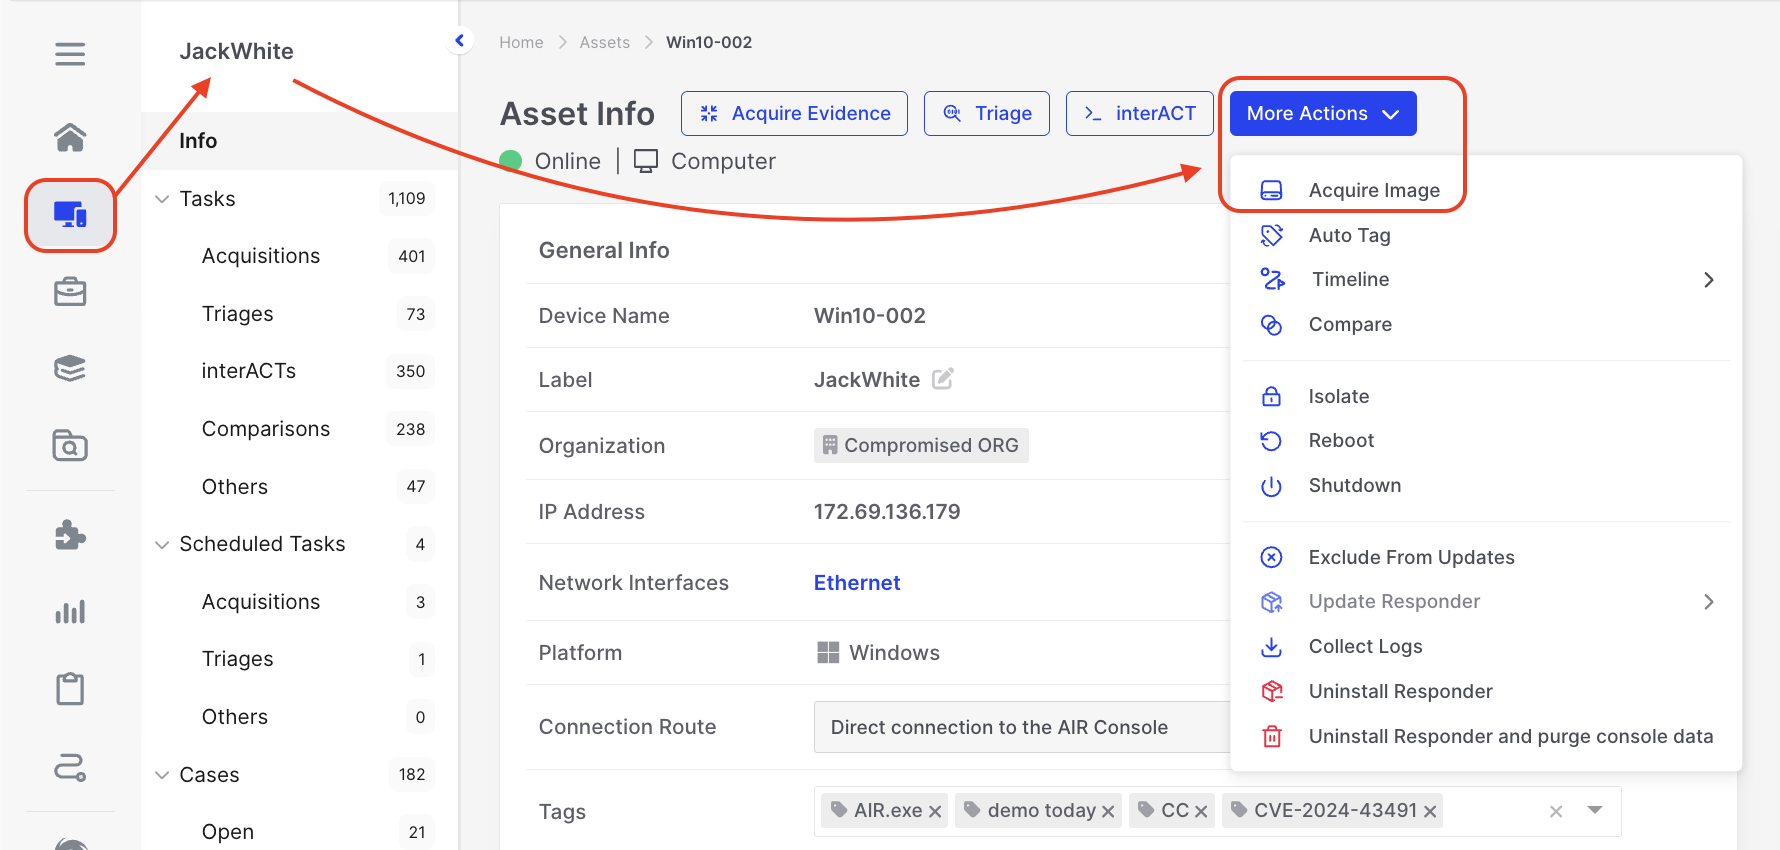
Disk and Volume Imaging: Acquire an image from a single asset
The Acquire Image wizard will now walk you through the steps needed to take a forensic image from the asset:
- Choose a Task Name.
- Select or create a case to which the image should be associated.
- Choose either the Volume or Disk tab (note that the size is displayed, so you can ensure the Repository has enough free space to hold the collected image).
- If there is more than one disk or volume, you can select the desired one by searching, filtering, or manually selecting it.
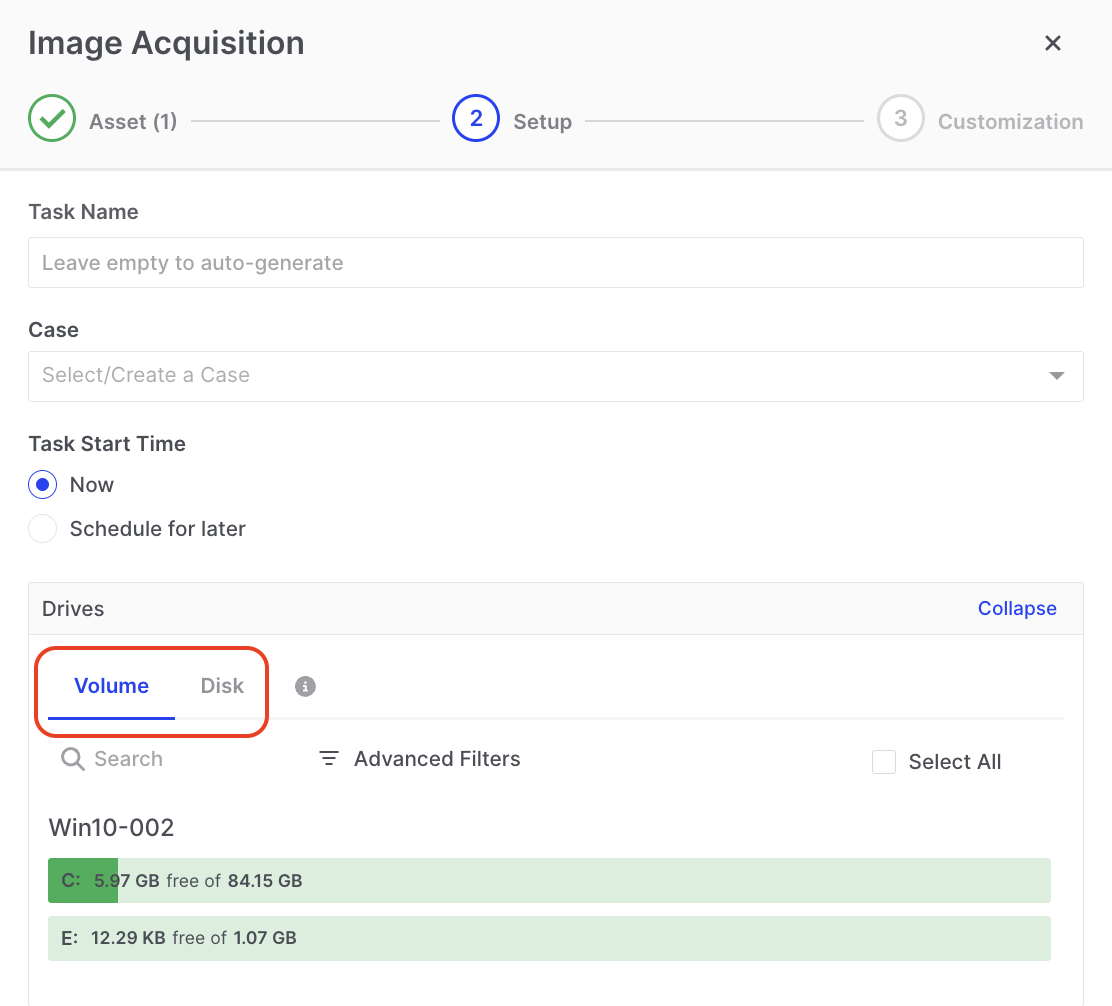
Disk and Volume Imaging: The Volume and Disk tabs
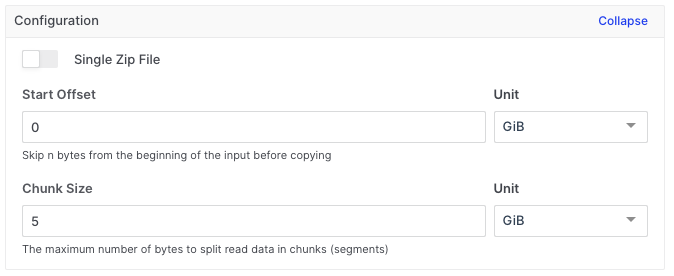
Having chosen what is to be imaged, you can now configure/set up the image file:
- Select an Evidence Repository to which the image file can be saved.
- Select your image format, RAW (dd) or EWF2 (Ex01), which is currently supported.
- For RAW (dd) only, a toggle switch provides users with the option to enable or disable the consolidation of physical disk or volume image files into a single zip file, eliminating the need to split them into separate chunks.
- For RAW (dd), if the ‘single zip file’ option is not toggled on, users will have the option to choose the size of image file chunks. If you want to use AIR’s File Explorer to browse the image file, the image must be supplied to AIR from an SMB, SFTP, Amazon S3 bucket, Azure Blob Storage, or Google Cloud Storage shared location, where it needs to be saved as a single contiguous RAW file or an EWF file which can be segmented.
- Users can also choose to skip a configurable number of bytes before starting the imaging process.
Disk and Volume Imaging: Configuration setting for the image files
In the ‘Resource Limits’ section, as with other AIR taskings, you can set limits on the network bandwidth used during the image acquisition process. Meanwhile, the ‘Compression and Encryption’ section provides options for conserving storage space and enhancing the security of the gathered evidence.
The output of your imaging task will be located in the evidence repository you selected when building the task in the wizard. The metadata associated with the acquisition will also be found there and this is explained here: Understanding errors documented in the metadata.yml file
The acquired image can be investigated using the AIR File Explorer.